


A self-hosted energy monitoring system keeps the monitoring server and electricity data under your control. Instead of sending every reading to a public cloud, the energy meter uploads data to a Docker container running on a local server, NAS, Raspberry Pi or compatible router.
IAMMETER-Docker provides a ready-to-run local energy monitoring server for electricity consumption and solar PV systems. It can collect measurements, display real-time and historical data, expose APIs and optionally operate as an offline datalogger.
IAMMETER energy meter
        │
        │ Wi-Fi / local network
        ▼
IAMMETER-Docker
        │
        ├── Local web dashboard
        ├── Historical energy data
        ├── REST API
        ├── MQTT
        ├── CSV datalogger
        └── Optional forwarding
IAMMETER-Docker is a practical self-hosted option, but it does not reproduce every feature and report in IAMMETER-Cloud. If you are still choosing an architecture, compare the options on the self-hosted energy monitoring solutions page.
🎬 Watch the IAMMETER-Docker video tutorial
IAMMETER-Docker is suitable when you want to:
Typical installations include:
If you only need direct meter readings for Home Assistant, Node-RED, a PLC or custom software, deploying a complete server may be unnecessary. See local and self-hosted integration options before choosing.
Before deployment, prepare:
5050 available for the web application and API;1883 if the built-in MQTT service will be used;The Docker host and meter should be able to reach each other over the local network. For offline operation, Internet access is not needed after the image and required software have been installed.
The current Docker Hub release is IAMMETER-Docker V2.4.
Create a working directory and run the container with persistent storage:
docker run -d \
  --name myiammeter \
  --restart always \
  -p 5050:5050 \
  -p 1883:1883 \
  -e TZ=Etc/UTC \
  -v "$PWD/data:/app/data" \
  iammeter/iammeter
Change TZ=Etc/UTC to the correct timezone for the monitoring site. Energy reports depend on the local date and time, so set this before collecting production data.
Create compose.yaml:
services:
  iammeter:
    image: iammeter/iammeter
    container_name: myiammeter
    restart: always
    ports:
      - "5050:5050"
      - "1883:1883"
    environment:
      TZ: Etc/UTC
    volumes:
      - ./data:/app/data
Start the service:
docker compose up -d
Check its status:
docker compose ps
docker compose logs --tail=100 iammeter
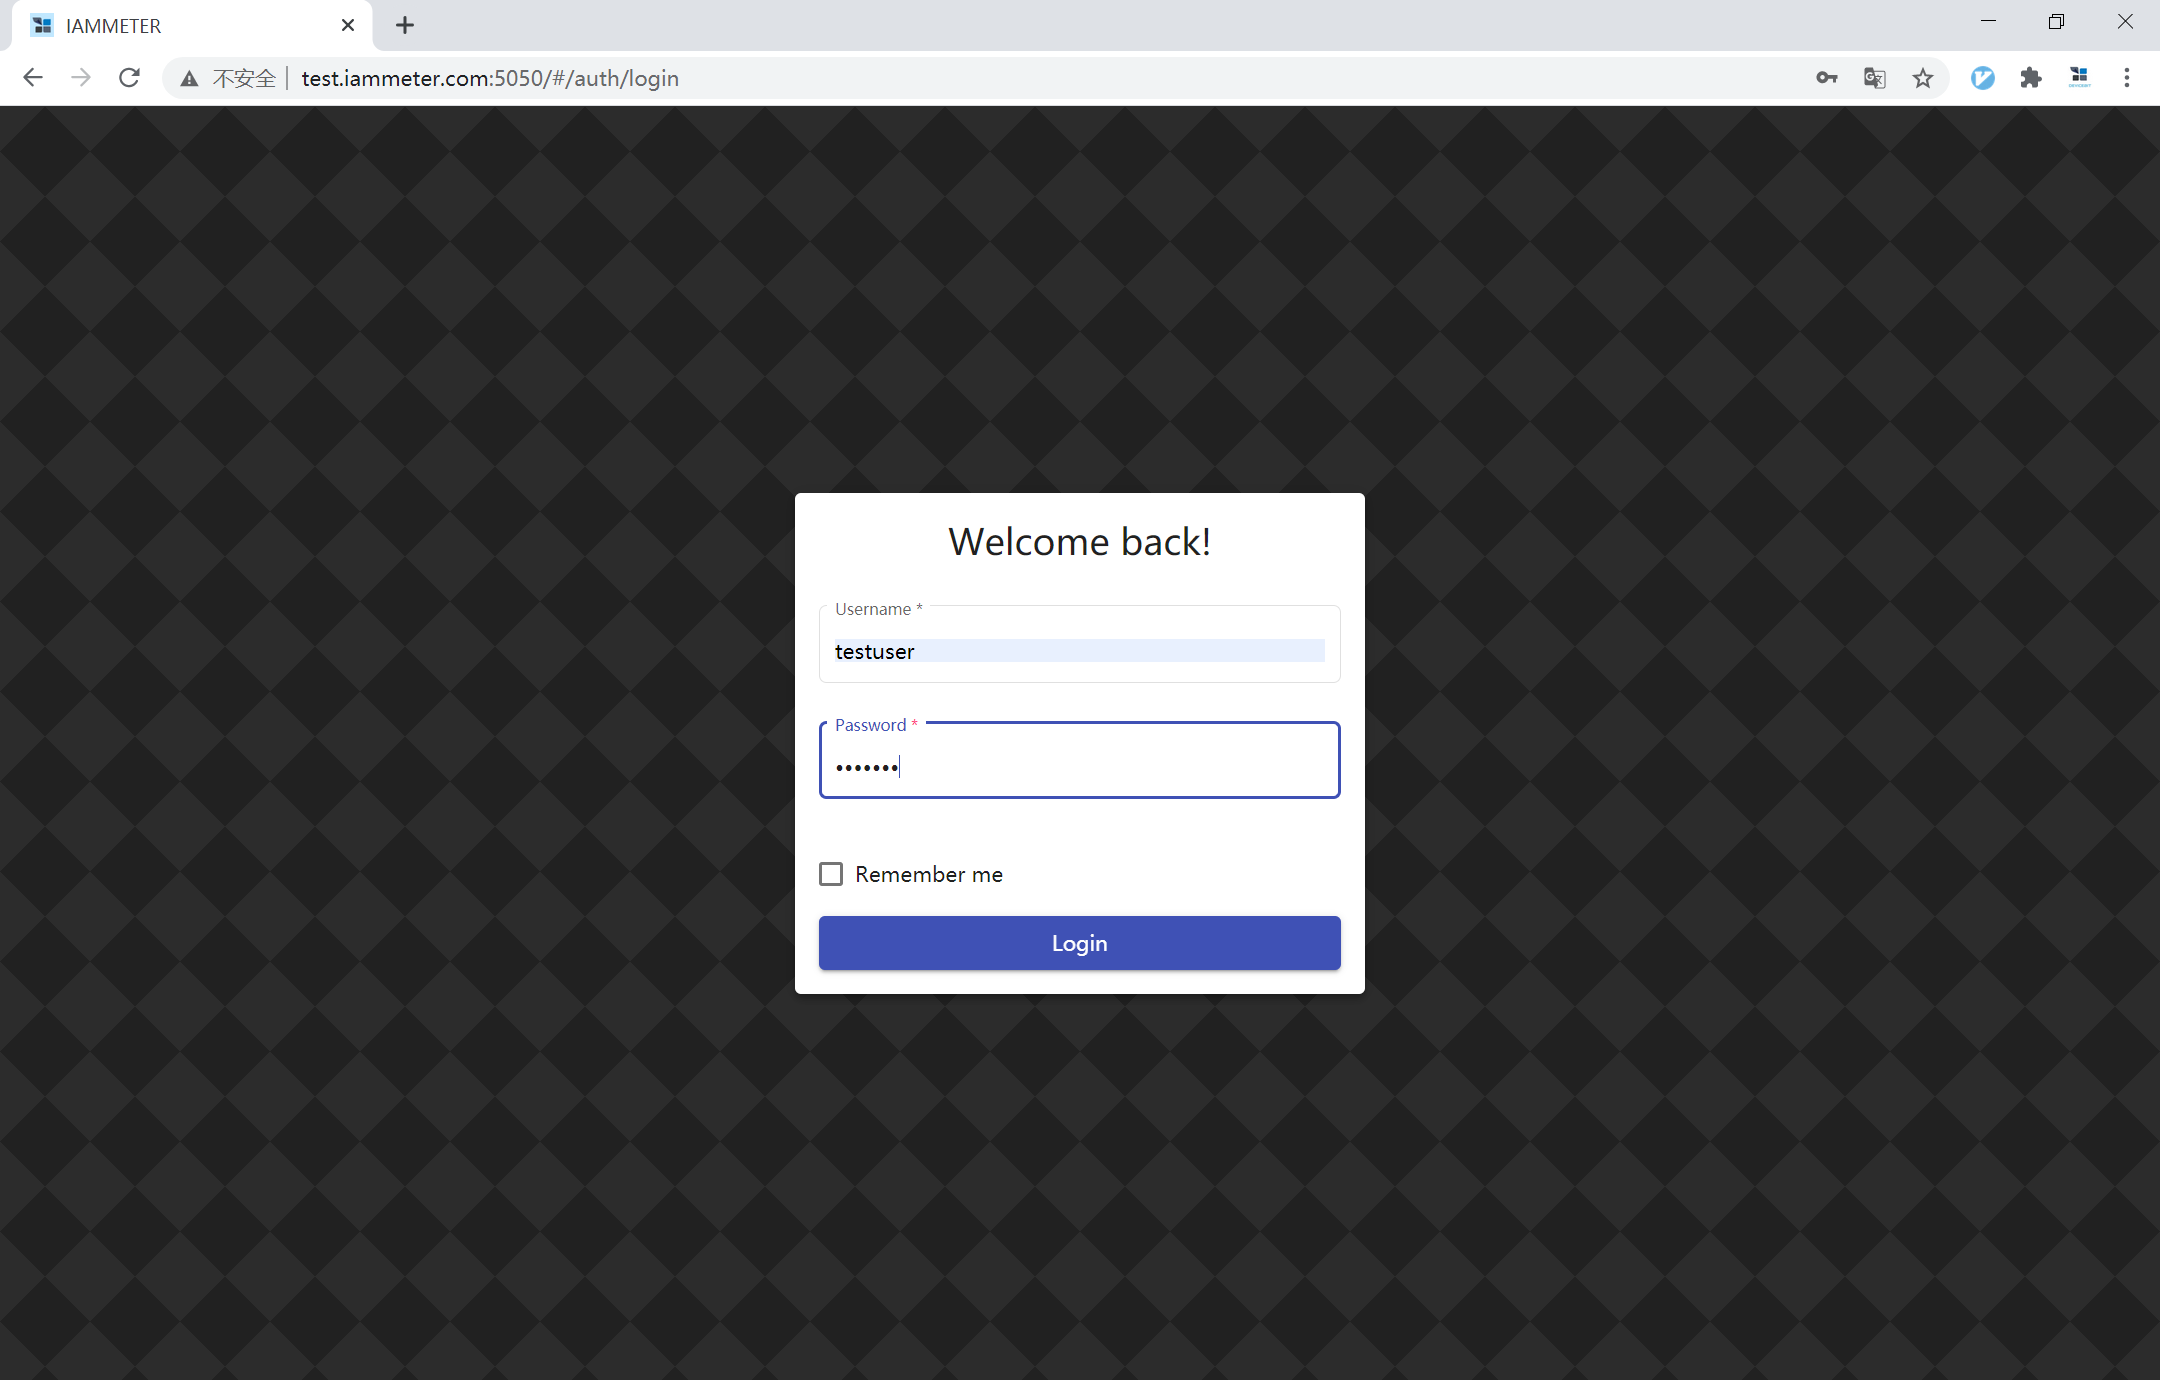
Open the following address from a browser on the same network:
http://<docker-host-ip>:5050
Default credentials:
Username: testuser
Password: 123456
Change the default password immediately. Do not expose port
5050or1883directly to the public Internet without an appropriate firewall, authentication and secure network design.
After signing in:
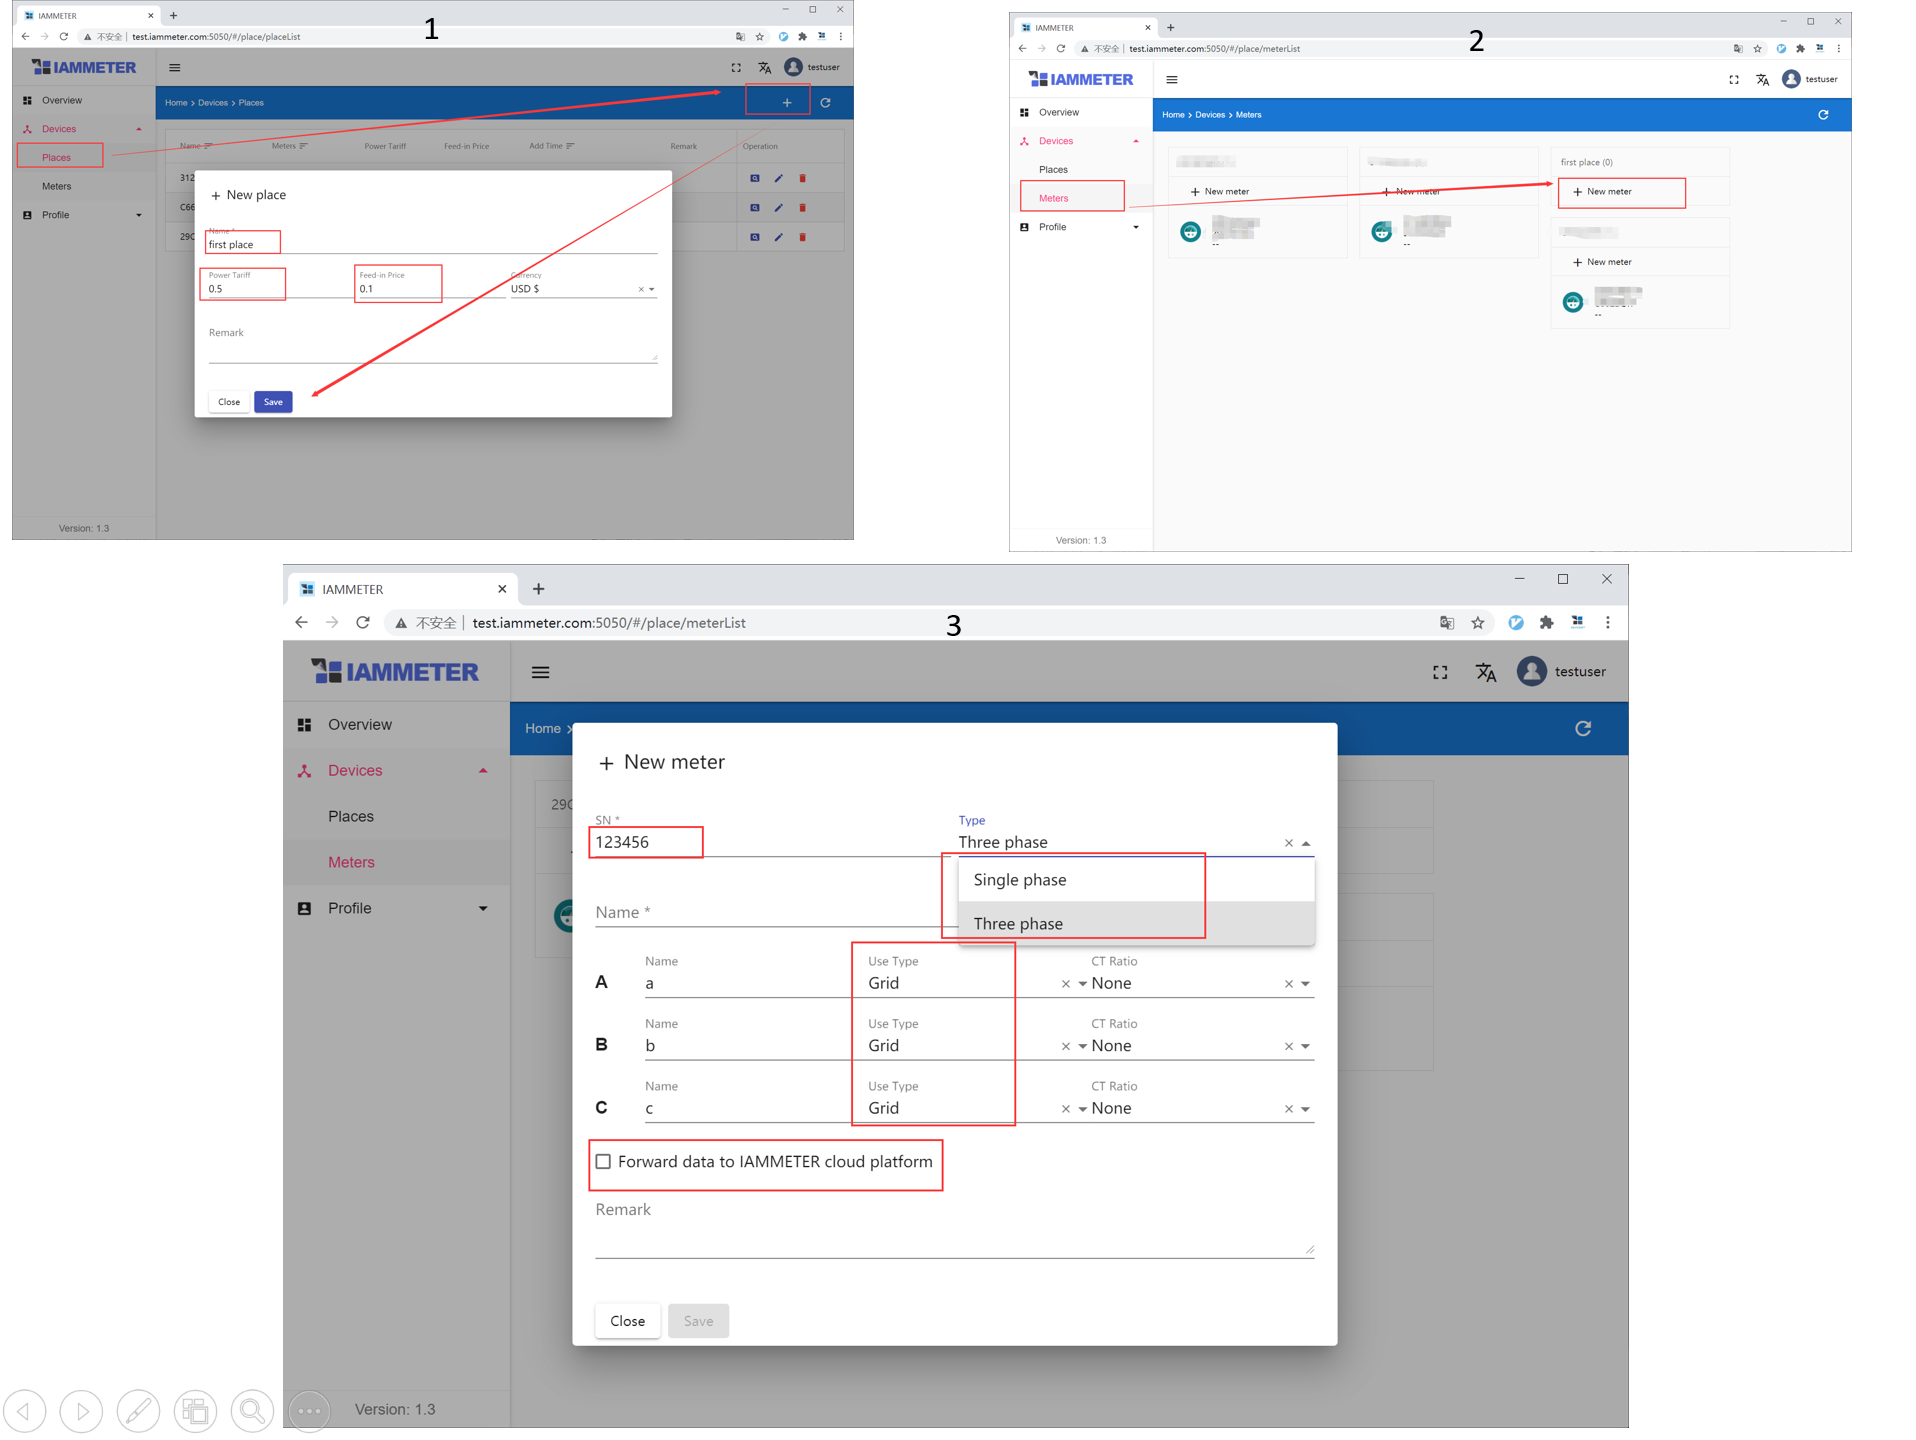
Correct channel assignment is especially important for solar monitoring. The system needs to know which measurement represents the grid, inverter or load before it can display meaningful energy-flow results.
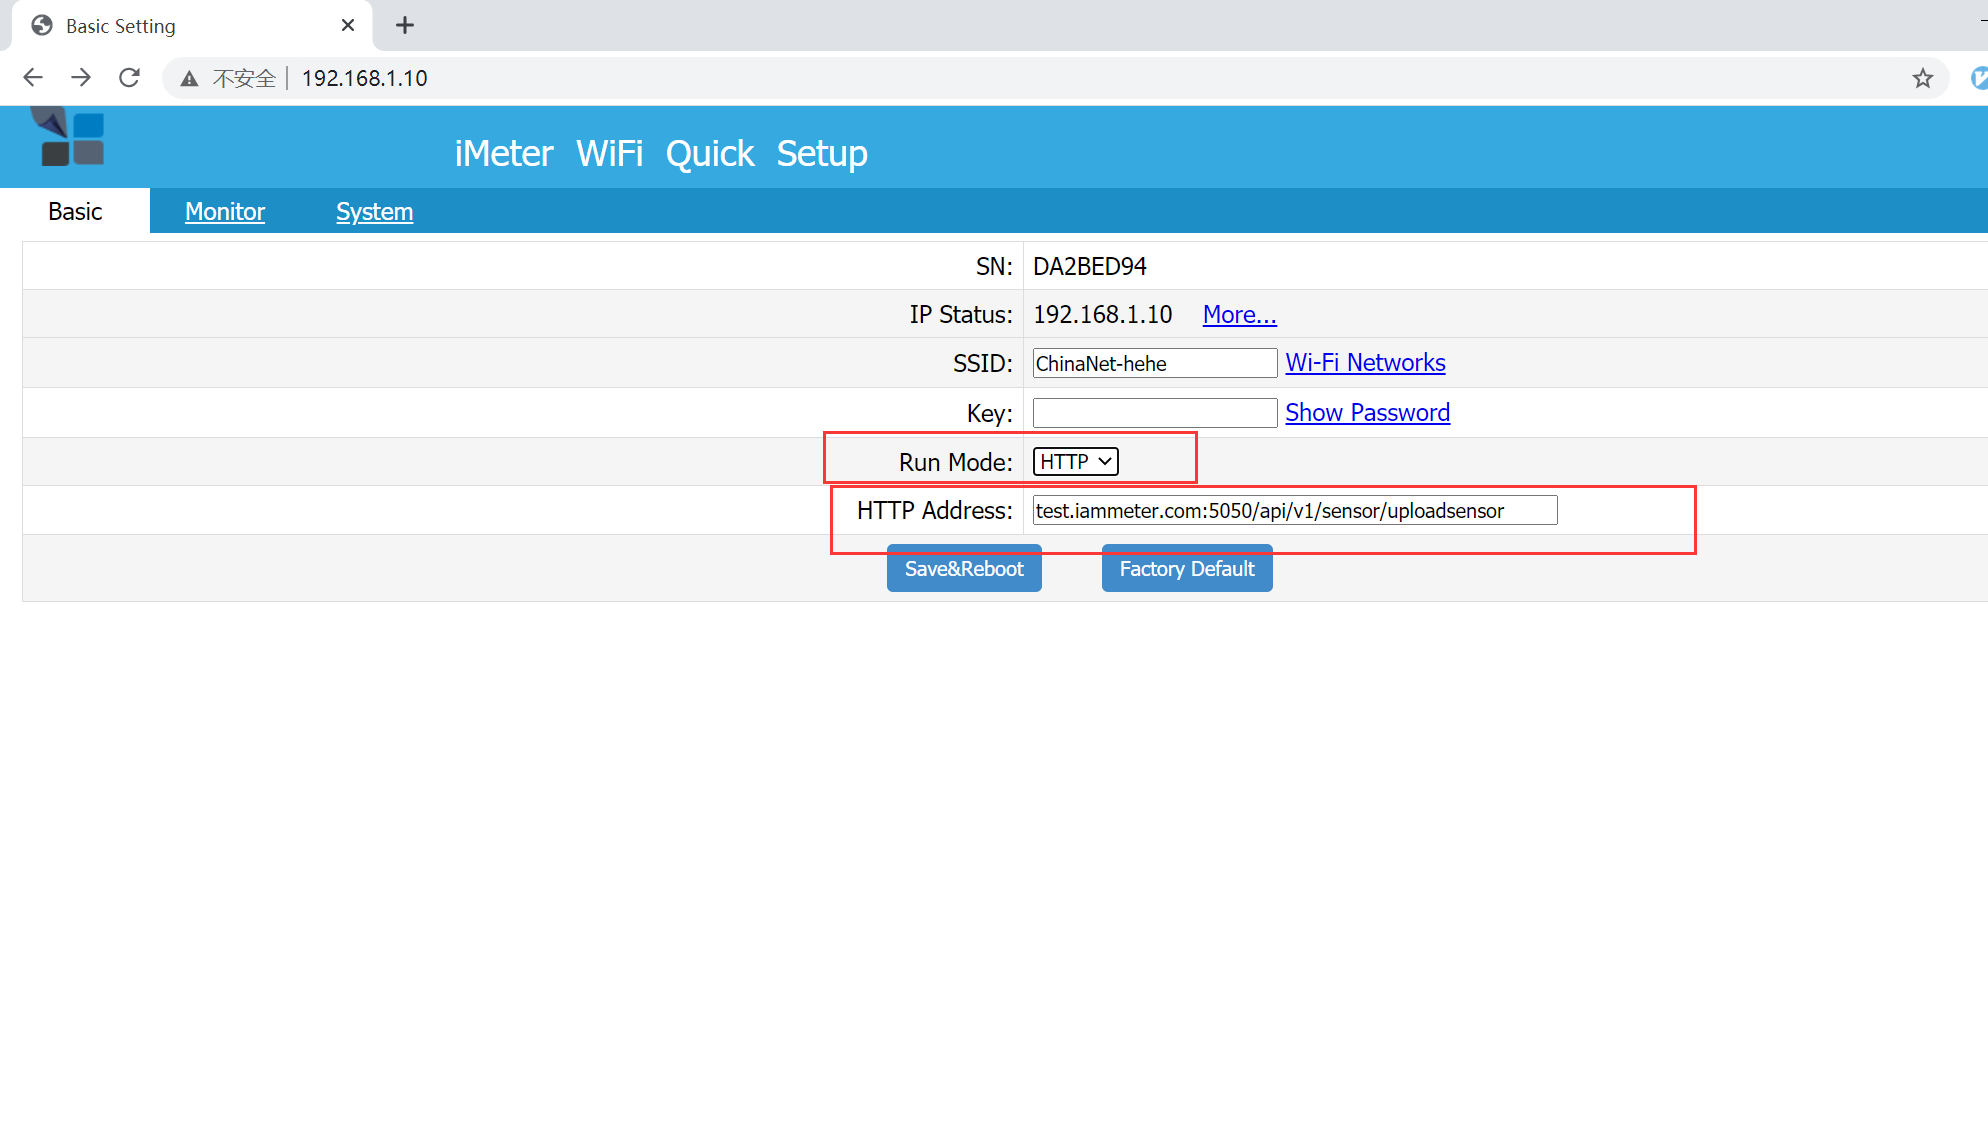
IAMMETER meters can upload directly to the local Docker server.
In the meter's WebUI, configure third-party HTTP upload and use the Docker host address:
<docker-host-ip>:5050/api/v1/sensor/uploadsensor
The Docker host IP must be reachable from the meter's Wi-Fi network. Use the same meter SN that was added to IAMMETER-Docker.
After saving the meter configuration:
IAMMETER-Docker can optionally forward meter data to IAMMETER-Cloud. Enable forwarding only when you want both local storage and IAMMETER-Cloud services.
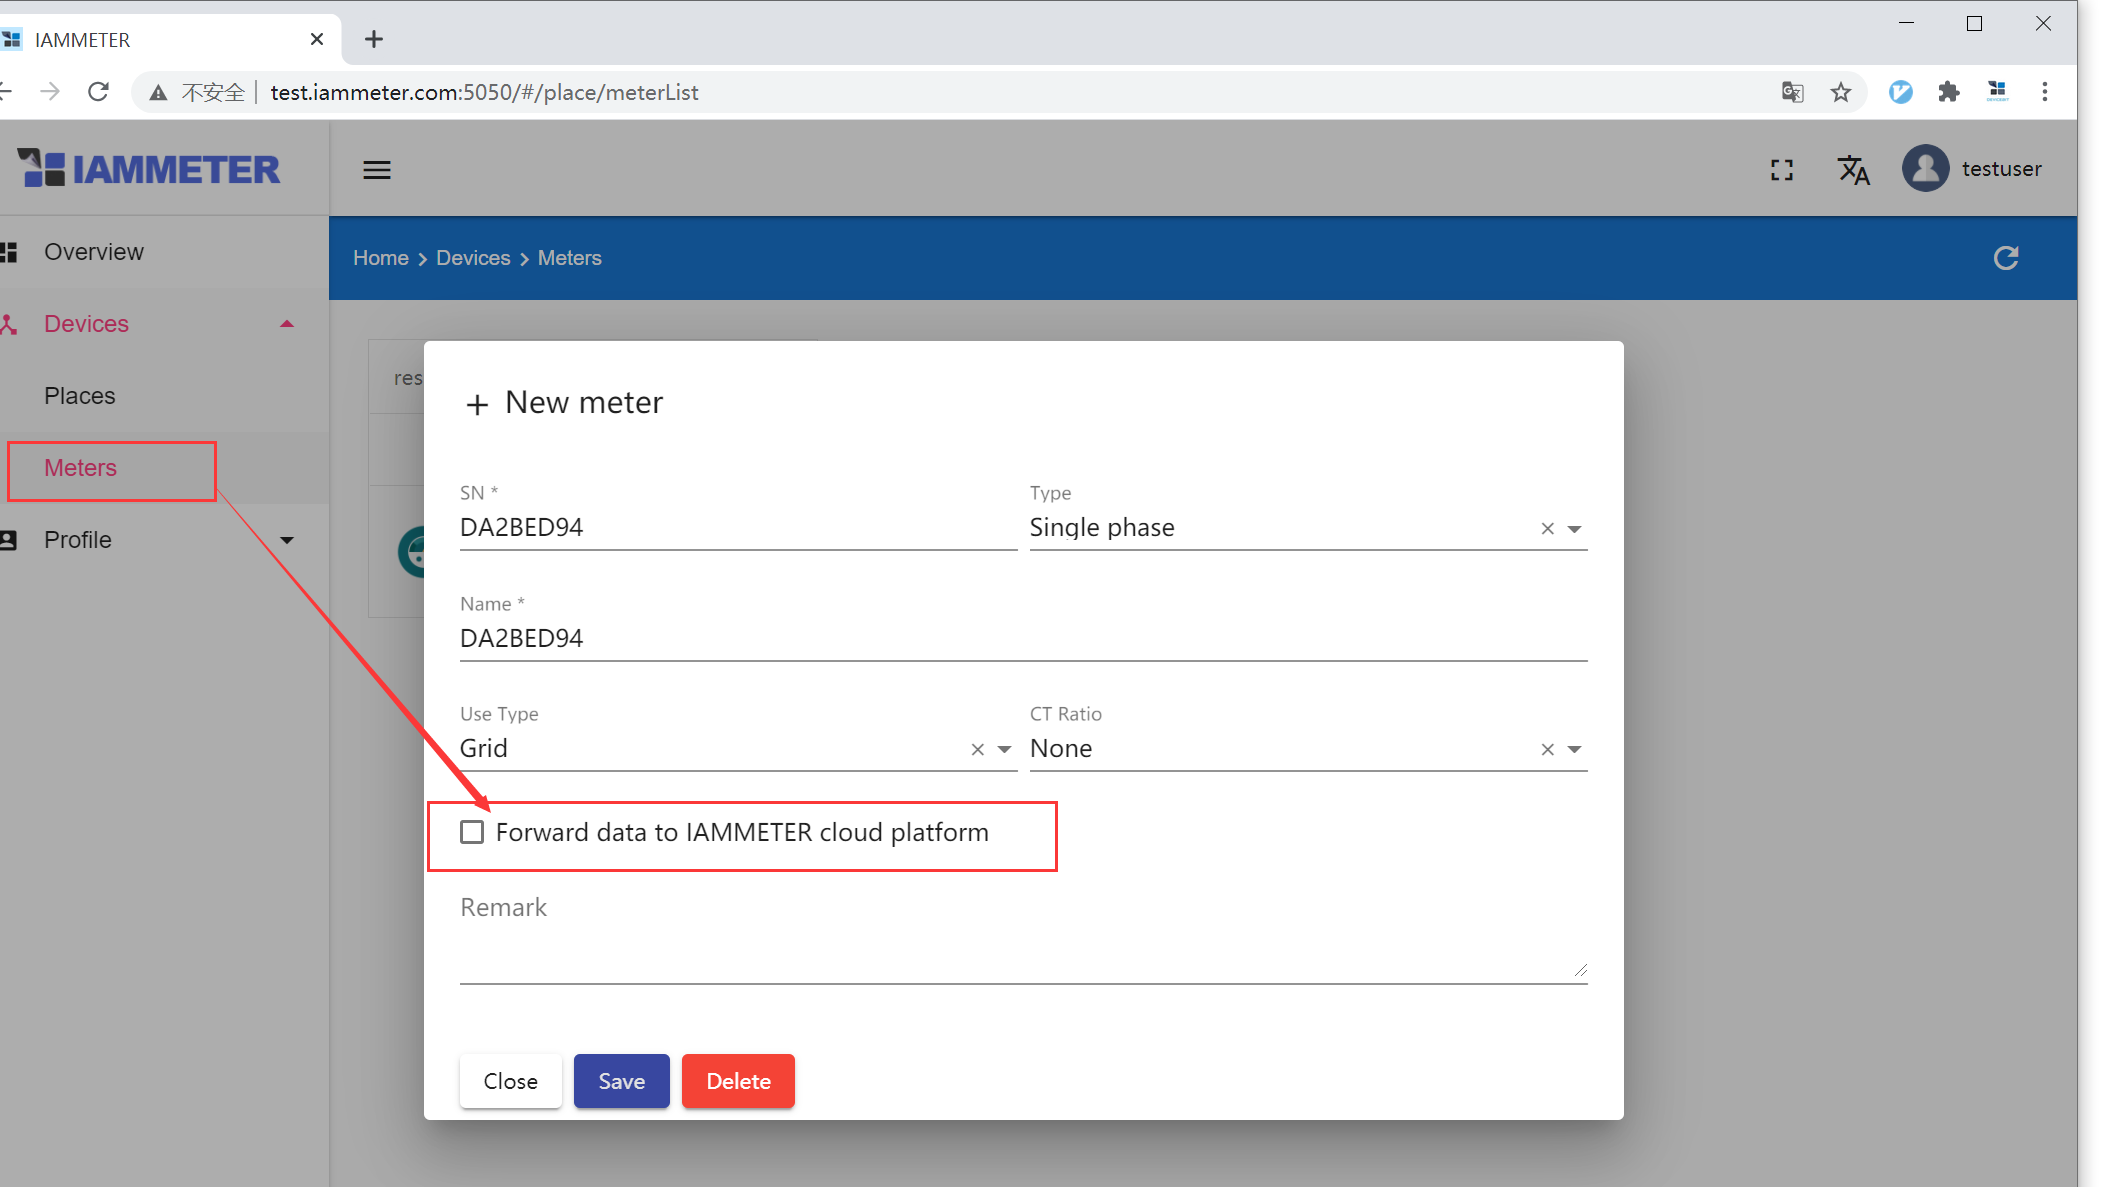
For an offline or cloud-independent installation, leave cloud forwarding disabled.
IAMMETER-Docker can also receive supported energy data through its REST API. This is useful for simulators, gateways or customer applications that do not use an IAMMETER meter.
Create a meter with a custom SN, then use that same SN in each API request.
The interactive API documentation is available on the local server:
http://<docker-host-ip>:5050/docs
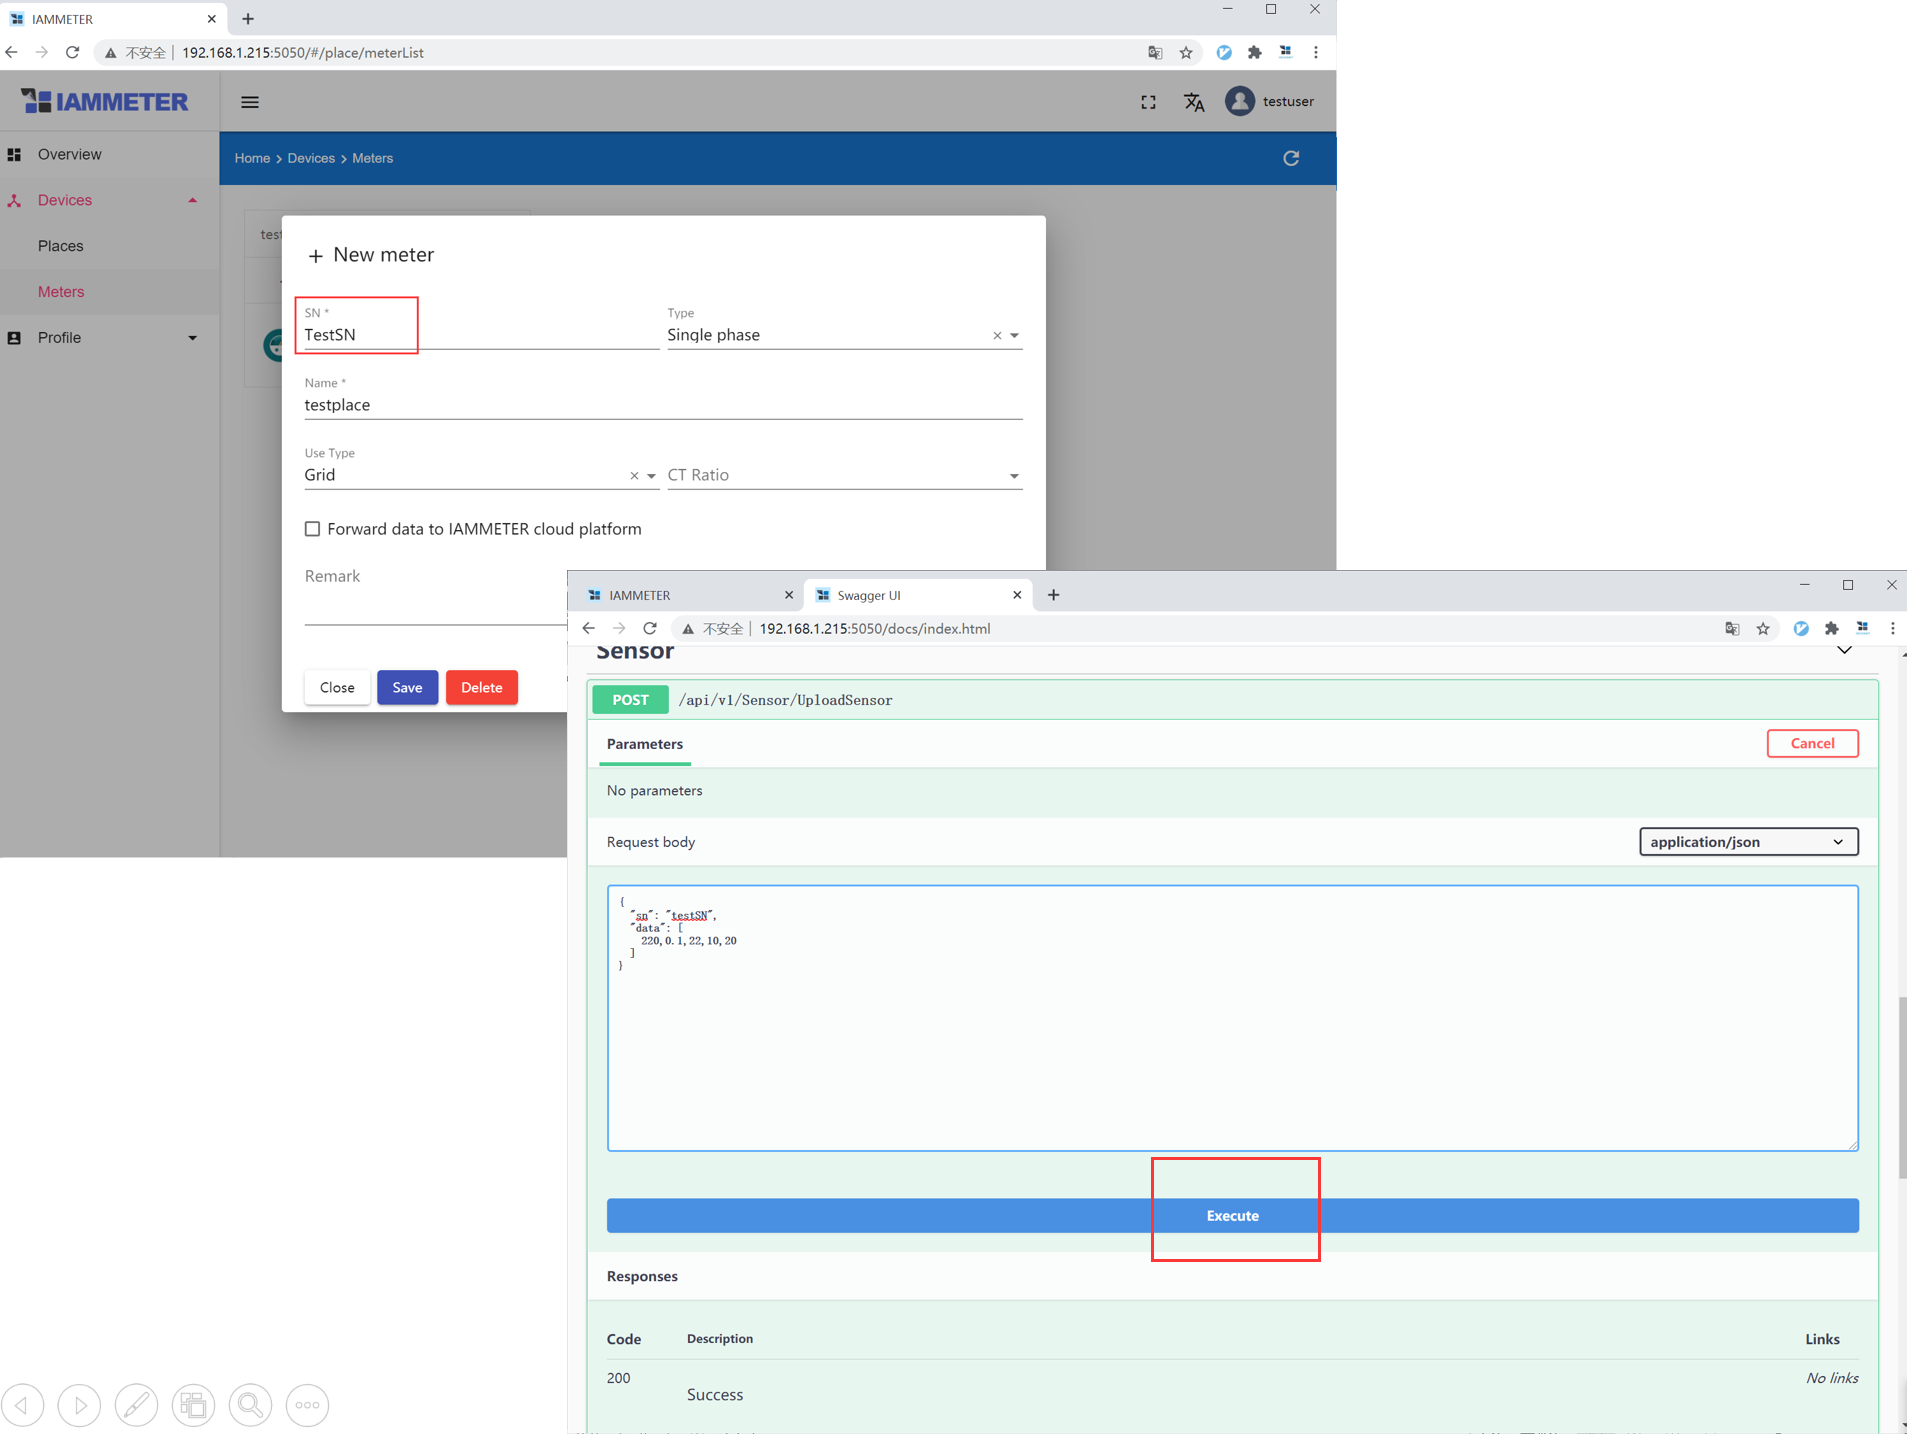
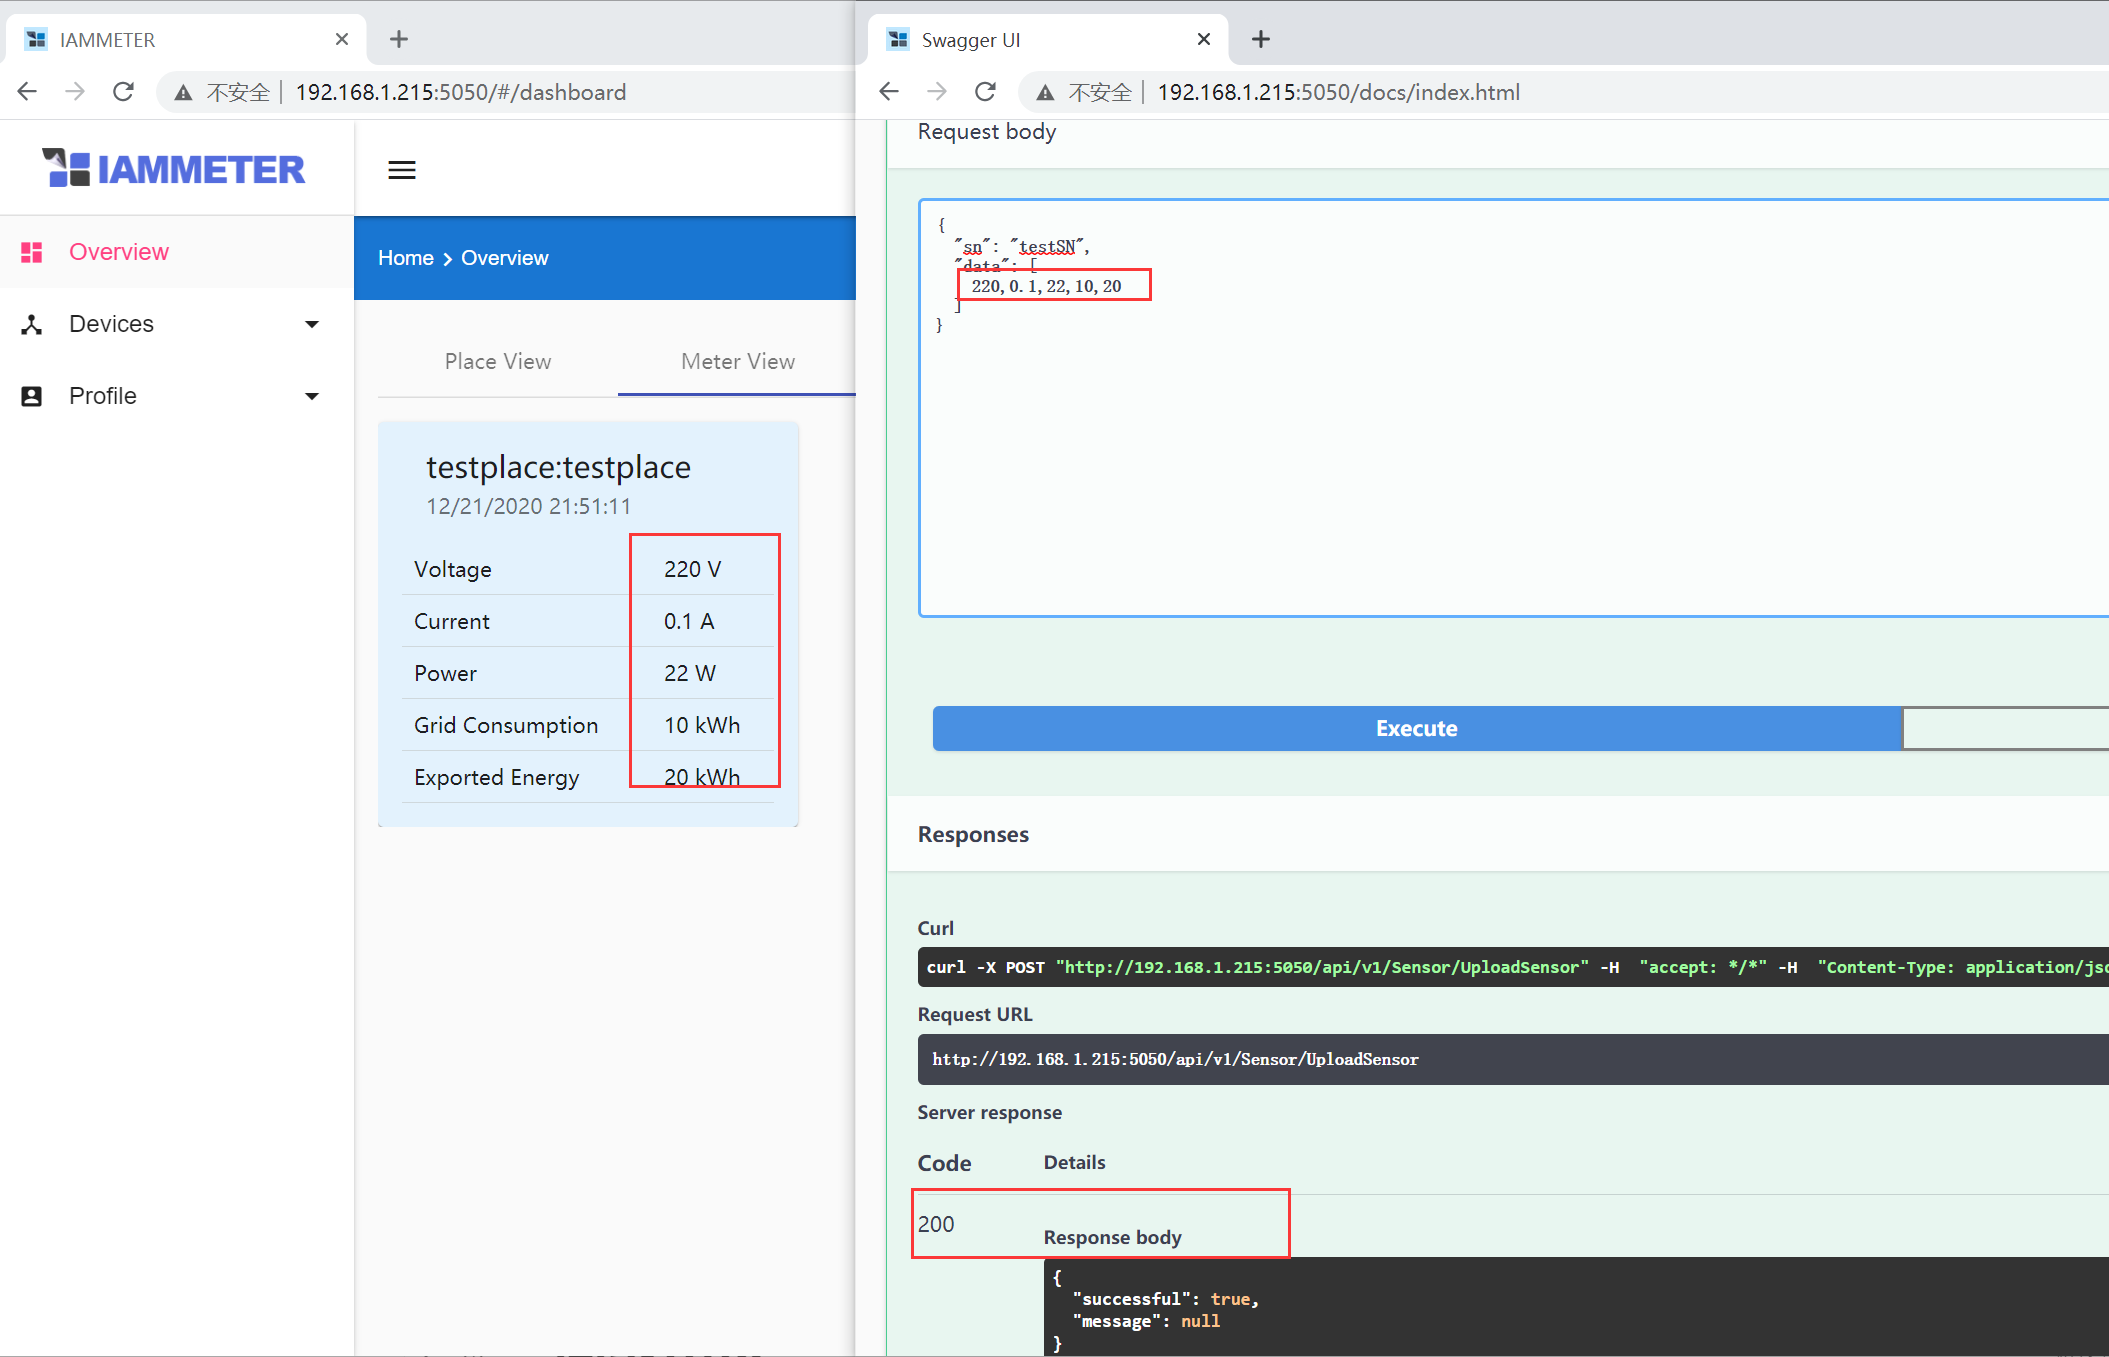
Test the API on a non-production meter first. Keep the SN, phase count, field order and units consistent so that historical data remains usable.
IAMMETER-Docker V2.4 can save data to CSV when a datalogger directory is mounted. This is useful for a remote solar site, factory or equipment room with no reliable Internet connection.
docker run -d \
  --name myiammeter \
  --restart always \
  -p 5050:5050 \
  -p 1883:1883 \
  -e TZ=Etc/UTC \
  -v "$PWD/data:/app/data" \
  -v "$PWD/datalogger:/app/datalogger" \
  iammeter/iammeter
For Docker Compose, add this volume:
volumes:
  - ./data:/app/data
  - ./datalogger:/app/datalogger
Open the datalogger page at:
http://<docker-host-ip>:5050/datalogger
The datalogger page initially uses:
Username: admin
Password: admin
Change this password as part of deployment. For the complete router-based and CSV-export workflow, see Offline Energy Datalogger with IAMMETER-Docker.
Port 1883 is used by the IAMMETER-Docker MQTT service. A meter or another application can publish supported measurement data to IAMMETER-Docker, and MQTT clients can subscribe to real-time values.
IAMMETER-Docker also supports features such as:
These features are intentionally kept out of the basic deployment path. Configure and test the core container first, then continue with the advanced IAMMETER-Docker guide.
The /app/data volume contains persistent application data. Back up the corresponding host directory regularly.
A safe basic process is:
data directory to backup storage;datalogger directory when CSV logging is enabled;Do not treat the container filesystem as permanent storage. If /app/data is not mounted, removing the container may remove the monitoring database with it.
Before upgrading, back up the persistent data directory.
For Docker Compose:
docker compose pull
docker compose up -d
docker compose logs --tail=100 iammeter
For a container created with docker run:
docker pull iammeter/iammeter
docker stop myiammeter
docker rm myiammeter
Then repeat the original docker run command. Removing a container is safe only when the application data has been stored in a correctly mounted and backed-up host directory.
docker ps or docker compose ps.5050 is already in use.localhost as the server address in the meter; it refers to the meter itself, not the Docker host./app/data was mounted to a persistent host directory.| Option | Best for | Data location | Setup effort | Main trade-off |
|---|---|---|---|---|
| IAMMETER-Docker | A ready-made local monitoring server | Your Docker host | Low to medium | Fewer managed cloud features |
| IAMMETER-Cloud | Ready-made monitoring, reports and remote access | IAMMETER-Cloud | Low | Uses a hosted cloud service |
| Home Assistant / Node-RED | Smart-home entities and custom automation | Your own platform | Medium | You design the dashboard and workflows |
| Custom server | A product, EMS or specialized data pipeline | Your infrastructure | High | You develop and maintain the system |
Continue with:
/app/data is mounted to persistent storage.5050 and 1883 are not unnecessarily exposed to the Internet.Last updated: July 17, 2026.
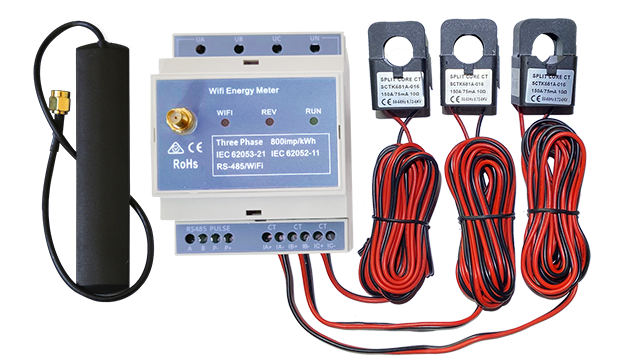
Three Phase Wi-Fi Energy Meter (WEM3080T)
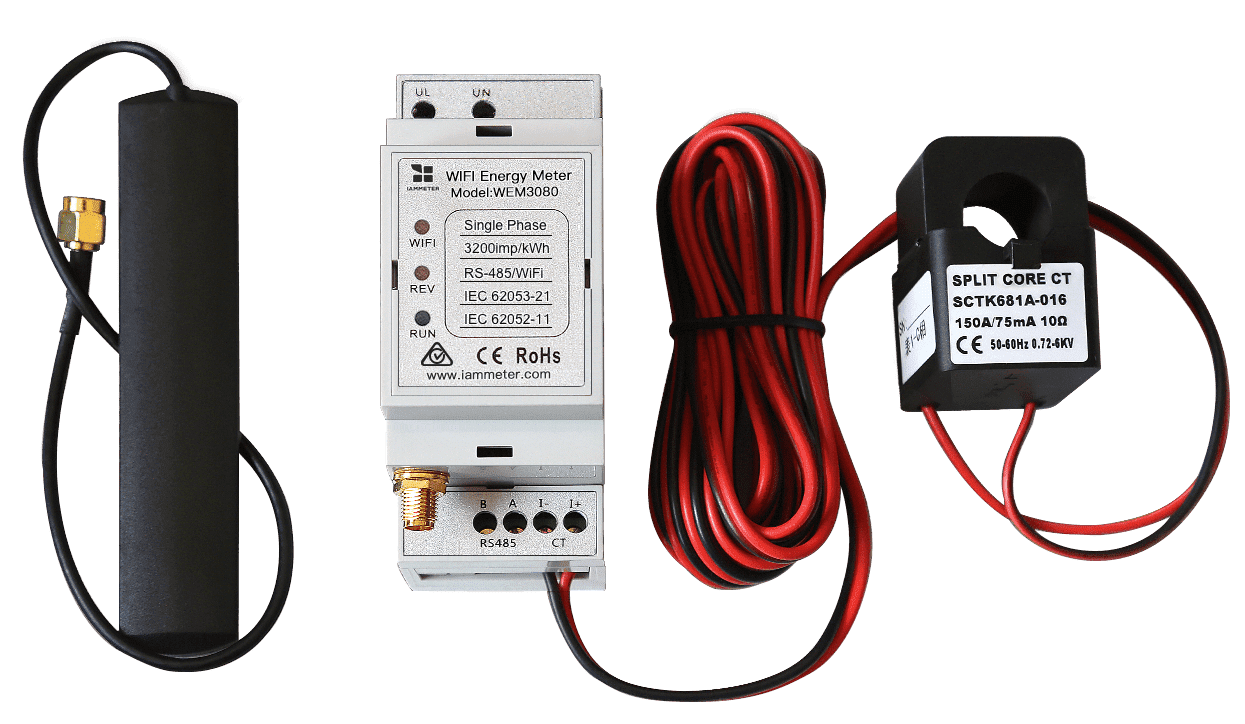
Single Phase Wi-Fi Energy Meter (WEM3080)
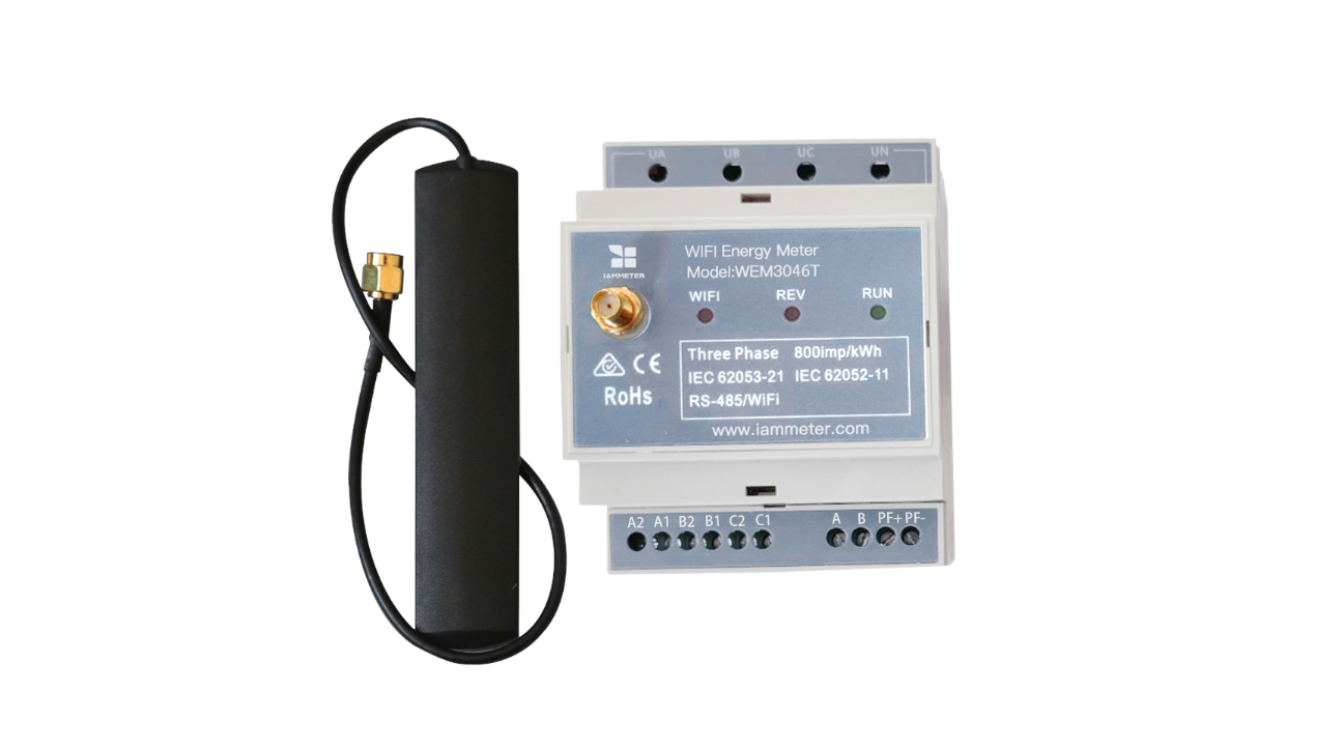
Three Phase Wi-Fi Energy Meter (WEM3046T)
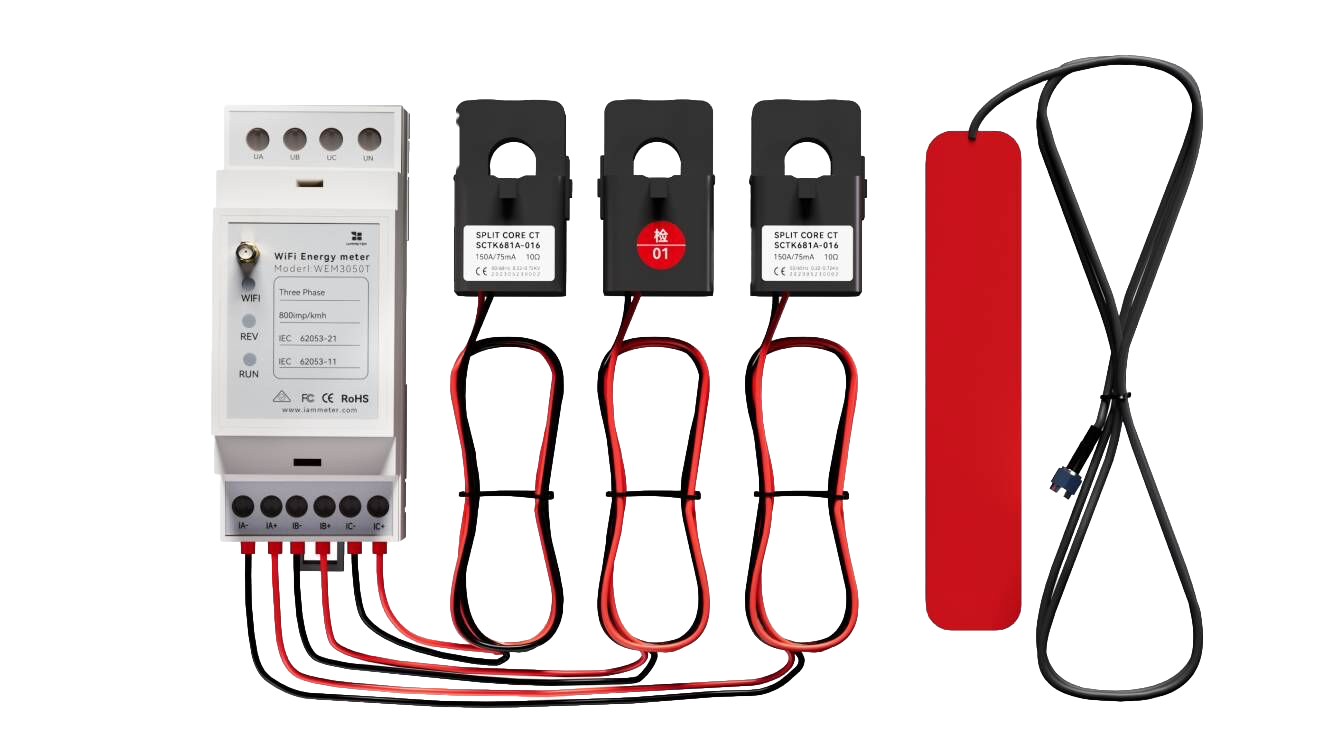
Three Phase Wi-Fi Energy Meter (WEM3050T)