


If you care about your electricity usage, you can reduce unnecessary consumption and lower your energy bills. IAMMETER is dedicated to providing practical tools—including hardware, software, and system integrations—to help customers gain real insight into their energy consumption. With IAMMETER’s smart monitoring solutions, saving electricity becomes easier and more effective.
Looking to integrate a Wi-Fi energy meter into ThingsBoard for real-time energy monitoring and dashboard visualization? This tutorial will guide you step-by-step to connect IAMMETER's smart meters to ThingsBoard via MQTT, enabling local and cloud-free energy data collection, perfect for solar and smart home scenarios.
💬 If you have any questions, please join the discussion at: 👉 https://imeter.club/topic/462
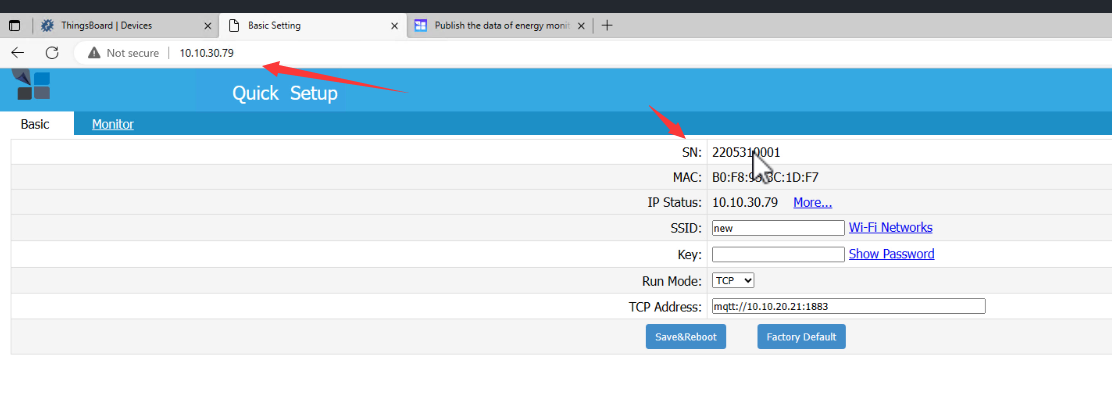
Access the local IP address of your IAMMETER smart energy meter via browser.
mqtt://10.10.20.21:1883
(This should be the IP address and port of your ThingsBoard MQTT Broker)Click Save & Reboot after entering these settings.
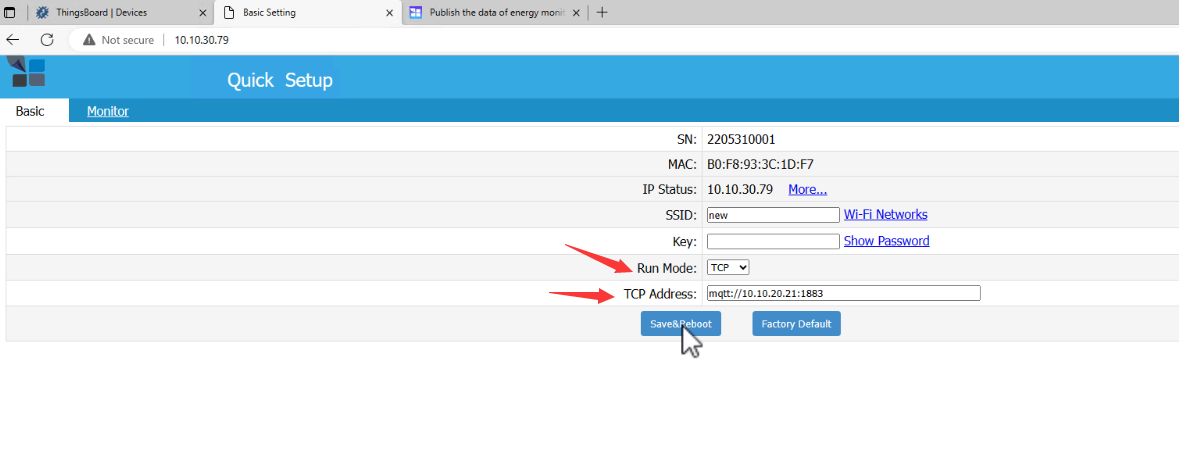
IAMMETER supports MQTT and allows you to set credentials via local API.
Example credentials:
laoliu123456API format to apply settings:
bash


复制编辑
http://<local_ip_of_meter>/api/mqtt?user=laoliu&pwd=123456
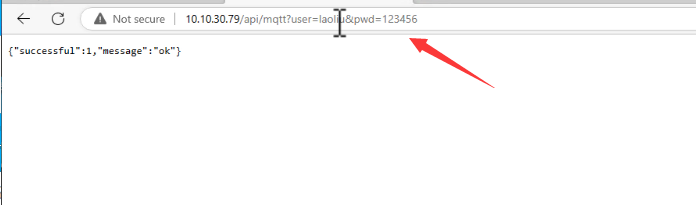
🔹 These credentials will be required when configuring the device in ThingsBoard.
Go to Profiles → Device Profiles in ThingsBoard.

Click + Add, then create a new profile:
IAMMETER-MQTT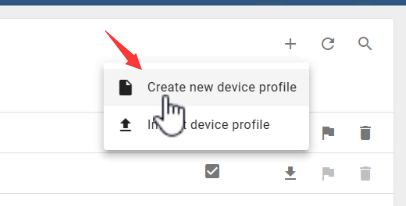
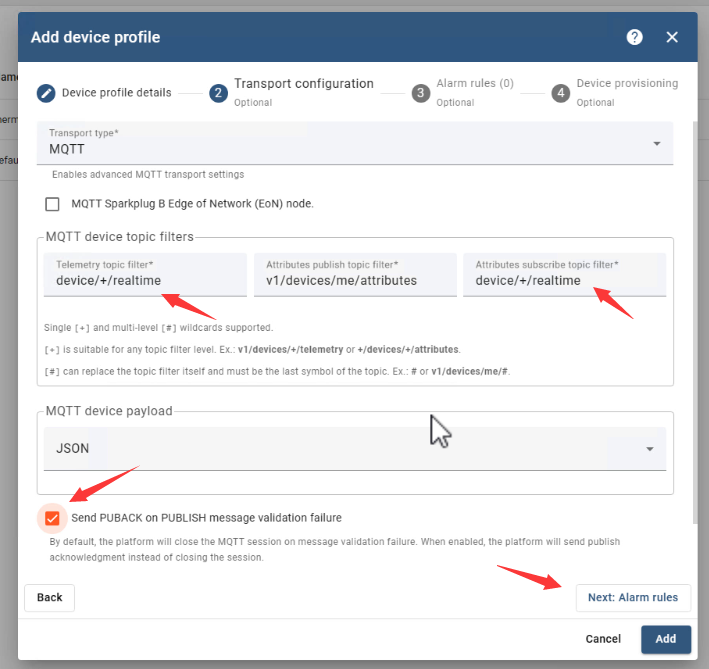
Set the following:
MQTTdevice/+/realtimedevice/+/realtimeMore on IAMMETER’s MQTT topics: Publish the data of energy monitor to your MQTT server
Click Next → Next → Add to finish.

Go to Devices → + Add new device
IAMMETERIAMMETER-MQTT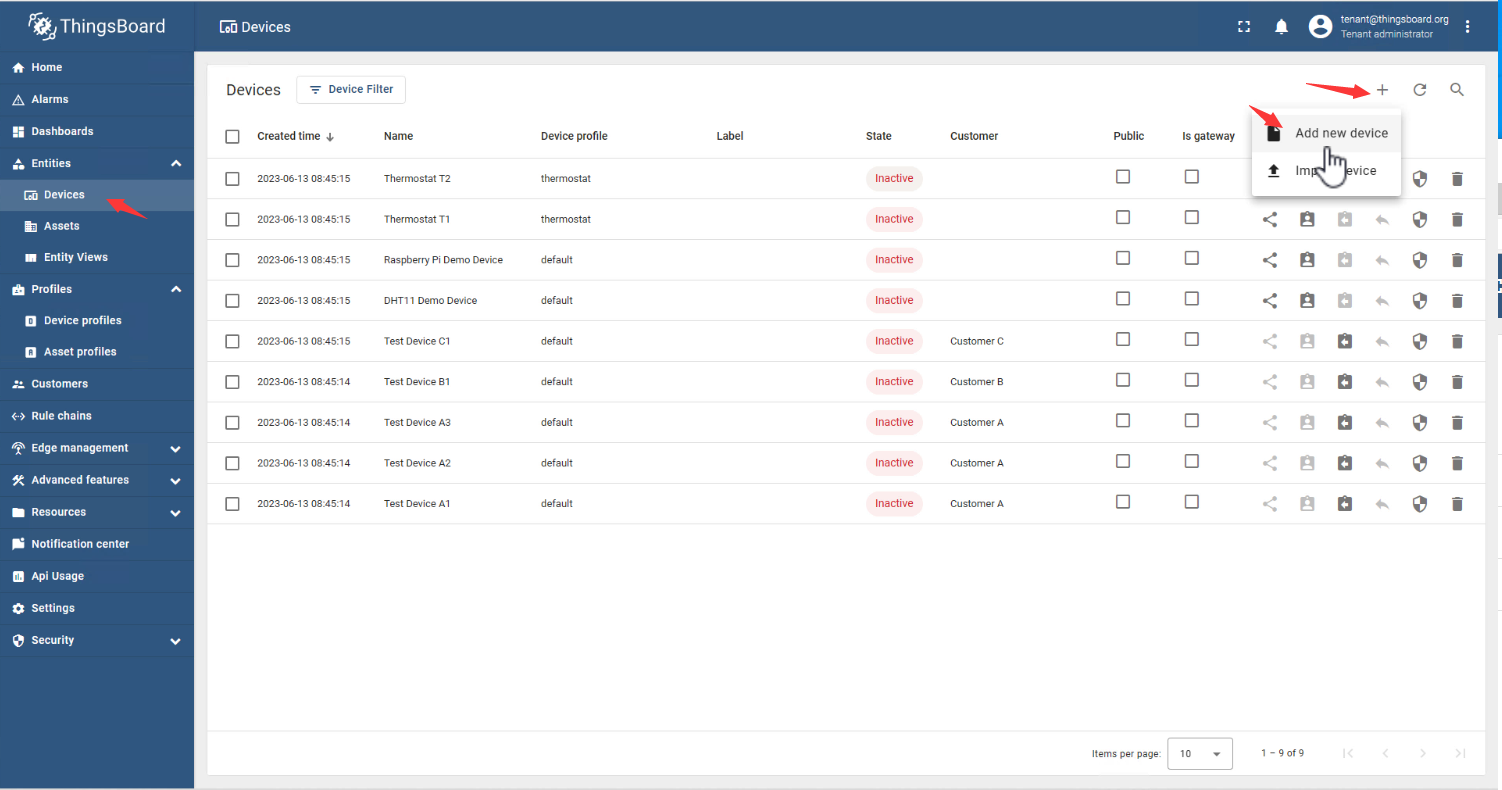
On the next screen:
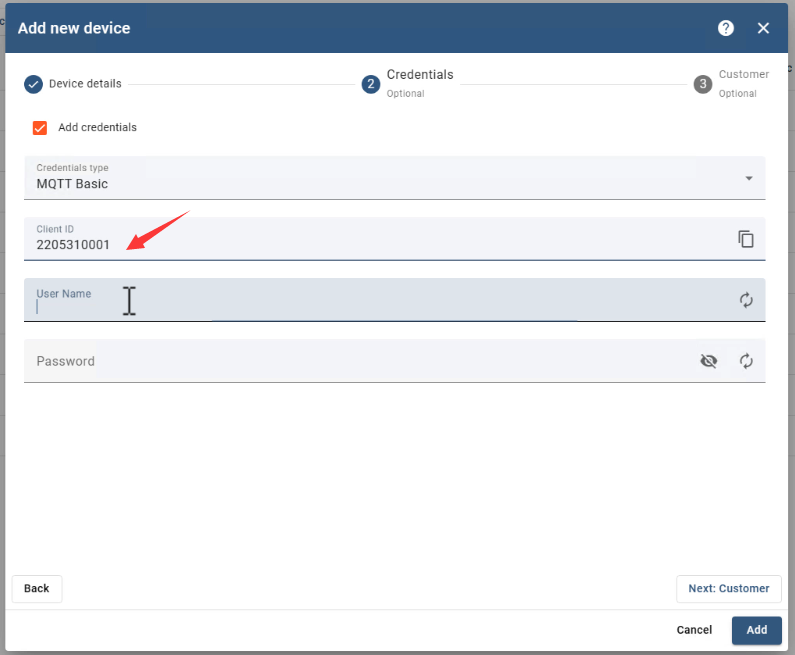
MQTT Basic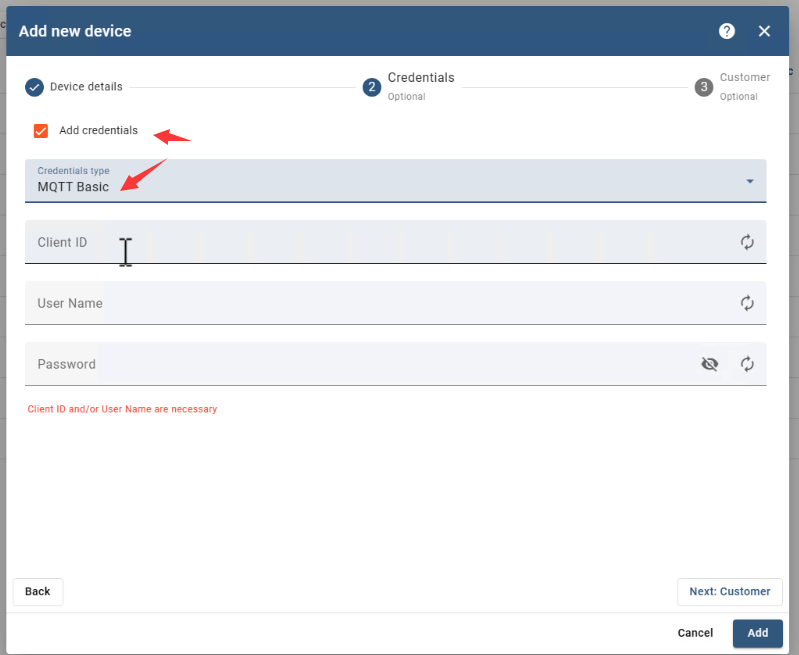
Client ID: Use the Serial Number (SN) of your IAMMETER Wi-Fi energy meter. Find the SN from the local web page of the meter and paste it.
Username & Password: Use the credentials set earlier (laoliu / 123456)
Click Next, and choose Public for device visibility.
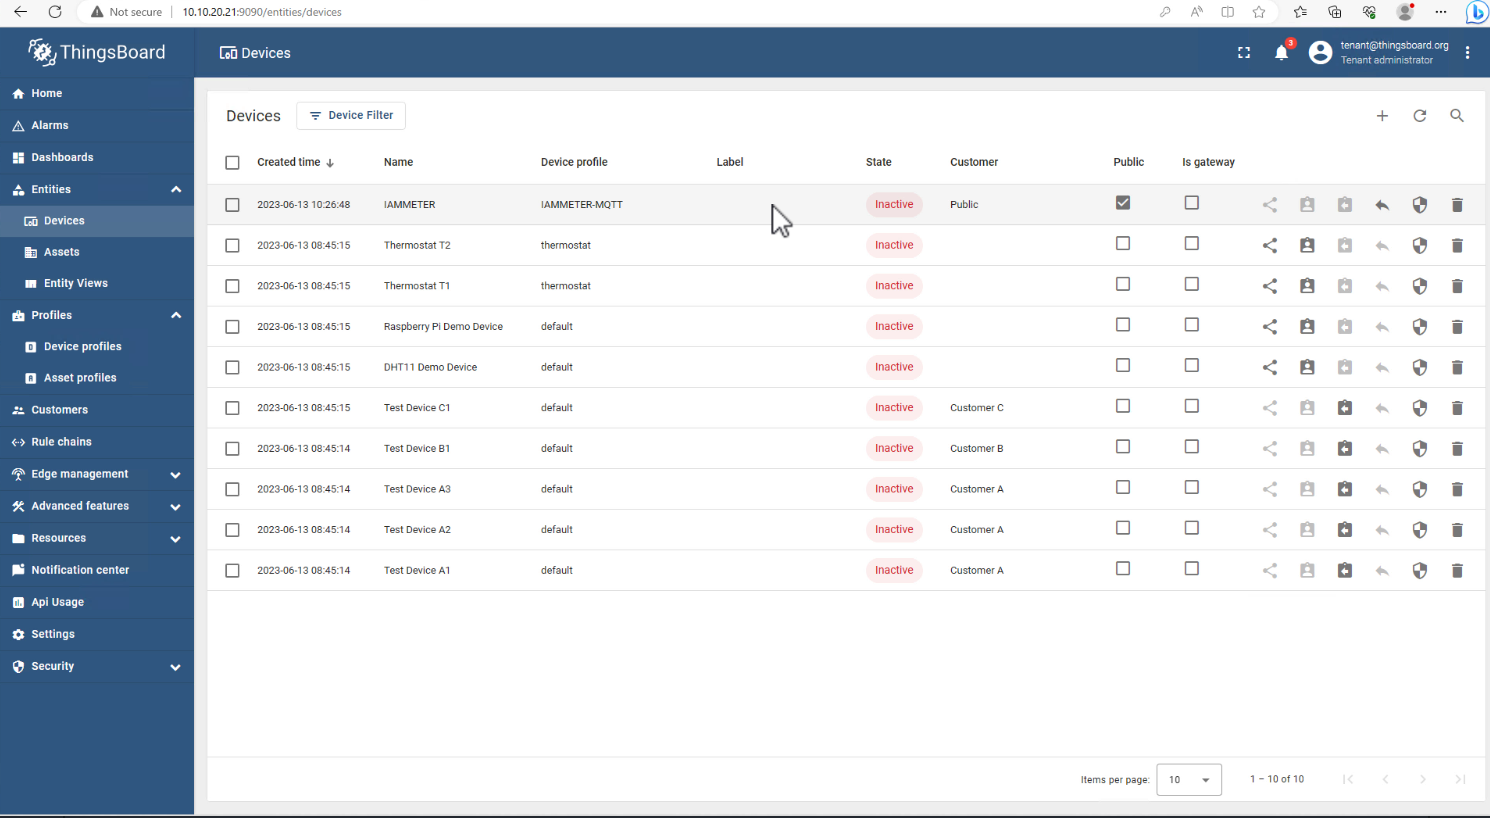
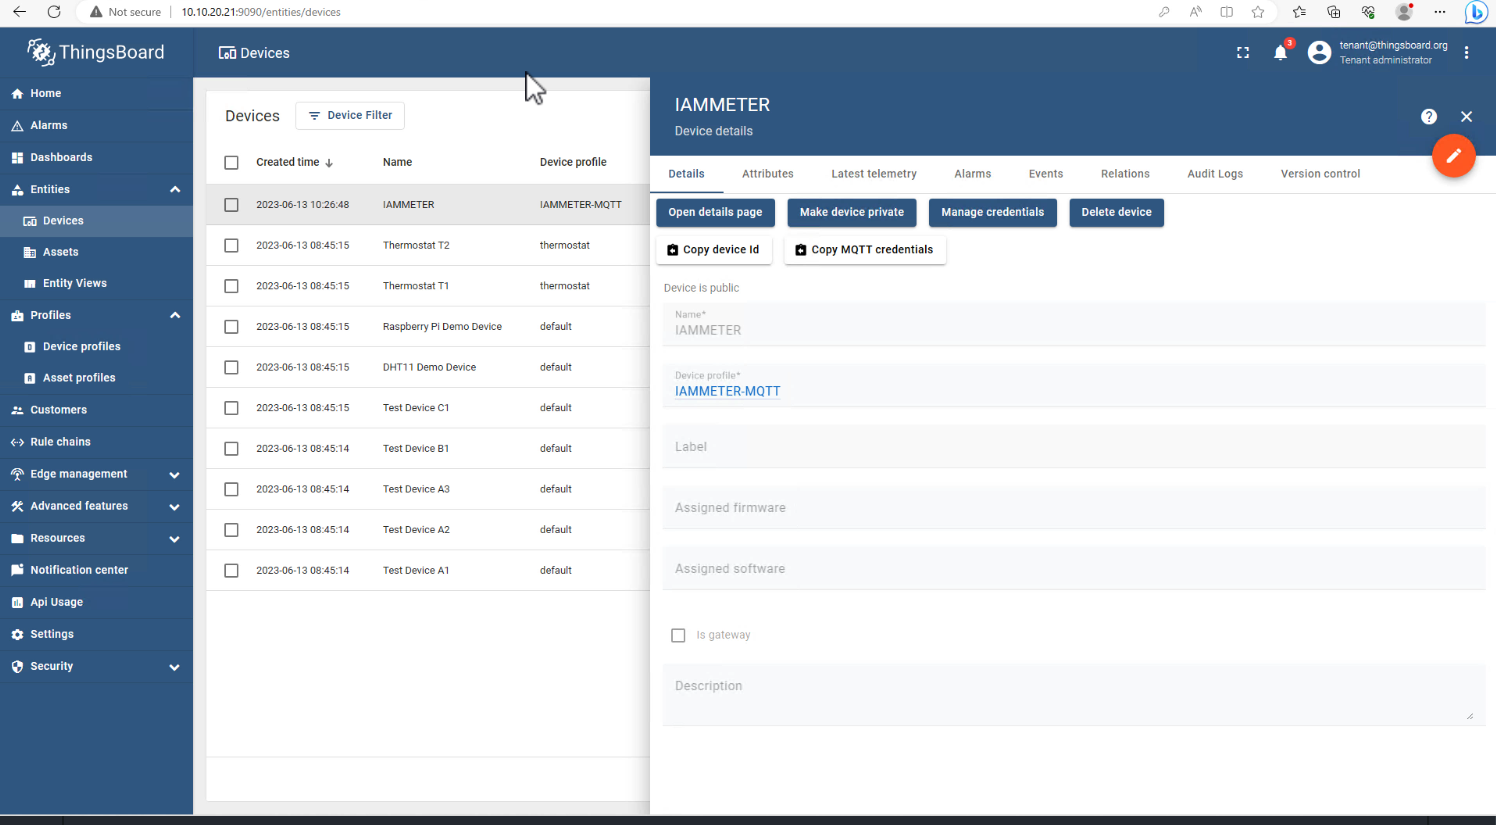
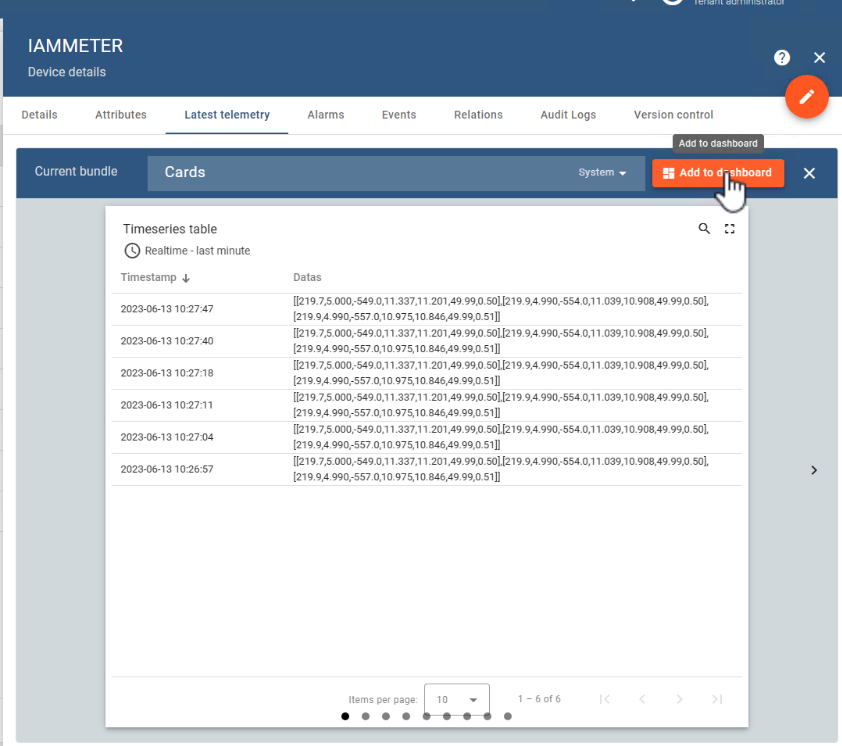
Your IAMMETER smart energy meter is now listed in ThingsBoard.
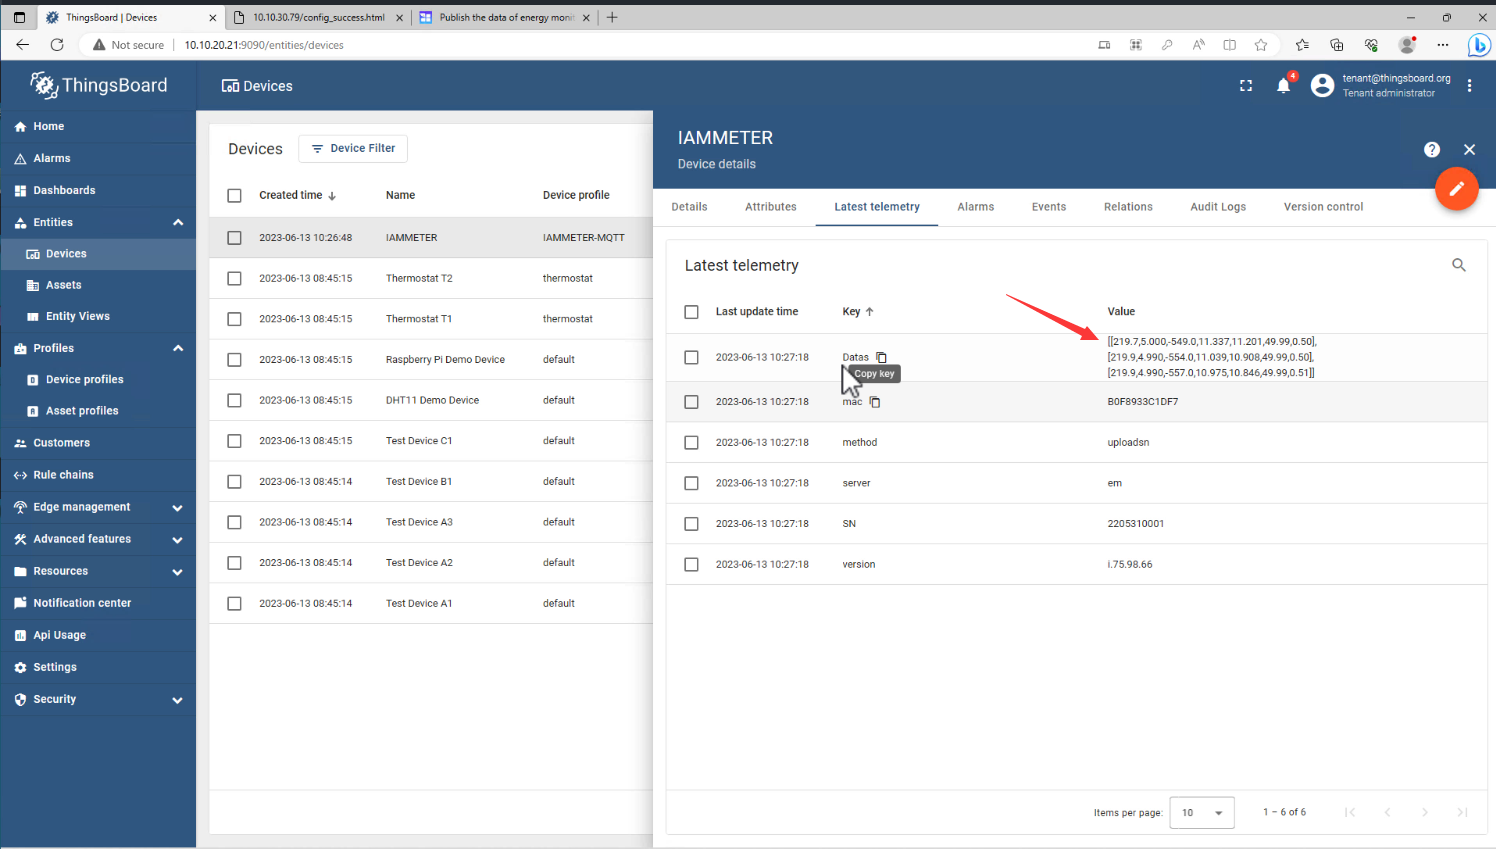
Once connected, the live telemetry data from the energy monitor will appear in your dashboard.
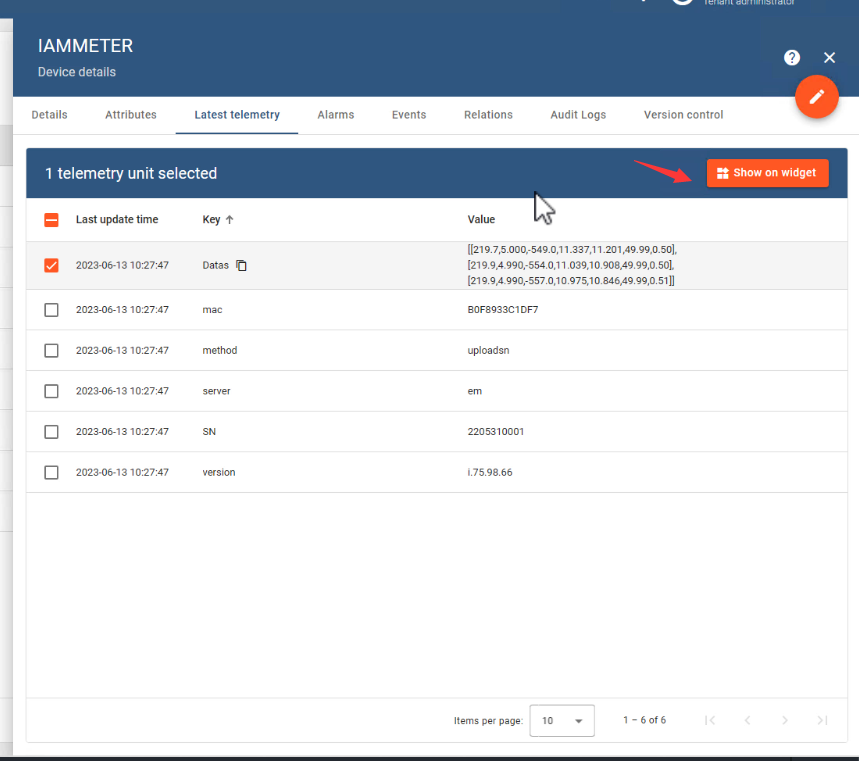
You can also visualize the energy data using custom Widgets.
Join the community discussion: 👉 https://imeter.club/topic/462
Or explore the official guide: 👉 IAMMETER MQTT Integration Docs
IAMMETER is a company focused on energy management products and services, offering smart energy meters, management apps, and cloud platforms.
Our goal is to help customers manage, utilize, and save energy effectively, reducing electricity bills through smart monitoring and analysis.

Three Phase Wi-Fi Energy Meter (WEM3080T)

Single Phase Wi-Fi Energy Meter (WEM3080)
")
Three Phase Wi-Fi Energy Meter (WEM3046T)
")
Three Phase Wi-Fi Energy Meter (WEM3050T)