


If you are looking for a power meter, please read this article first. It will help you quickly confirm whether IAMMETER products meet your requirements. How to choose the power meter with regard to your requirements
| No. | Item | Qty | Remark |
|---|---|---|---|
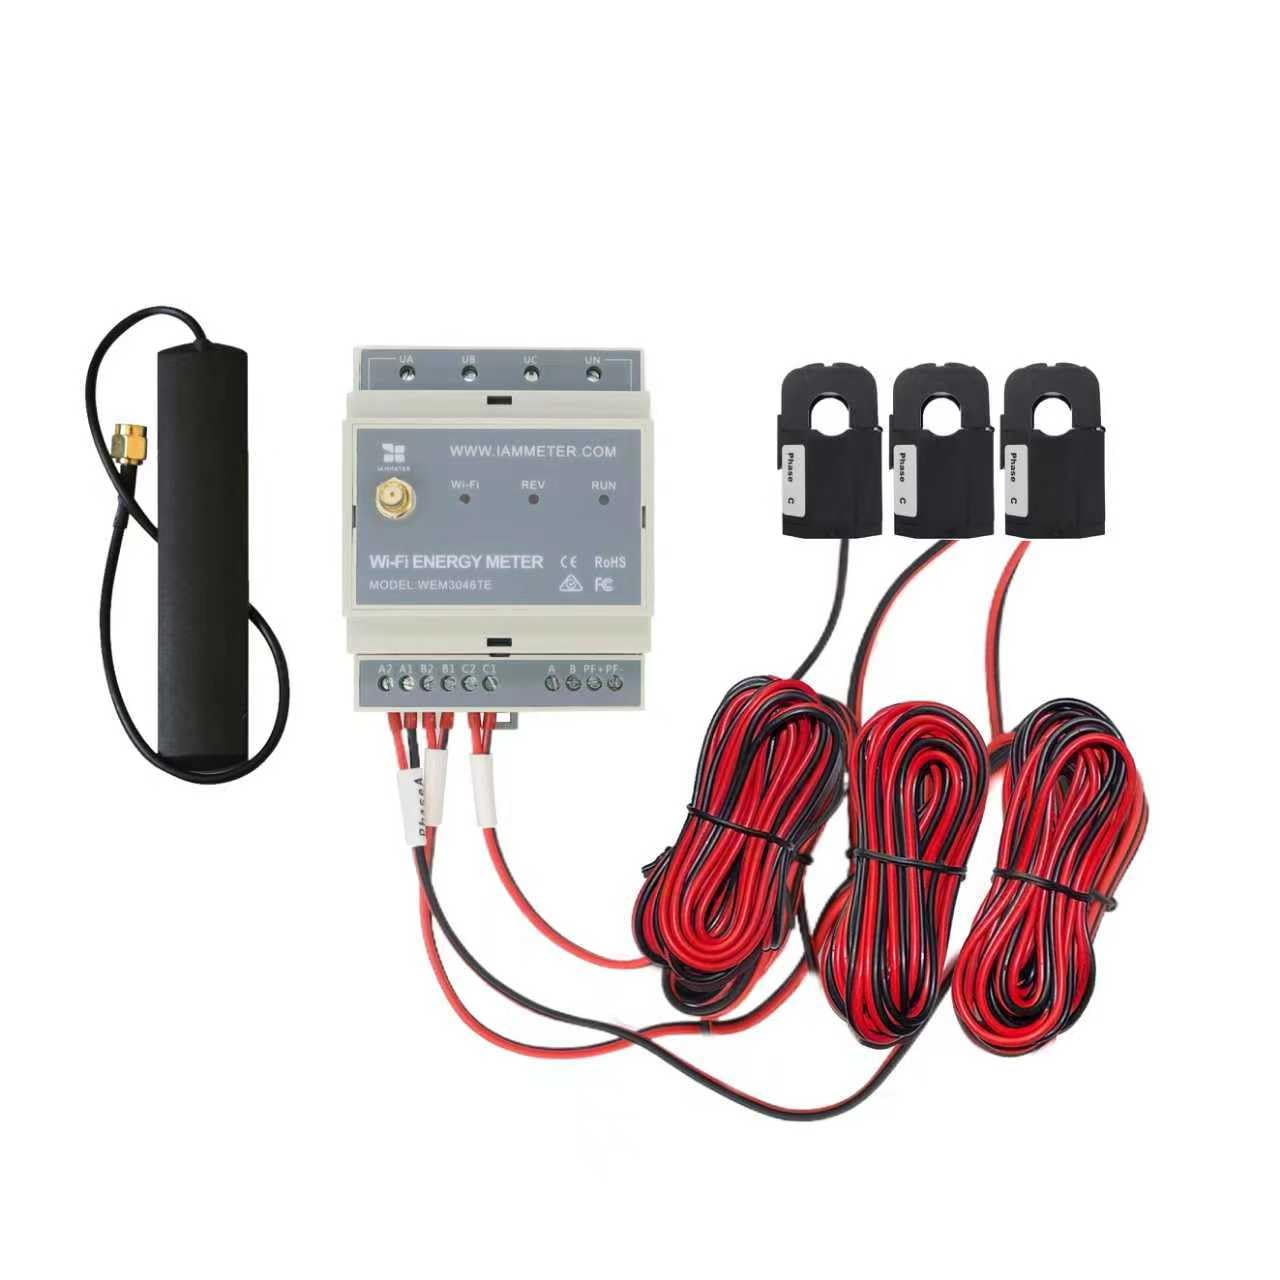
| 1 | Wi-Fi Energy Meter | 1 | Wi-Fi module embedded |
| 2 | Split-core Current Transformer | 3 | 5A, 10mm split-core CT |
| 3 | 2.4G Wi-Fi Antenna | 1 |
Note:
WEM3046TE is designed for retrofit projects and double-CT installation scenarios. Unlike WEM3046T, which connects third-party xxx:5A CTs directly to the terminal, WEM3046TE includes three 5A split-core CTs. These CTs are typically clamped onto the existing CT circuits on site, making WEM3046TE suitable for site retrofit projects where the original wiring should remain unchanged.
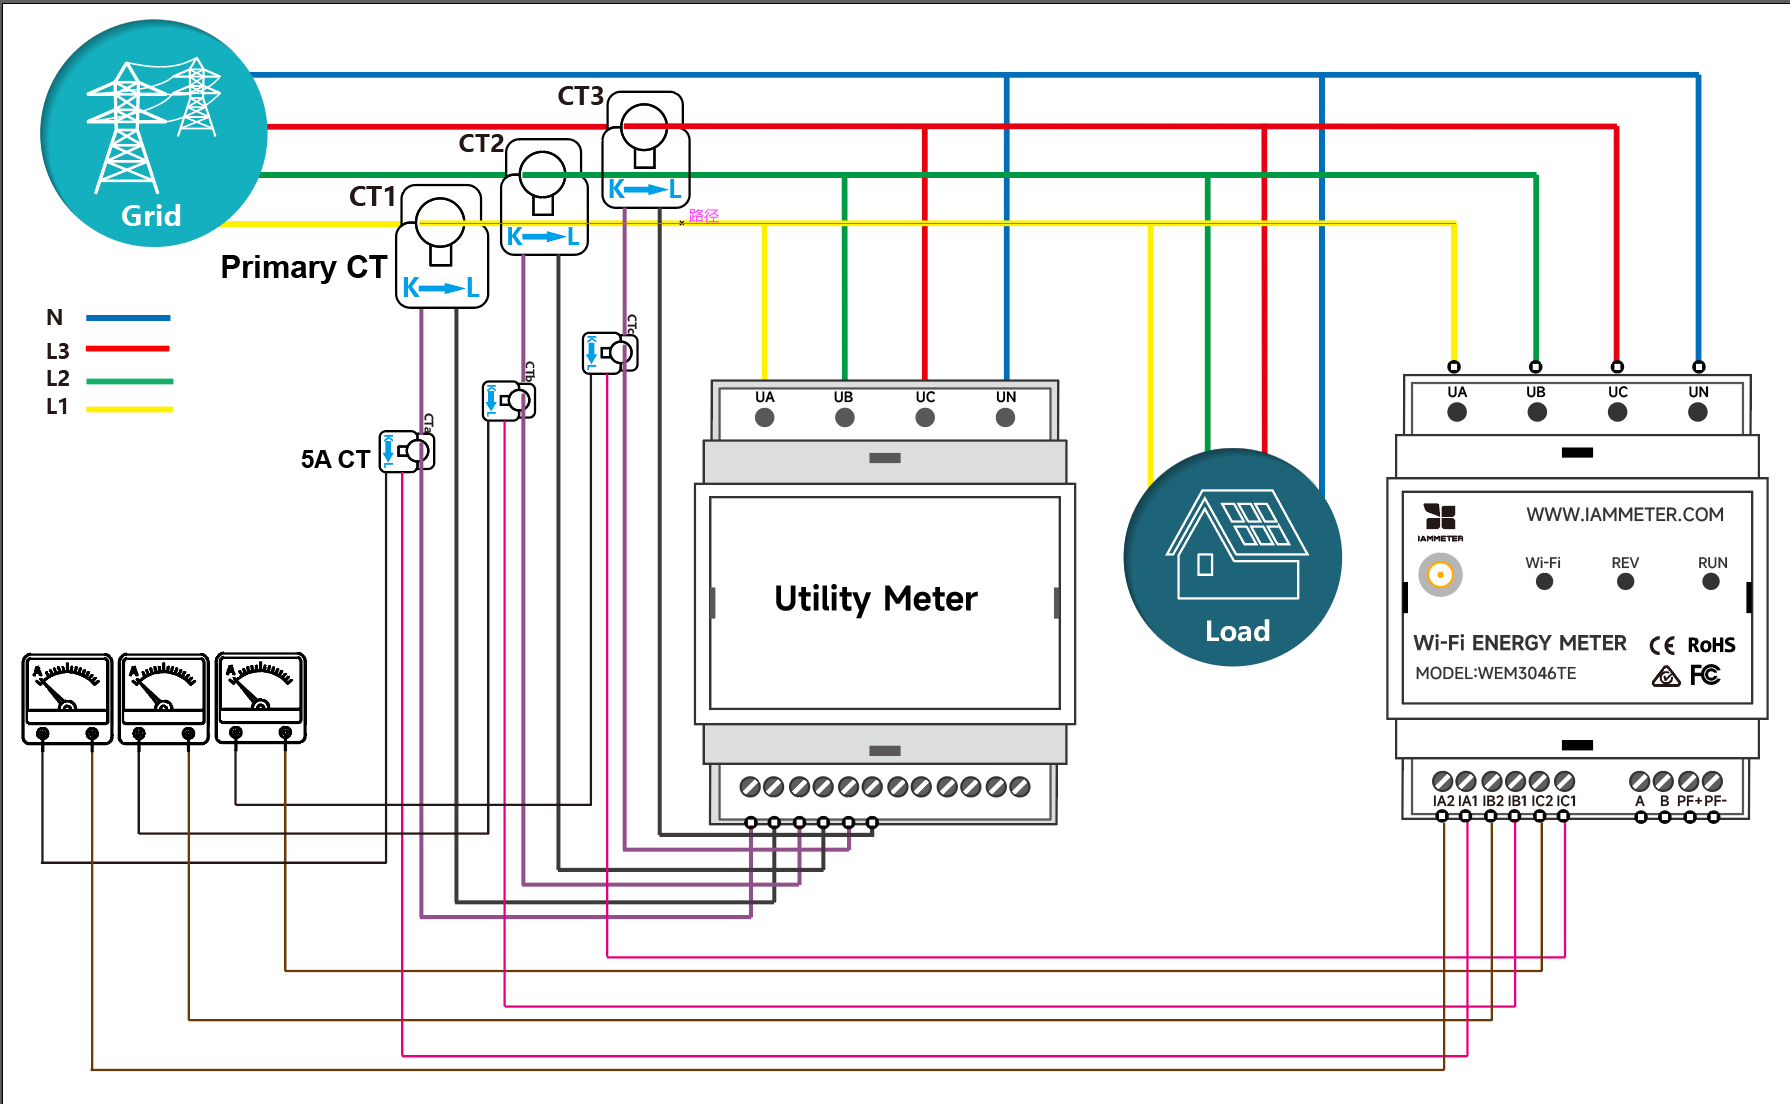
How to connect WEM3046TE to the existing CT circuit
WEM3046TE is designed for retrofit projects where 5A CTs are already installed on site and the original CT wiring should remain unchanged. The included split-core 5A CTs can be clamped onto the existing CT secondary circuit for non-intrusive installation.
Note: This is the most typical application scenario of WEM3046TE. It is suitable for retrofit projects where the existing CT circuit is already available in the distribution box.
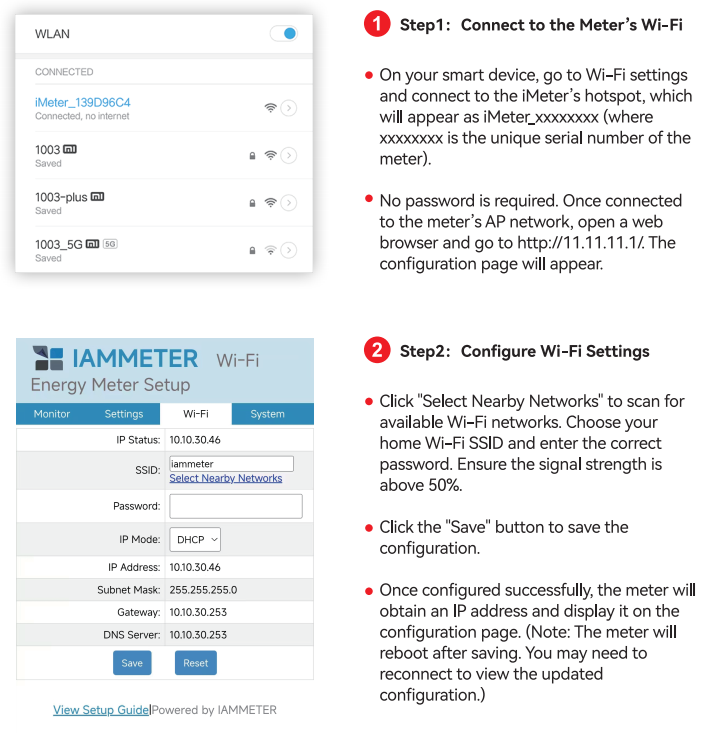
There are two ways to configure the meter's Wi-Fi settings. Setting up by mobile app is recommended. However, you can also set it up in the browser if you encounter any problems when using the app.
Video: WiFi set up by mobile App
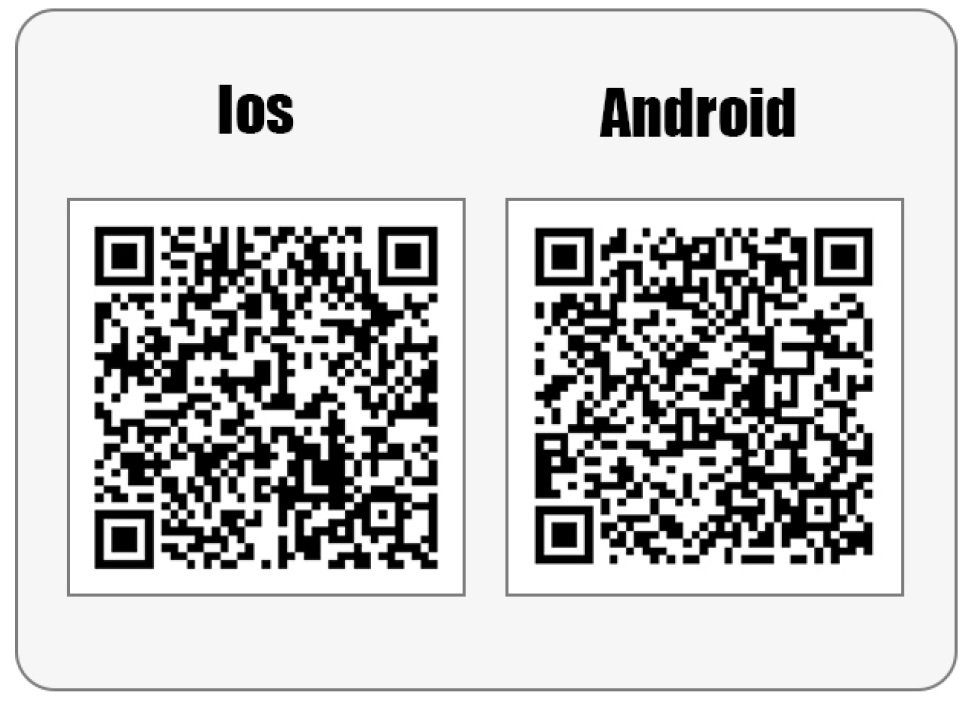
Step 1, scan the QR code and download the mobile app.
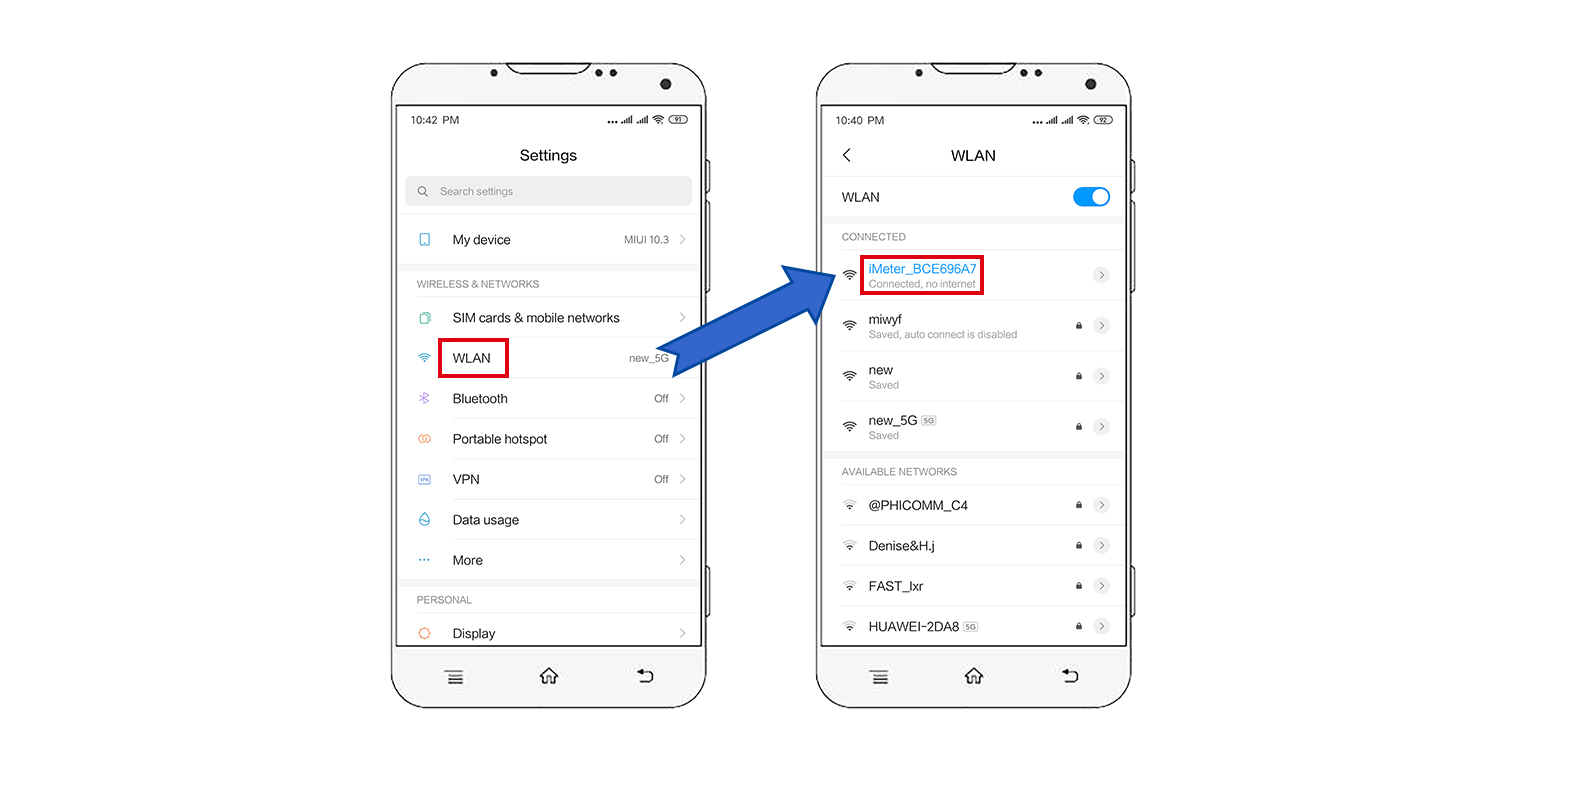
Step 2, search and connect your phone to the iMeter access point signal iMeter_xxxxxxxx.
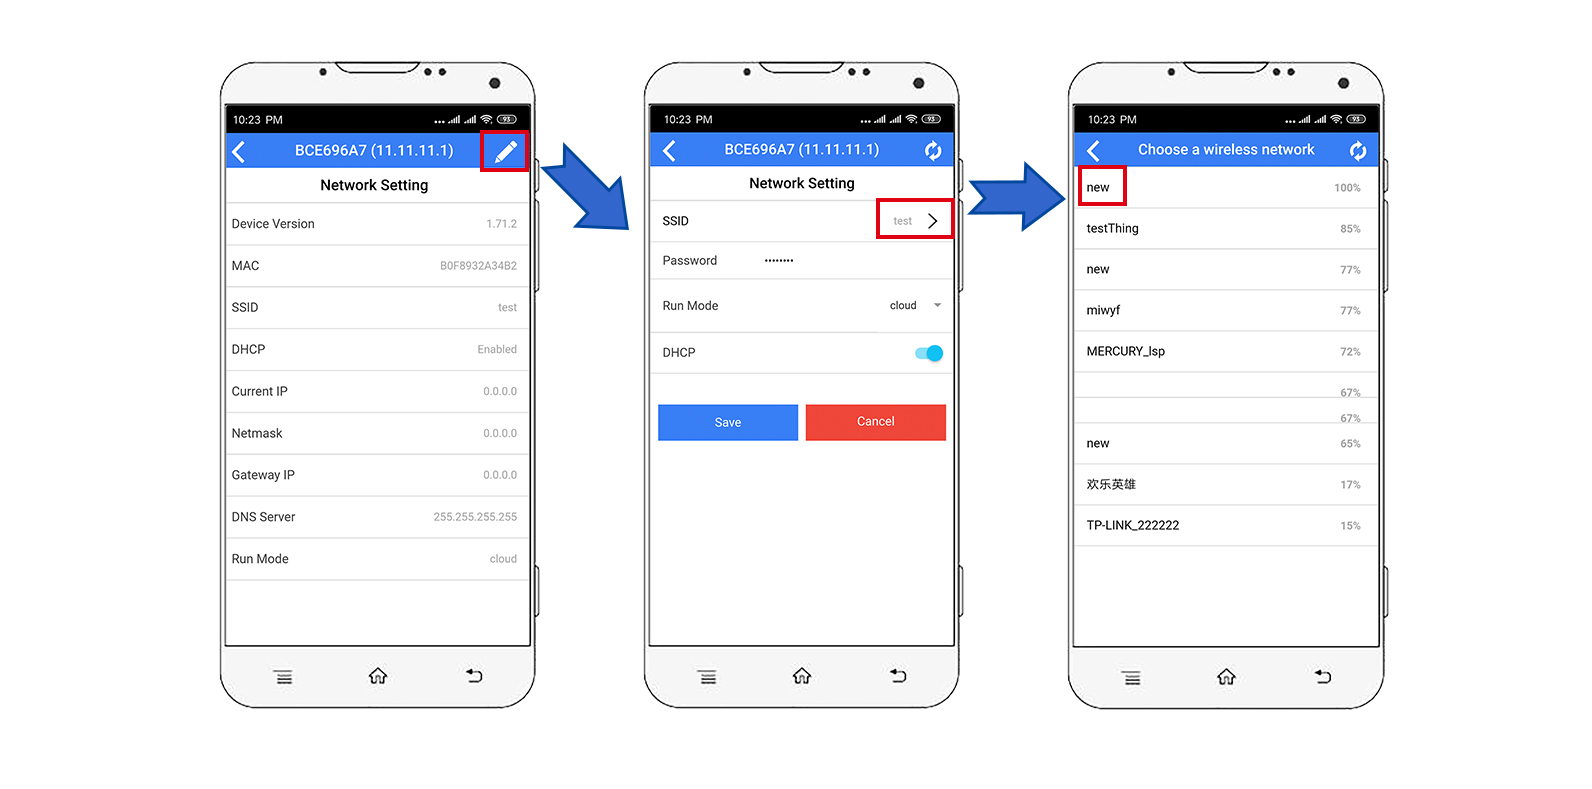
Step 3, open the app and find the iMeter.

Tips: If the app prompts "Invalid device version", you need to set up the Wi-Fi network by browser, same as 3.1 WEM3162 QuickStart
Step 4, select the SSID of your home Wi-Fi network.
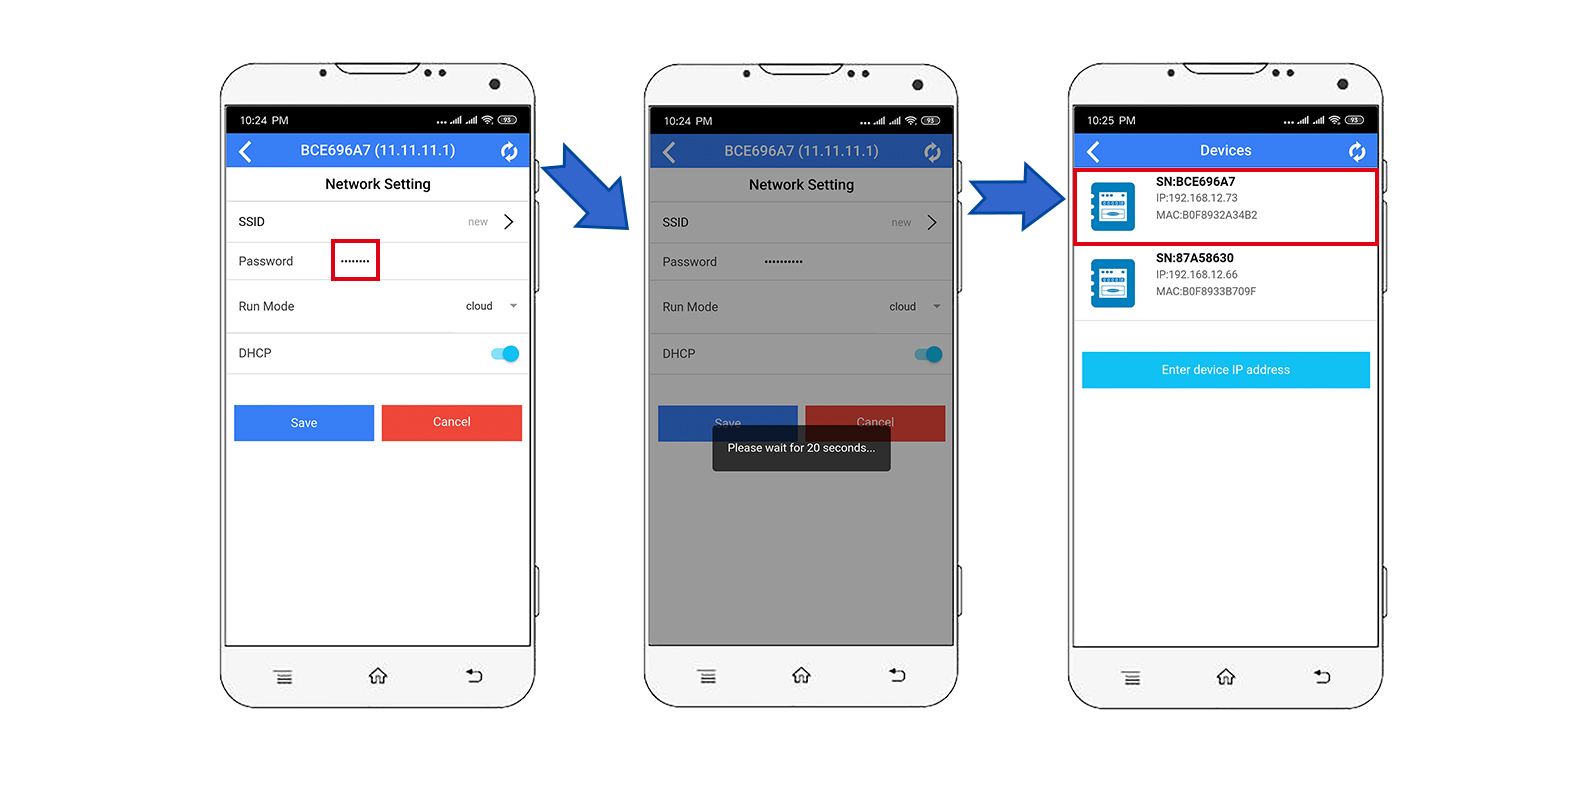
Step 5, enter the password and save. After the Wi-Fi settings are configured successfully, you will see the IP address allocated to the iMeter.
Video: WiFi set up in the browser
If you have successfully set up the meter's Wi-Fi settings in step 3.1, you can skip this section.
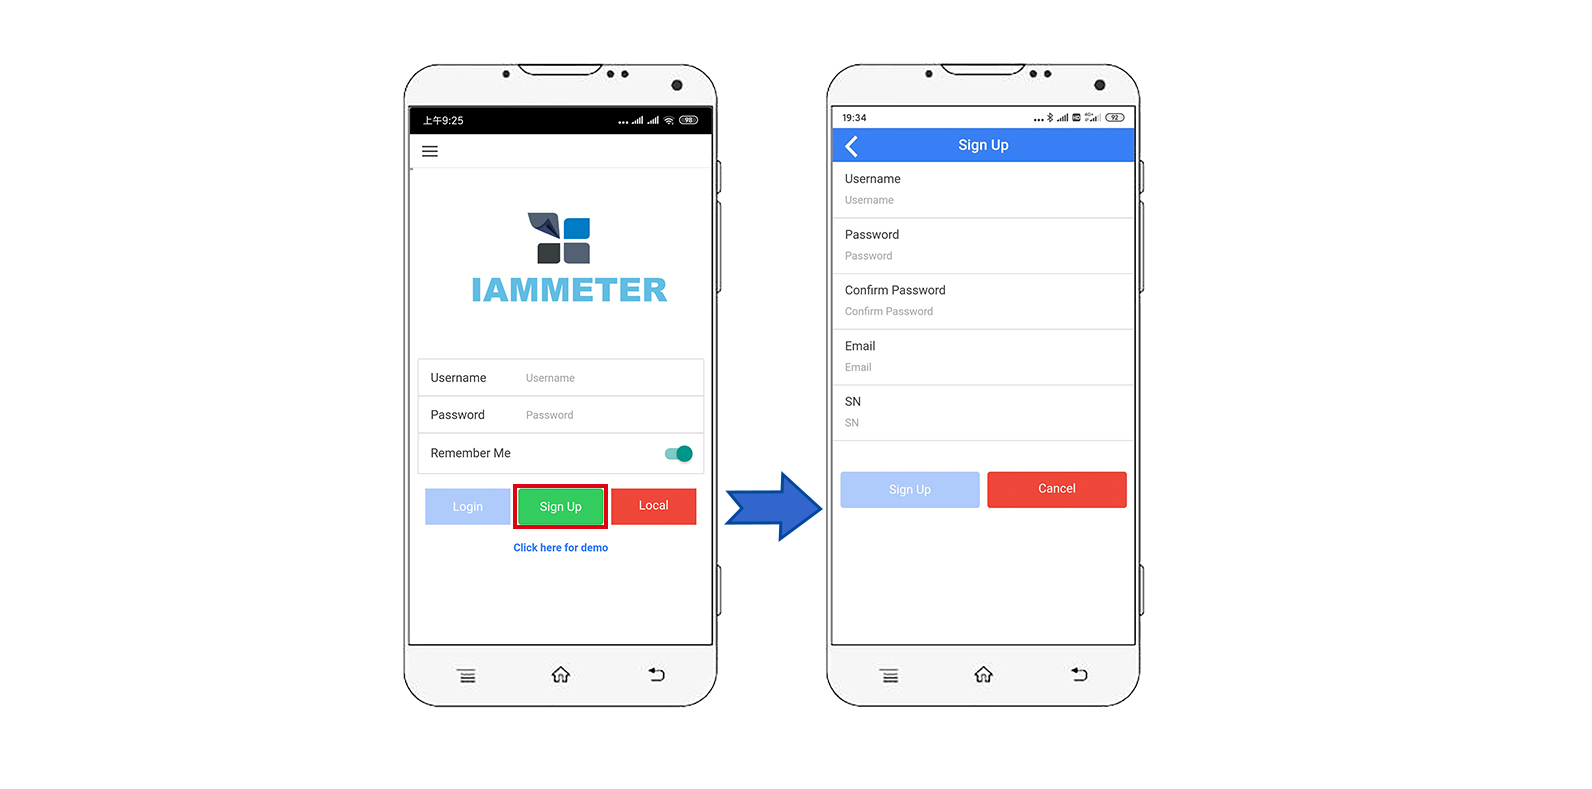
Tips: SN is the unique serial number of your iMeter. You can copy it from the iMeter's access point signal (
iMeter_xxxxxxxx, wherexxxxxxxxis the SN).
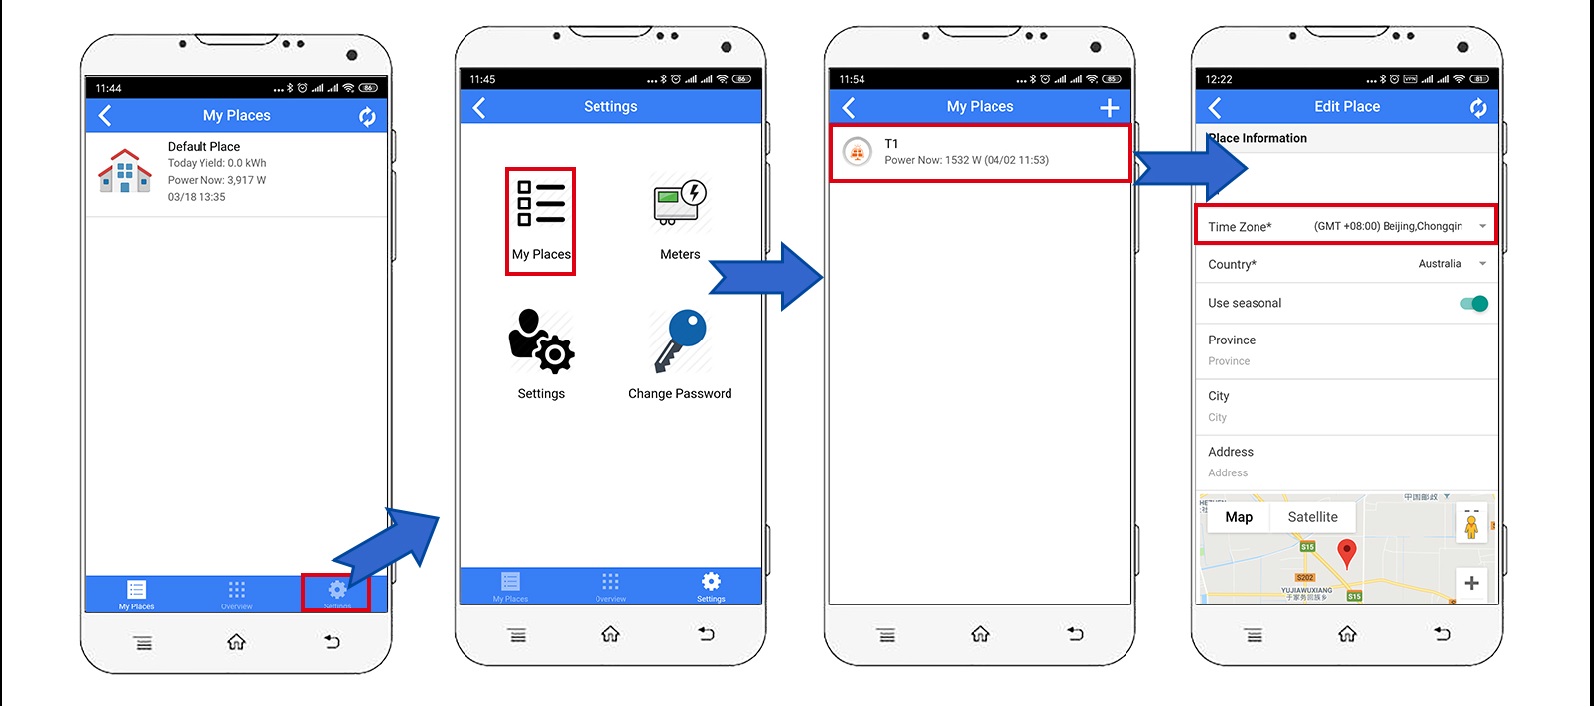
Tips: The time zone must be set according to where your meter is located for correct data display and time-based reports.
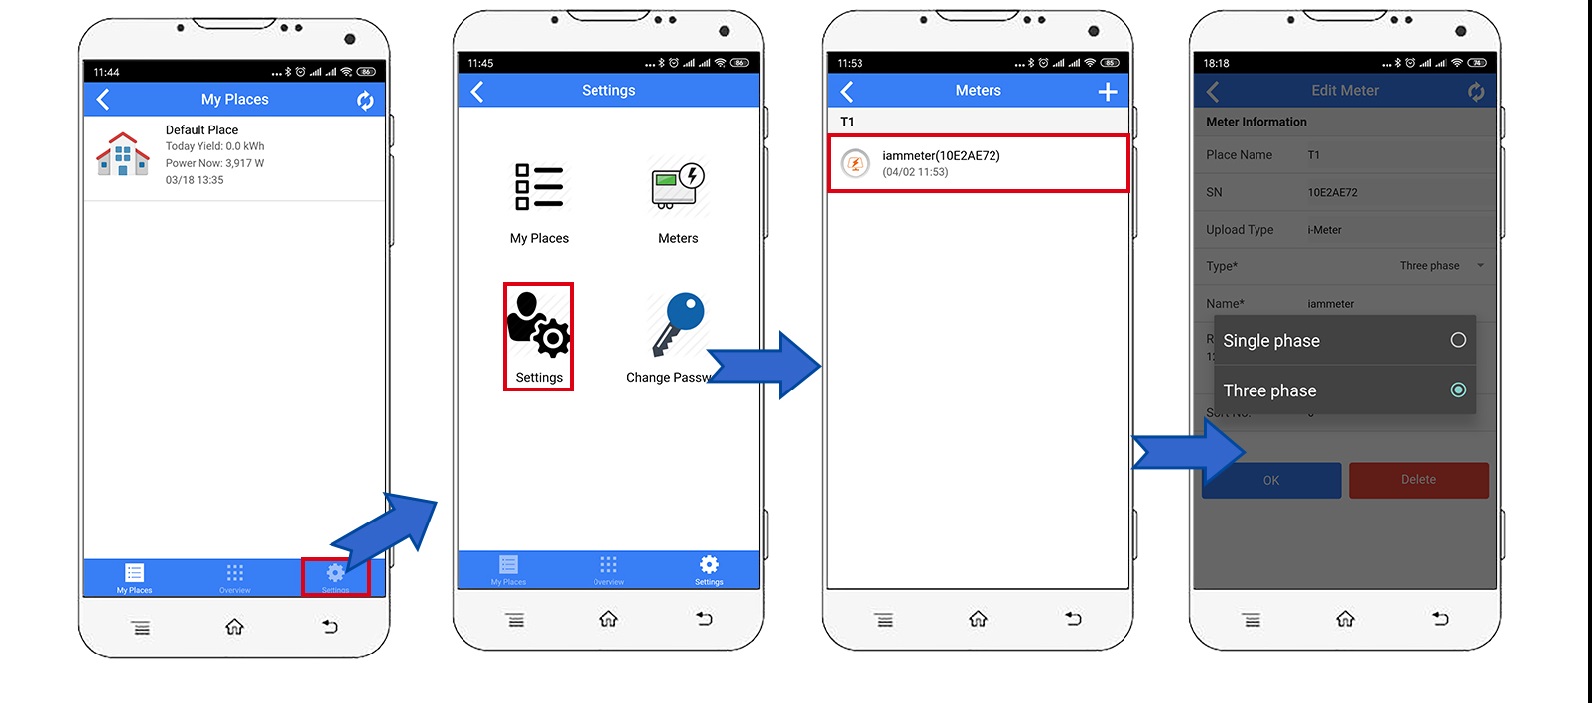
Tips: It is "single phase" as the default meter type in IAMMETER. You need to change the meter type to "Three Phase".
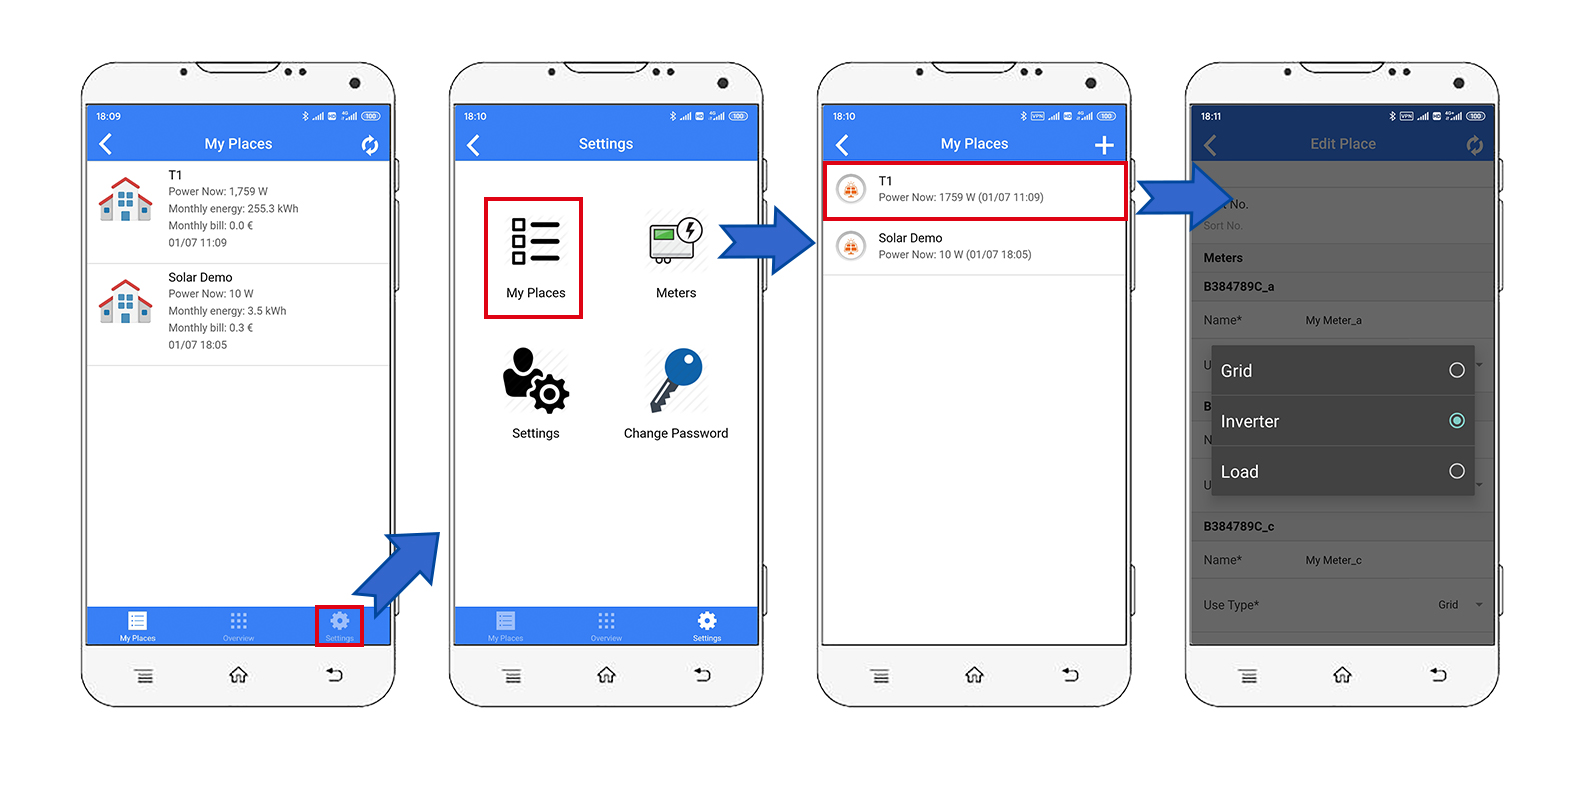
Tips: Please set the use type of each CT according to the actual CT installation. For example, if you clamp the CT of phase A onto the grid side, then set its use type as "grid".
Monitor your energy consumption in IAMMETER-Cloud
Monitor your solar PV system in IAMMETER-Cloud
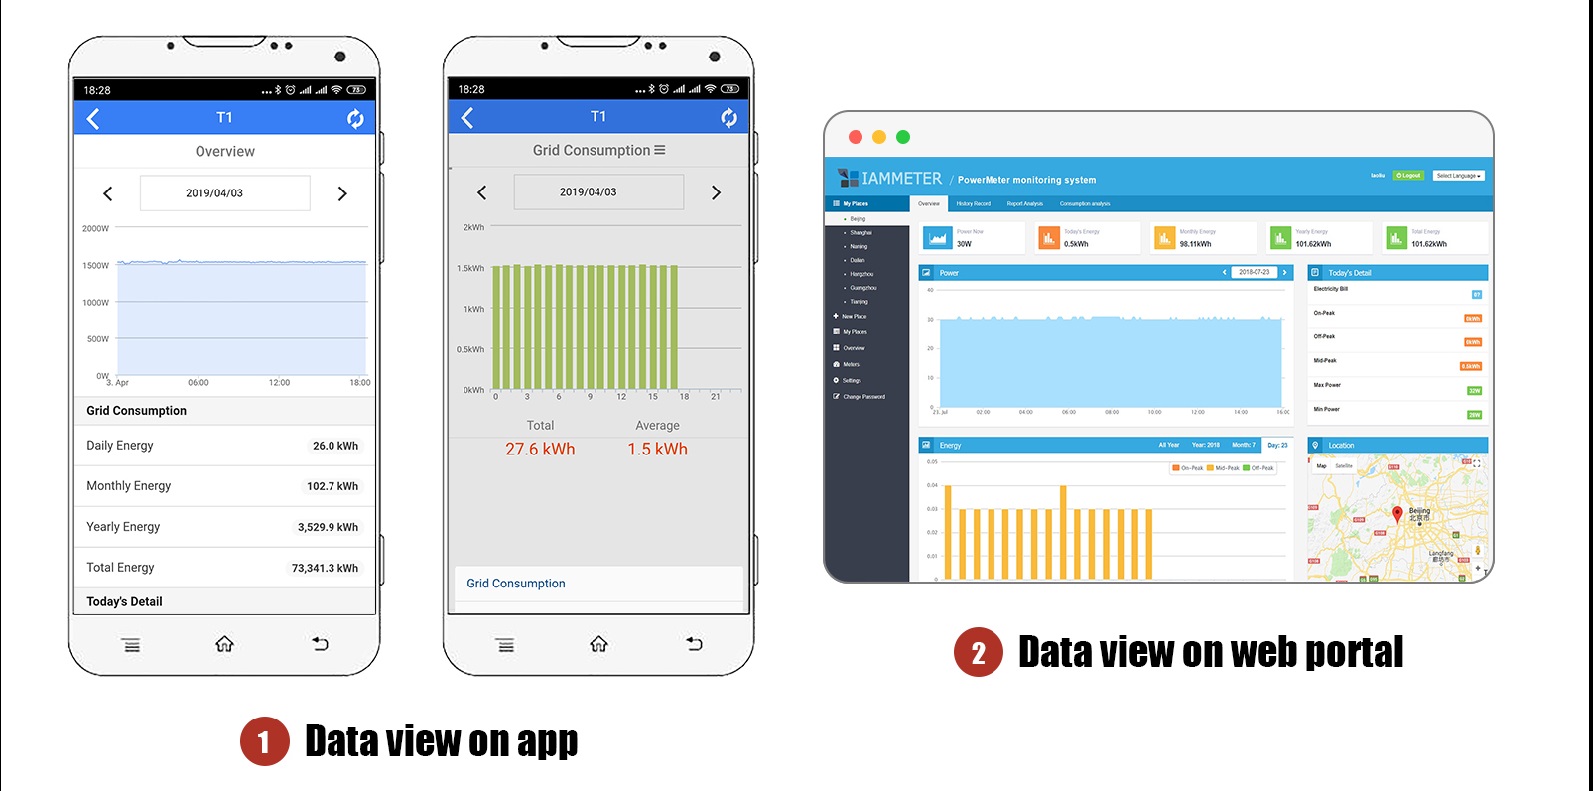
View on Mobile App
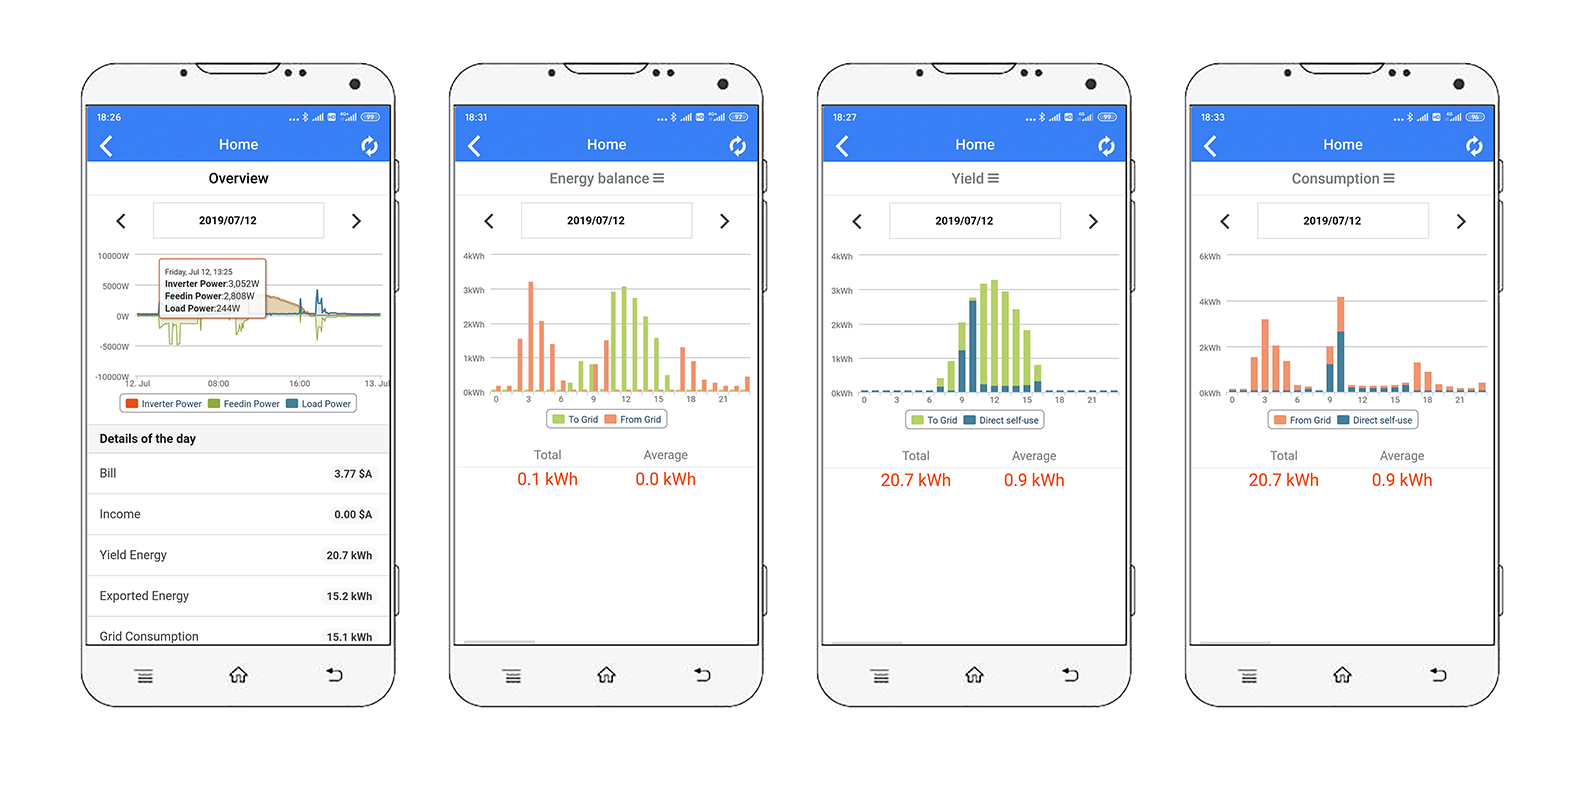
View on Web browser
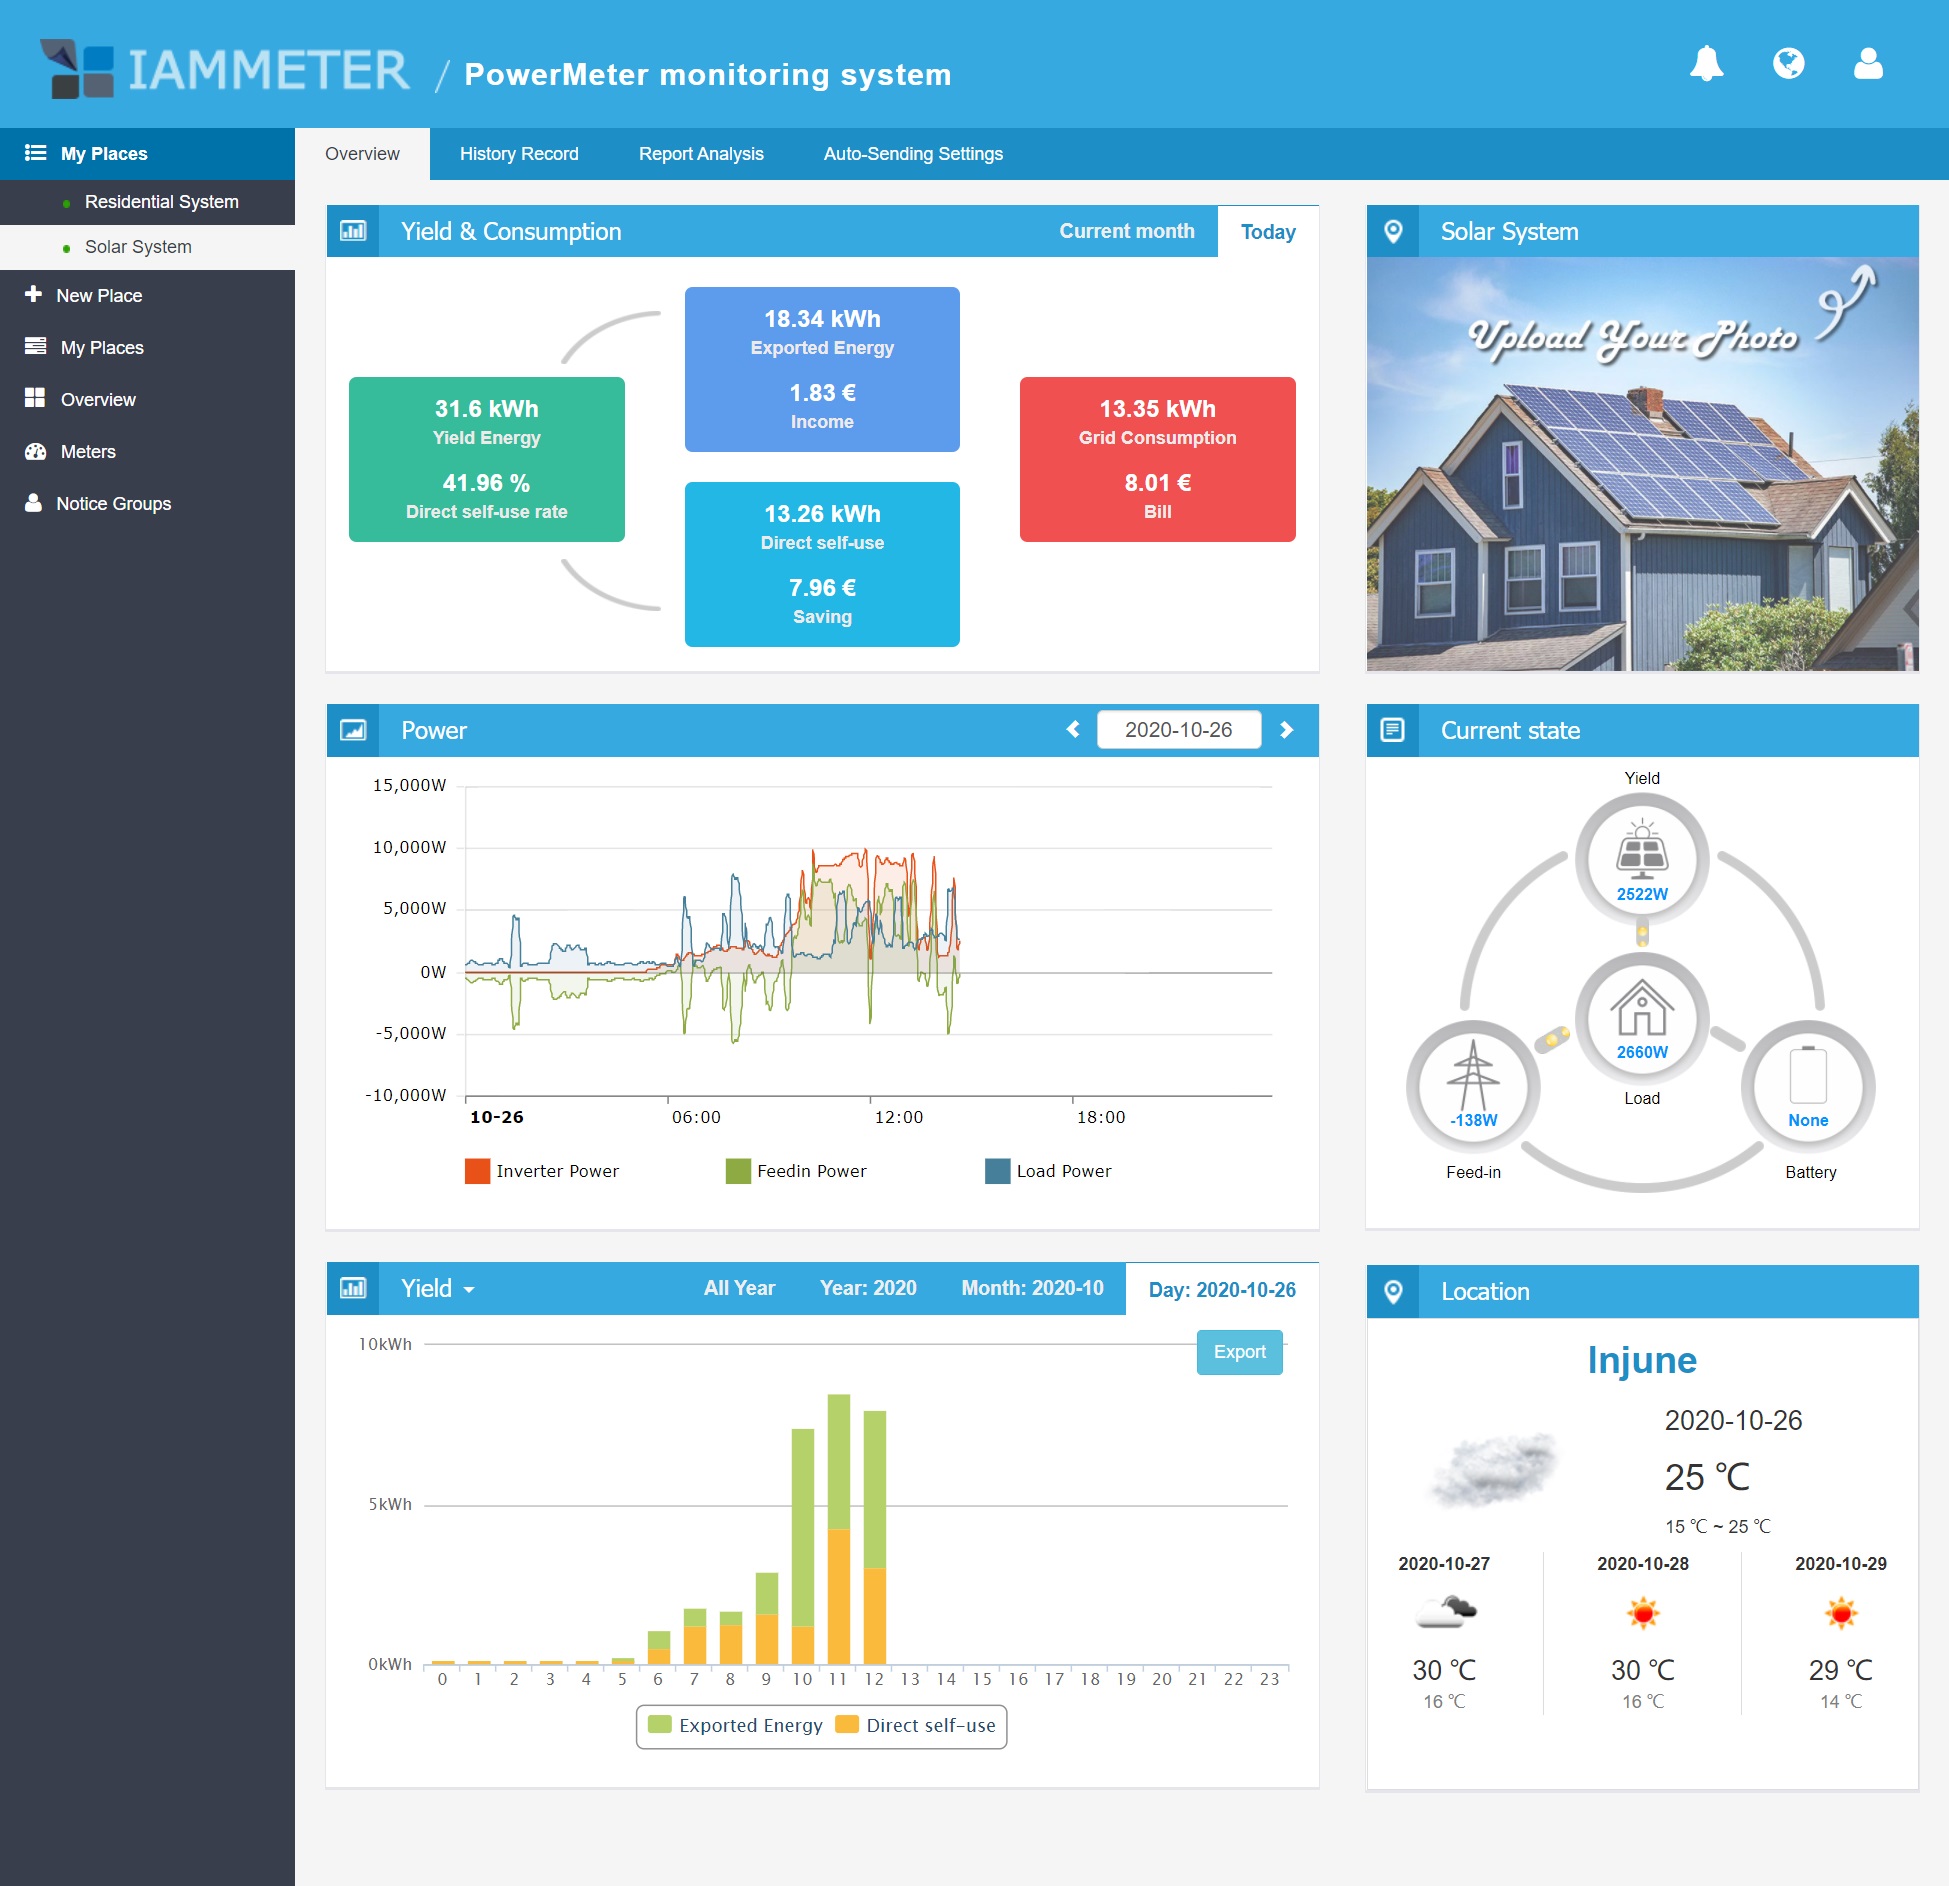
Tips: Please visit IAMMETER to log in to the web portal. Use the same username and password as the app.
iMeter_xxxxxxxx) disappears for security reasons.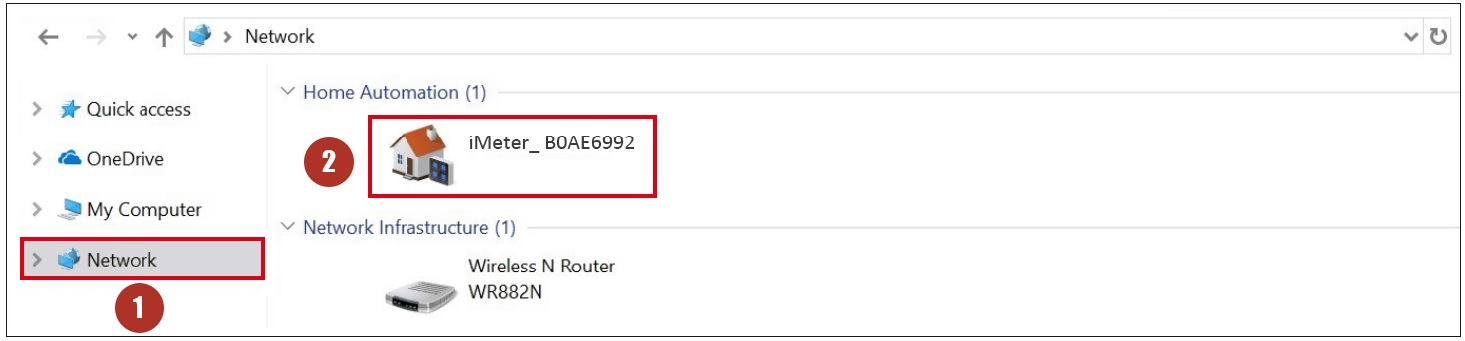
Integrate the Wi-Fi energy meter into Home Assistant
IAMMETER Energy monitor video tutorials
Please note that these video tutorials only introduce part of IAMMETER's functions. For more detailed introductions, please refer to IAMMETER Docs.
Integrate IAMMETER energy meter to third-party platforms other than Home Assistant
Use the Wi-Fi energy meter in areas without internet access
Use the 3 phase energy meter the way you like
Monitor your solar pv system with Home Assistant
Integrate IAMMETER energy meter to third-party platform

Three Phase Wi-Fi Energy Meter (WEM3080T)

Single Phase Wi-Fi Energy Meter (WEM3080)
")
Three Phase Wi-Fi Energy Meter (WEM3046T)
")
Three Phase Wi-Fi Energy Meter (WEM3050T)