


Try an Energy Meter in Home Assistant—Before You Buy One
Wondering how an energy meter would fit into your Home Assistant setup? Try it before you buy. With IAMMETER's online simulator, you can set up MQTT discovery, explore simulated WEM2067 readings, and experiment with dashboards and automations—without buying or wiring a meter. When you're ready for the real hardware, the same MQTT setup steps apply.
This hands-on guide uses the WEM2067 online simulator and Home Assistant's built-in MQTT integration. Home Assistant discovers the simulated meter and creates its sensor entities automatically. You won't need an IAMMETER HACS integration or individual sensor definitions in YAML.
1. Get your MQTT broker ready
You'll need an MQTT broker, such as Mosquitto or EMQX. An existing broker is fine: the key is to connect both Home Assistant and the simulator to the same broker.
We'll use the following examples throughout. Replace them with your own connection details:
| Setting | Example |
|---|---|
| Broker host | mqtt.example.com |
| MQTT TCP port | 1883 |
| Username | mqtt_user |
| Password | Your MQTT password |
| Home Assistant discovery prefix | homeassistant |
mqtt.example.com is a placeholder. Your broker must be reachable from both Home Assistant and the simulator server. A broker address that works only on your home LAN will not work with the public online simulator. The broker does not have to run on the same machine as Home Assistant.
2. Connect Home Assistant to MQTT
- In Home Assistant, go to Settings → Devices & services → Add integration, then search for MQTT.
- Enter your broker's hostname, port, username, and password. In our example, the host is
mqtt.example.comand the port is1883. - Submit the settings to connect. The host field takes a hostname or IP address only—leave out
http://,mqtt://, and any URL path. - MQTT discovery is enabled by default, with
homeassistantas the discovery prefix. If you've changed it, make sure it matches the prefix used by the meter.
Already connected to the right broker? You're ready for the next step. There's no need to add another MQTT integration or change your existing connection.
3. Configure the simulator and enable discovery
Open Settings in the simulator below and enter:
| Setting | What to enter |
|---|---|
| Run Mode | mqtt |
| Address | mqtt.example.com:1883 |
| Username | Your MQTT username; mqtt_user in this example |
| Password | Your MQTT password |
| HA MQTT Discovery | Check the box |
| Upload Interval | 10 seconds |
The public simulator currently accepts upload intervals from 10 to 3600 seconds. We'll use 10 seconds here.
Click Save. The simulator connects to your broker, publishes the Home Assistant discovery configuration, and sends simulated readings at the chosen interval. Notice that the simulator's Address field combines the host and port, unlike Home Assistant's separate fields.
Keep the simulator page active while testing. By default, background uploads stop after five minutes without page activity. Your settings remain saved, but readings stop being sent.
Try it now
For the full walkthrough, see Home Assistant MQTT Discovery for an Energy Meter. The essential step is shown below: open Settings and enter your MQTT broker details.
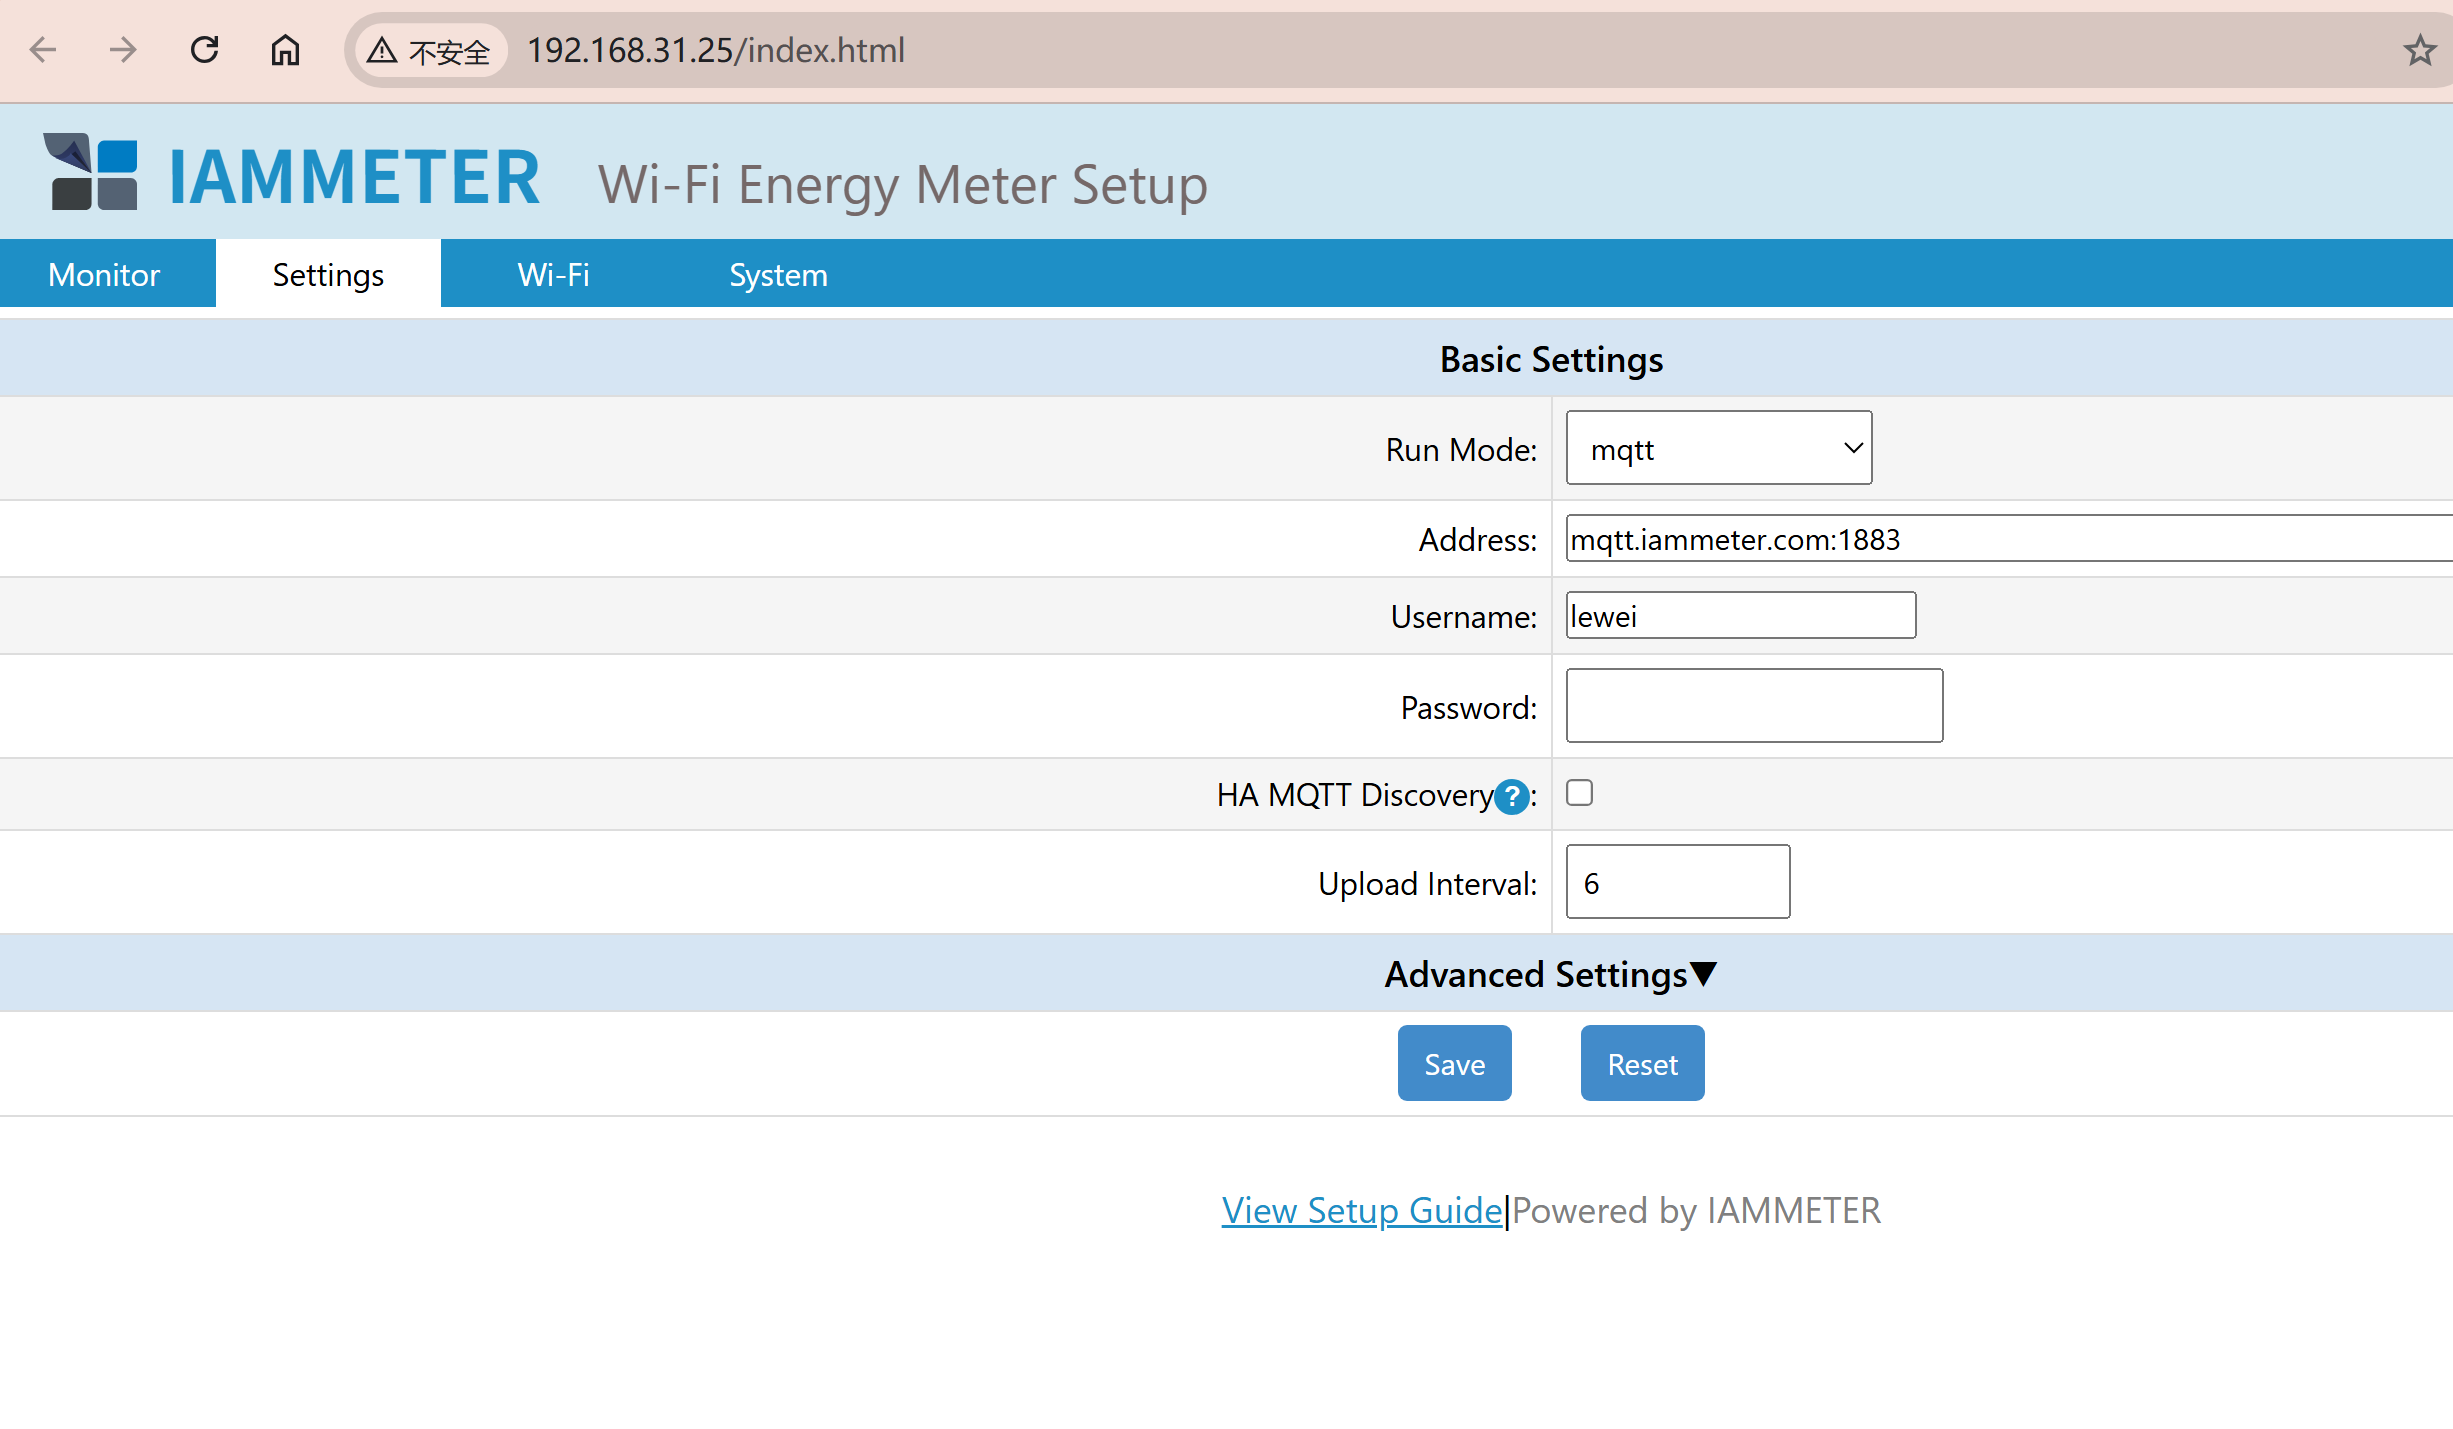
Your turn. The WEM2067 simulator below is interactive—click Settings to configure it with your own broker.
If the embedded simulator doesn't load, open the WEM2067 simulator in a new tab and continue there.
4. Find your meter in Home Assistant
Return to Settings → Devices & services → MQTT and look for the meter in the device list. The WEM2067 simulator used here has the serial number ZAT3LQD9.
This example creates one WEM2067 device with 12 sensor entities: voltage, current, power, power factor, imported energy, and exported energy for each of its two channels.
Open the device and check the readings for channels A and B. Wait at least one upload interval and confirm that the values and update timestamps continue to change. In the default inverter-and-grid scenario, channel A represents solar generation and channel B represents grid import/export. Negative power on channel B means electricity is being exported to the grid.
Once the readings are updating, you can use the entities in dashboards and automations. You can also try adding the energy sensors to the Energy dashboard; eligibility depends on the device class, state class, and unit reported for each entity in Home Assistant.

5. Check messages and troubleshoot
With HA MQTT Discovery enabled, this simulator publishes readings to:
wem/imeter_zat3lqd9/tele/monitorTo check whether messages are arriving, subscribe to this topic using the MQTT integration's topic listener. Discovery messages use the homeassistant/ prefix. With discovery disabled, the WEM2067 uses device/ZAT3LQD9/realtime instead, so make sure you're listening to the topic for the selected mode.
| What you see | What to check |
|---|---|
| Home Assistant cannot connect to the broker | Check the host, port, username, and password, and confirm the broker is reachable from Home Assistant. Match the protocol and port to your broker's MQTT or MQTTS configuration. |
| MQTT is connected, but no meter appears | Enable HA MQTT Discovery in the simulator and save. Confirm that both clients use the same broker, discovery is enabled in Home Assistant, and the discovery prefixes match. |
| The device appears, but readings do not update | Check that the simulator is still uploading and has not paused due to inactivity. Wait one upload interval, then listen for messages on the data topic above. |
| Readings jump between different values | Simulator sessions for the same model share a serial number and discovery identifiers. Keep only one active session per model connected to a given broker. |
For more detail, see the simulator MQTT/MQTTS guide, IAMMETER MQTT discovery guide, and Home Assistant MQTT documentation.
Ready for a physical meter? The MQTT discovery setup follows the same steps. Connect Home Assistant and the meter to the same broker, enter the MQTT details in the meter's Settings, enable HA MQTT Discovery, and check the discovered device and entities in Home Assistant. The meter needs firmware that supports MQTT discovery. It also has its own serial number, so review the entity references in your dashboards and automations when you switch. Follow the physical meter MQTT discovery walkthrough for the complete setup.
MQTT is one of several options. Explore the IAMMETER Home Assistant integration guide to compare the available methods.
6. About the WEM2067
The WEM2067 is IAMMETER's dual-channel energy meter for home monitoring. Its two channels can measure a single-phase solar inverter and the grid at the same time, or monitor the two legs of a split-phase grid supply.
In the simulator's default scenario, phase A carries inverter generation data and phase B carries grid import/export data. This differs from the wiring diagram, where CTa measures the grid and CTb measures the inverter. See Section 2.2: Use Solar and Grid Data in Home Assistant for the mapping.