


Send Home Assistant Energy Data to Cloud | IAMMETER-Link
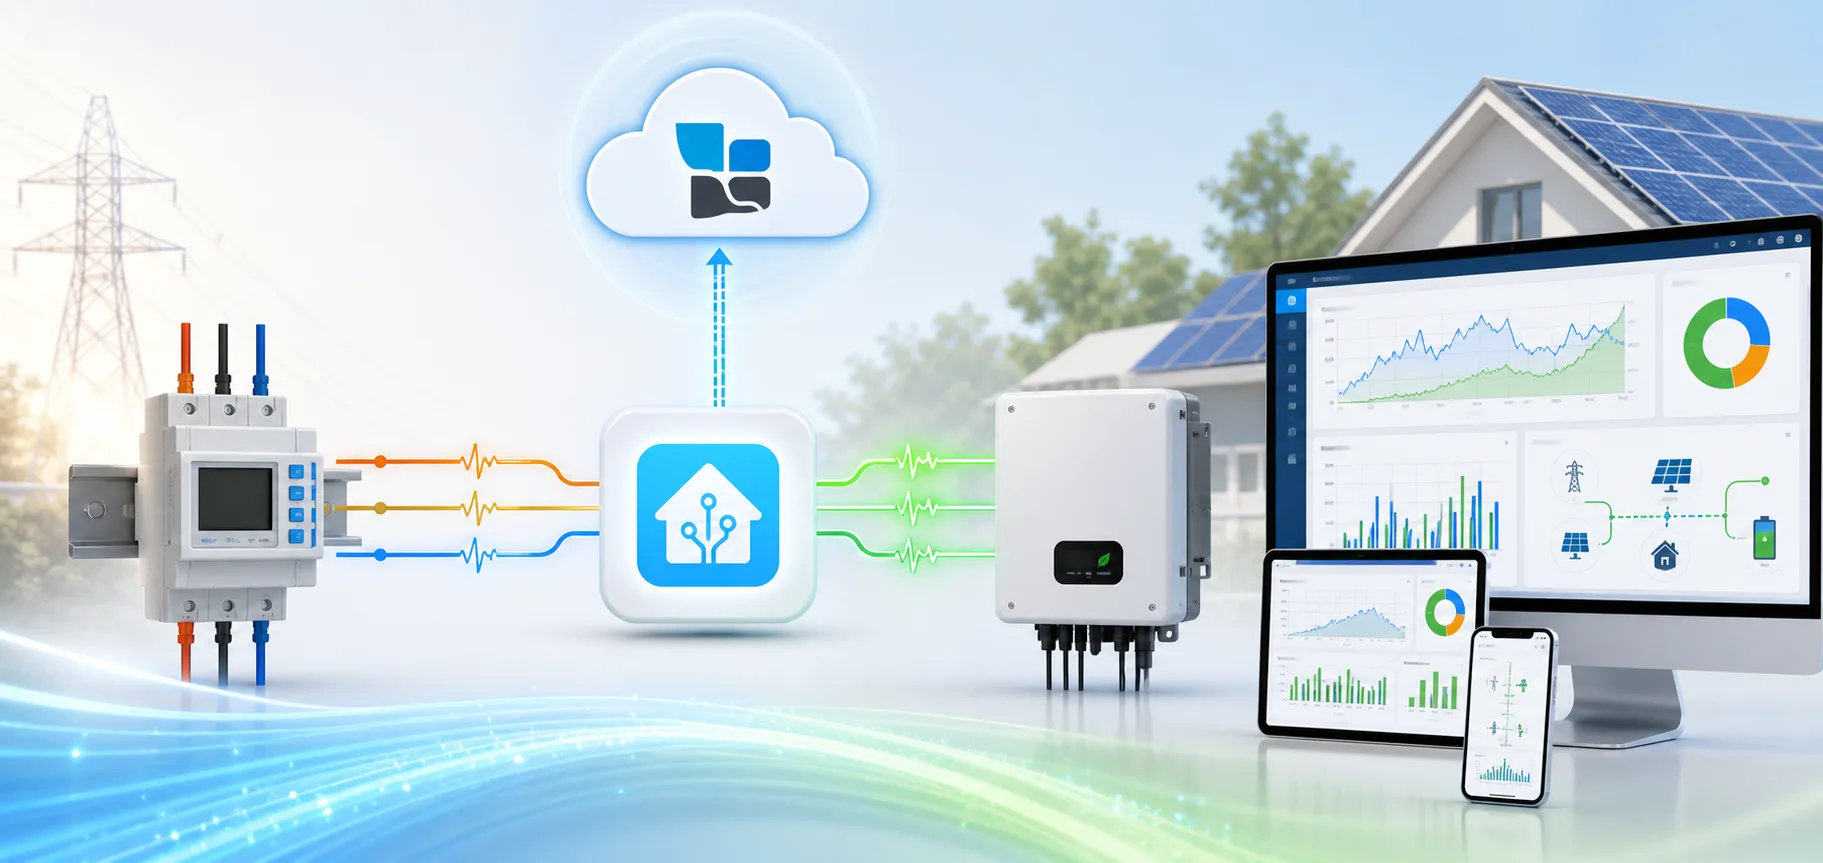
Send Home Assistant Energy Data to Cloud with IAMMETER-Link
If an inverter, electricity meter, battery system, or other energy device already provides sensor entities in Home Assistant, IAMMETER-Link can upload those values to an IAMMETER Virtual Meter for cloud dashboards, remote access, and energy analysis.
This makes Home Assistant a compatibility bridge:
Energy device → Home Assistant entities → IAMMETER-Link → Virtual Meter → IAMMETER Cloud
The source device does not need to be an IAMMETER meter. It can be any device that Home Assistant already integrates, provided that its entities expose valid and correctly scaled energy measurements.
IAMMETER-Link is useful when you want to combine Home Assistant's broad device compatibility with IAMMETER Cloud's energy and solar monitoring services.
What IAMMETER-Link does—and does not do
IAMMETER-Link reads selected entities from Home Assistant and uploads their current values to an IAMMETER Virtual Meter.
It can map values such as:
- voltage in V;
- current in A;
- active power in W;
- imported energy in kWh;
- exported energy in kWh;
- battery state of charge where supported by the configured data model.
It does not:
- read an IAMMETER hardware meter directly over HTTP, Modbus, or MQTT;
- create missing energy measurements from an unrelated power entity;
- turn IAMMETER Cloud into a fully local service;
- replace the original Home Assistant integration for the source device.
To bring an IAMMETER hardware meter into Home Assistant, use the Home Assistant energy meter integration guide. IAMMETER-Link sends data in the opposite direction.
When cloud energy monitoring through Home Assistant is useful
A third-party inverter is already in Home Assistant
Many inverters already expose generation power and cumulative energy through a Home Assistant integration. IAMMETER-Link can map those entities to a Virtual Meter so the inverter data can be viewed in IAMMETER Cloud without adding a second physical meter solely for data transfer.
Grid and inverter data come from different integrations
For example:
- an IAMMETER meter monitors grid import/export;
- a third-party inverter integration provides PV generation in Home Assistant;
- IAMMETER-Link uploads the inverter entities as a Virtual Meter;
- IAMMETER Cloud displays the grid-side and inverter-side data in the solar monitoring workflow.
This is especially useful when one platform does not natively communicate with every inverter brand.
Remote or multi-site access is required
Home Assistant can remain the local integration hub at each installation, while selected energy measurements are sent to IAMMETER Cloud for remote dashboards and longer-term analysis.
The exact site and Virtual Meter structure should be planned before deployment. Do not map several independent systems to the same Virtual Meter serial number.
Requirements
Before installation, confirm that you have:
- a working Home Assistant installation;
- stable source entities for the required measurements;
- internet access from Home Assistant to IAMMETER Cloud;
- an IAMMETER Cloud account;
- an IAMMETER Virtual Meter serial number;
- HACS, unless you choose manual custom-component installation.
IAMMETER-Link repository:
Release v1.1.1 includes optimized upload logic and state-of-charge handling.
Upload interval: Basic and Pro
The upload interval depends on the IAMMETER Cloud service level:
| Cloud service | Upload interval |
|---|---|
| IAMMETER Basic | 300 seconds |
| IAMMETER Pro | 60 seconds |
IAMMETER-Link is intended for cloud reporting and remote monitoring, not second-level control loops. Keep fast automations inside Home Assistant using the original local entities.
For example:
- use a local Modbus or MQTT power entity for a 2–5 second automation;
- use IAMMETER-Link for one- or five-minute Cloud updates and analysis.
Step 1: Install IAMMETER-Link
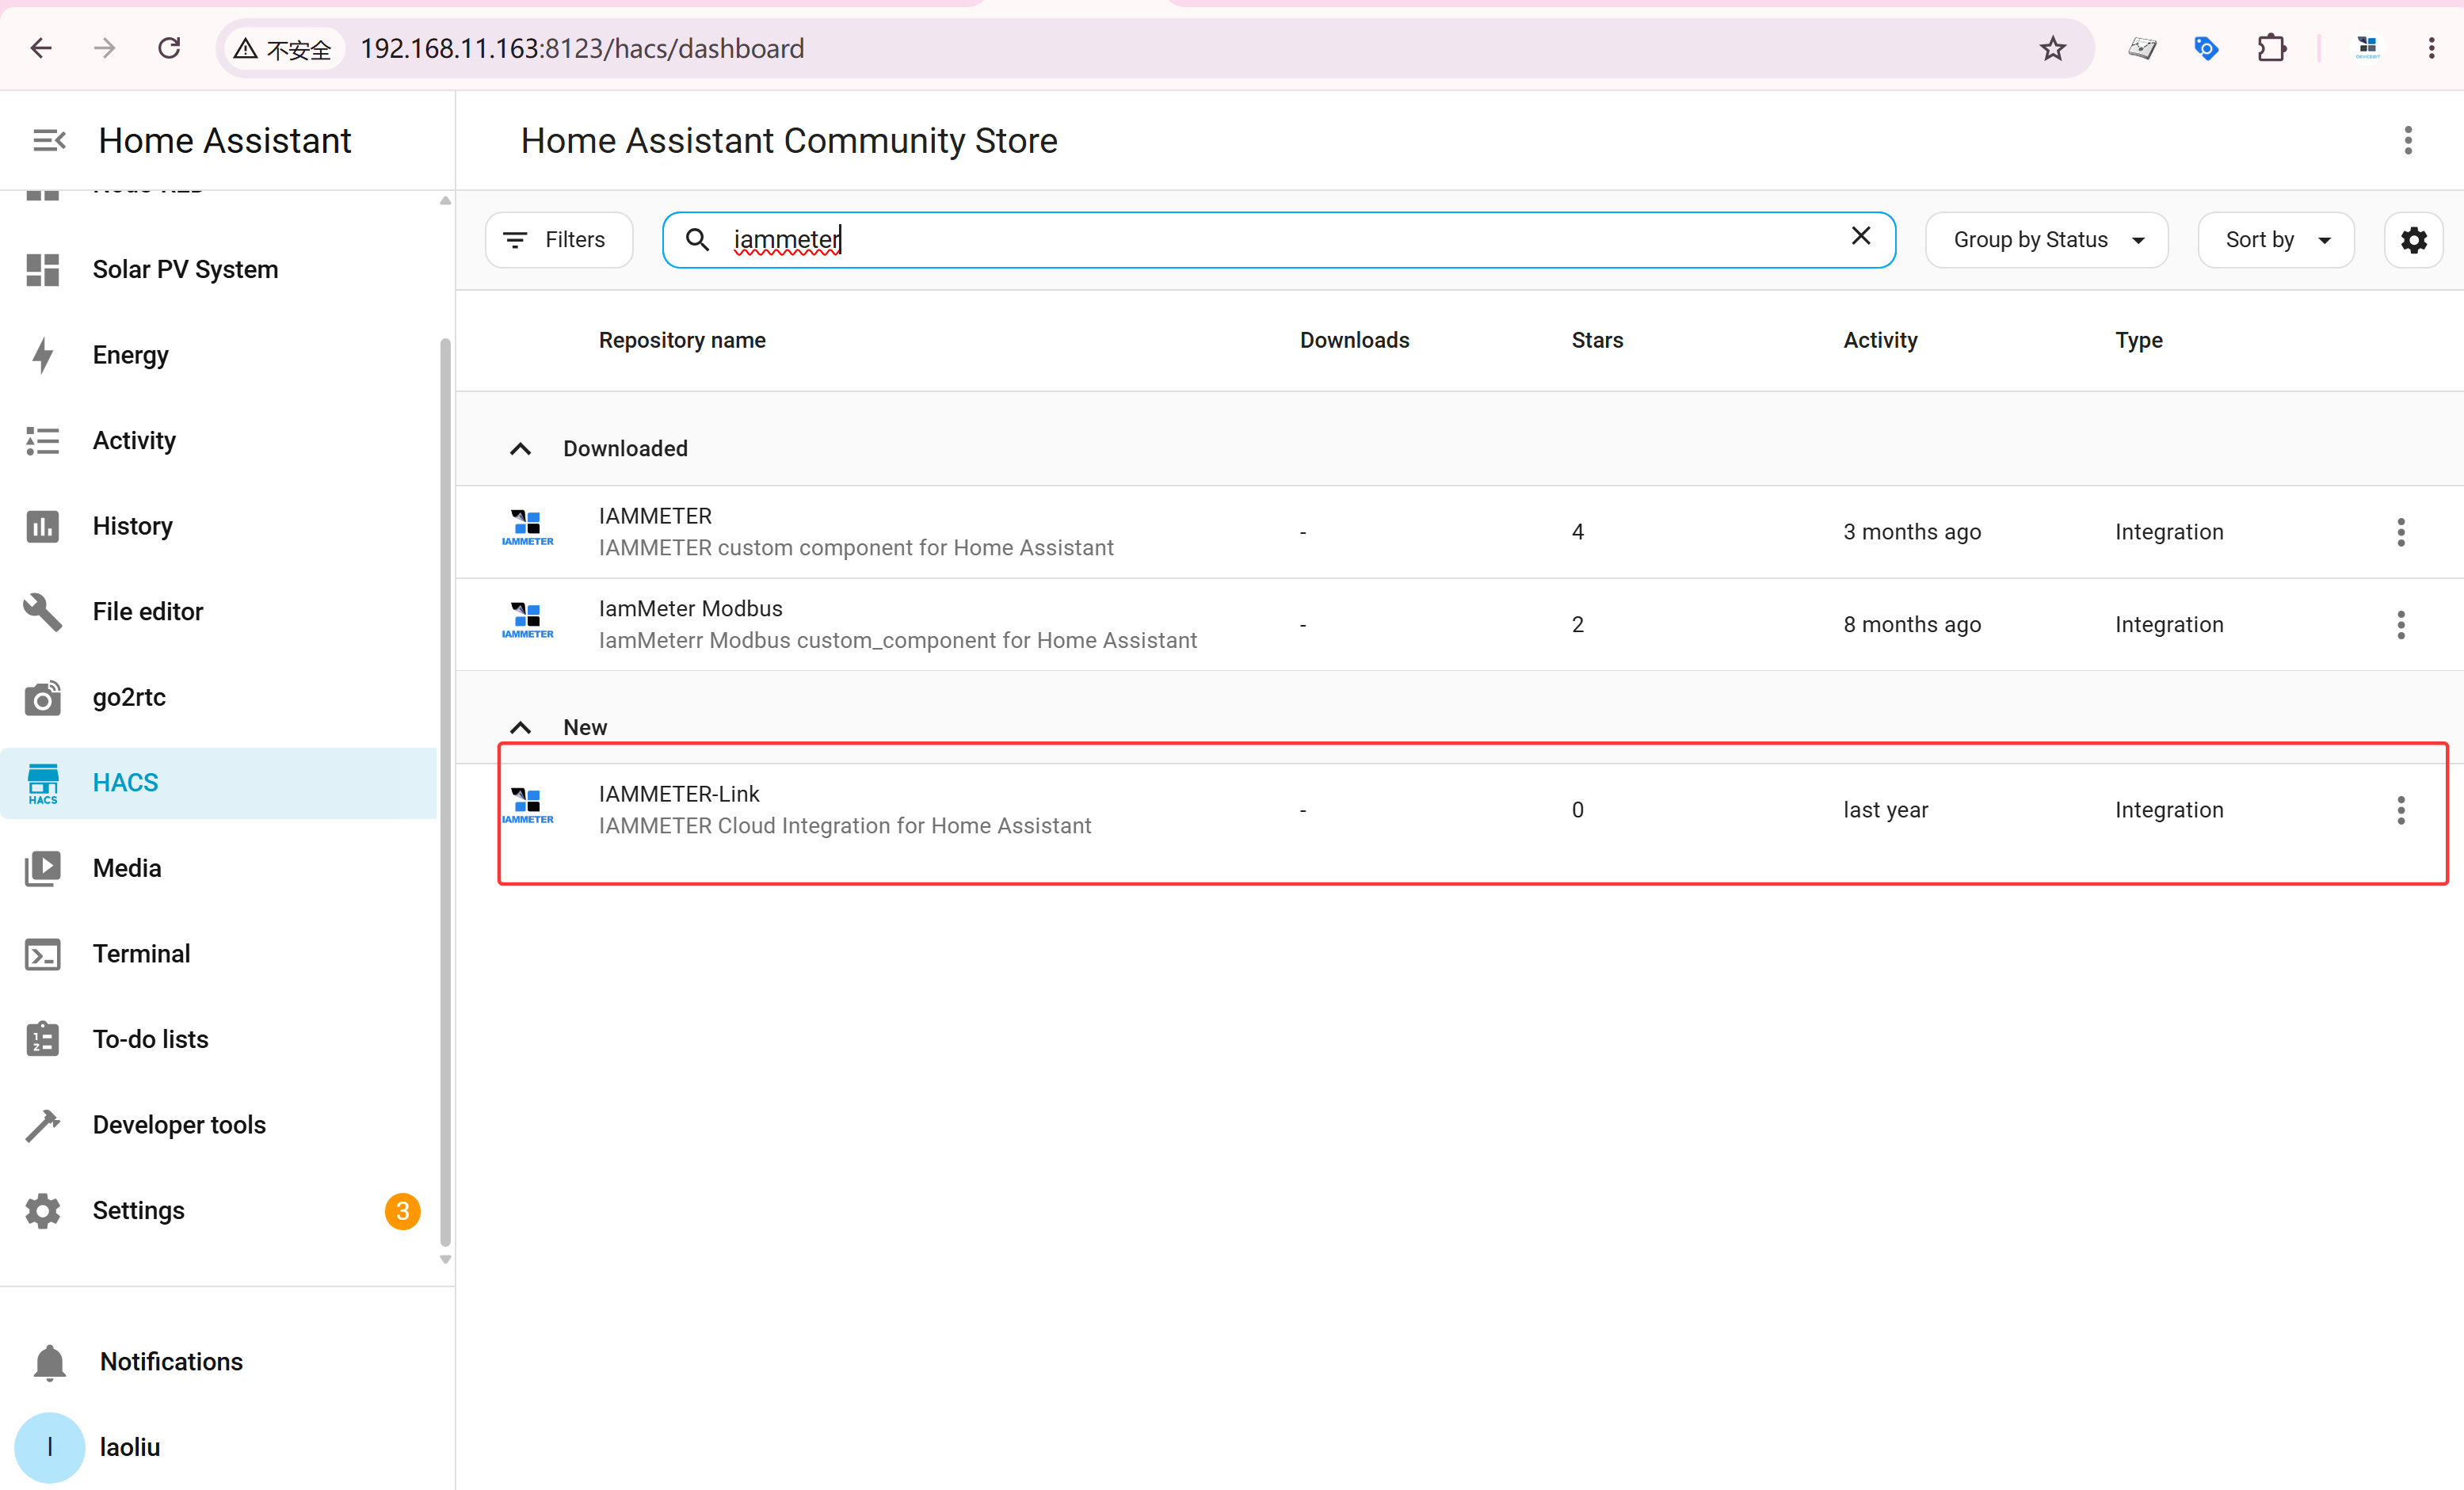
Install with HACS
- Make sure HACS is installed.
- Add
https://github.com/lewei50/ha_iammeter_linkas an Integration under HACS custom repositories if it is not already available. - Search for and install IAMMETER-Link.
- Restart Home Assistant when required.
Add the integration
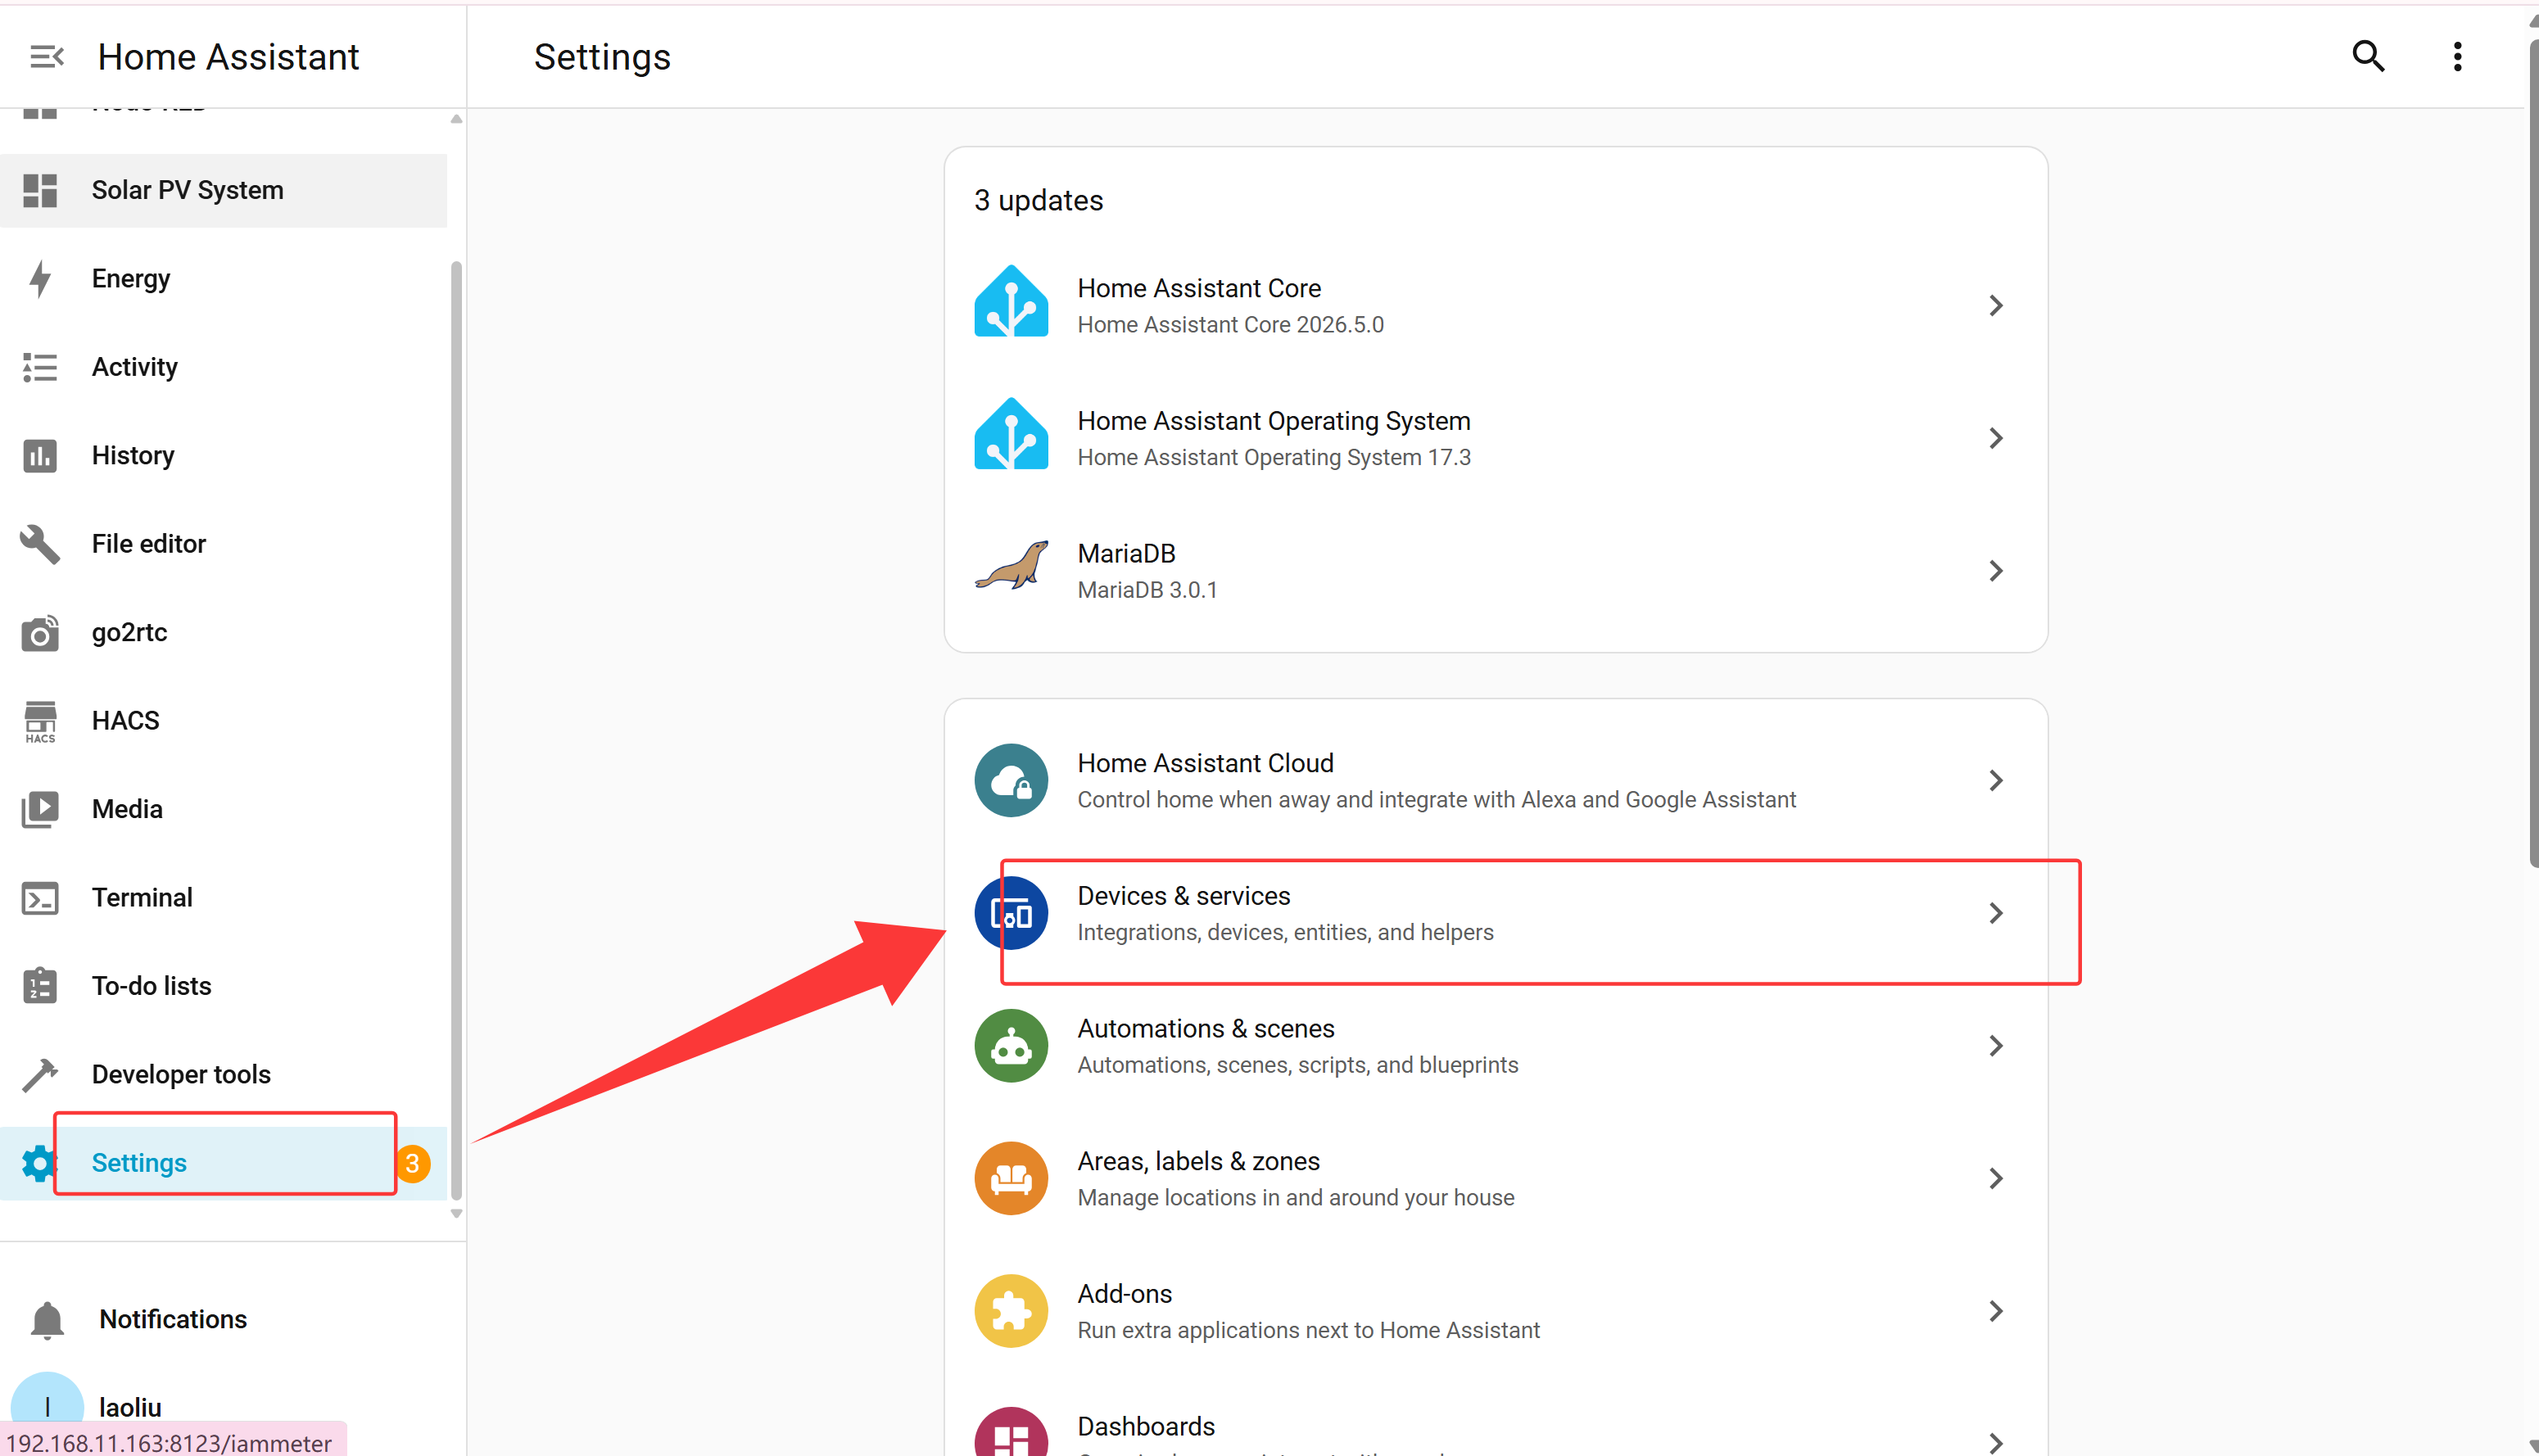
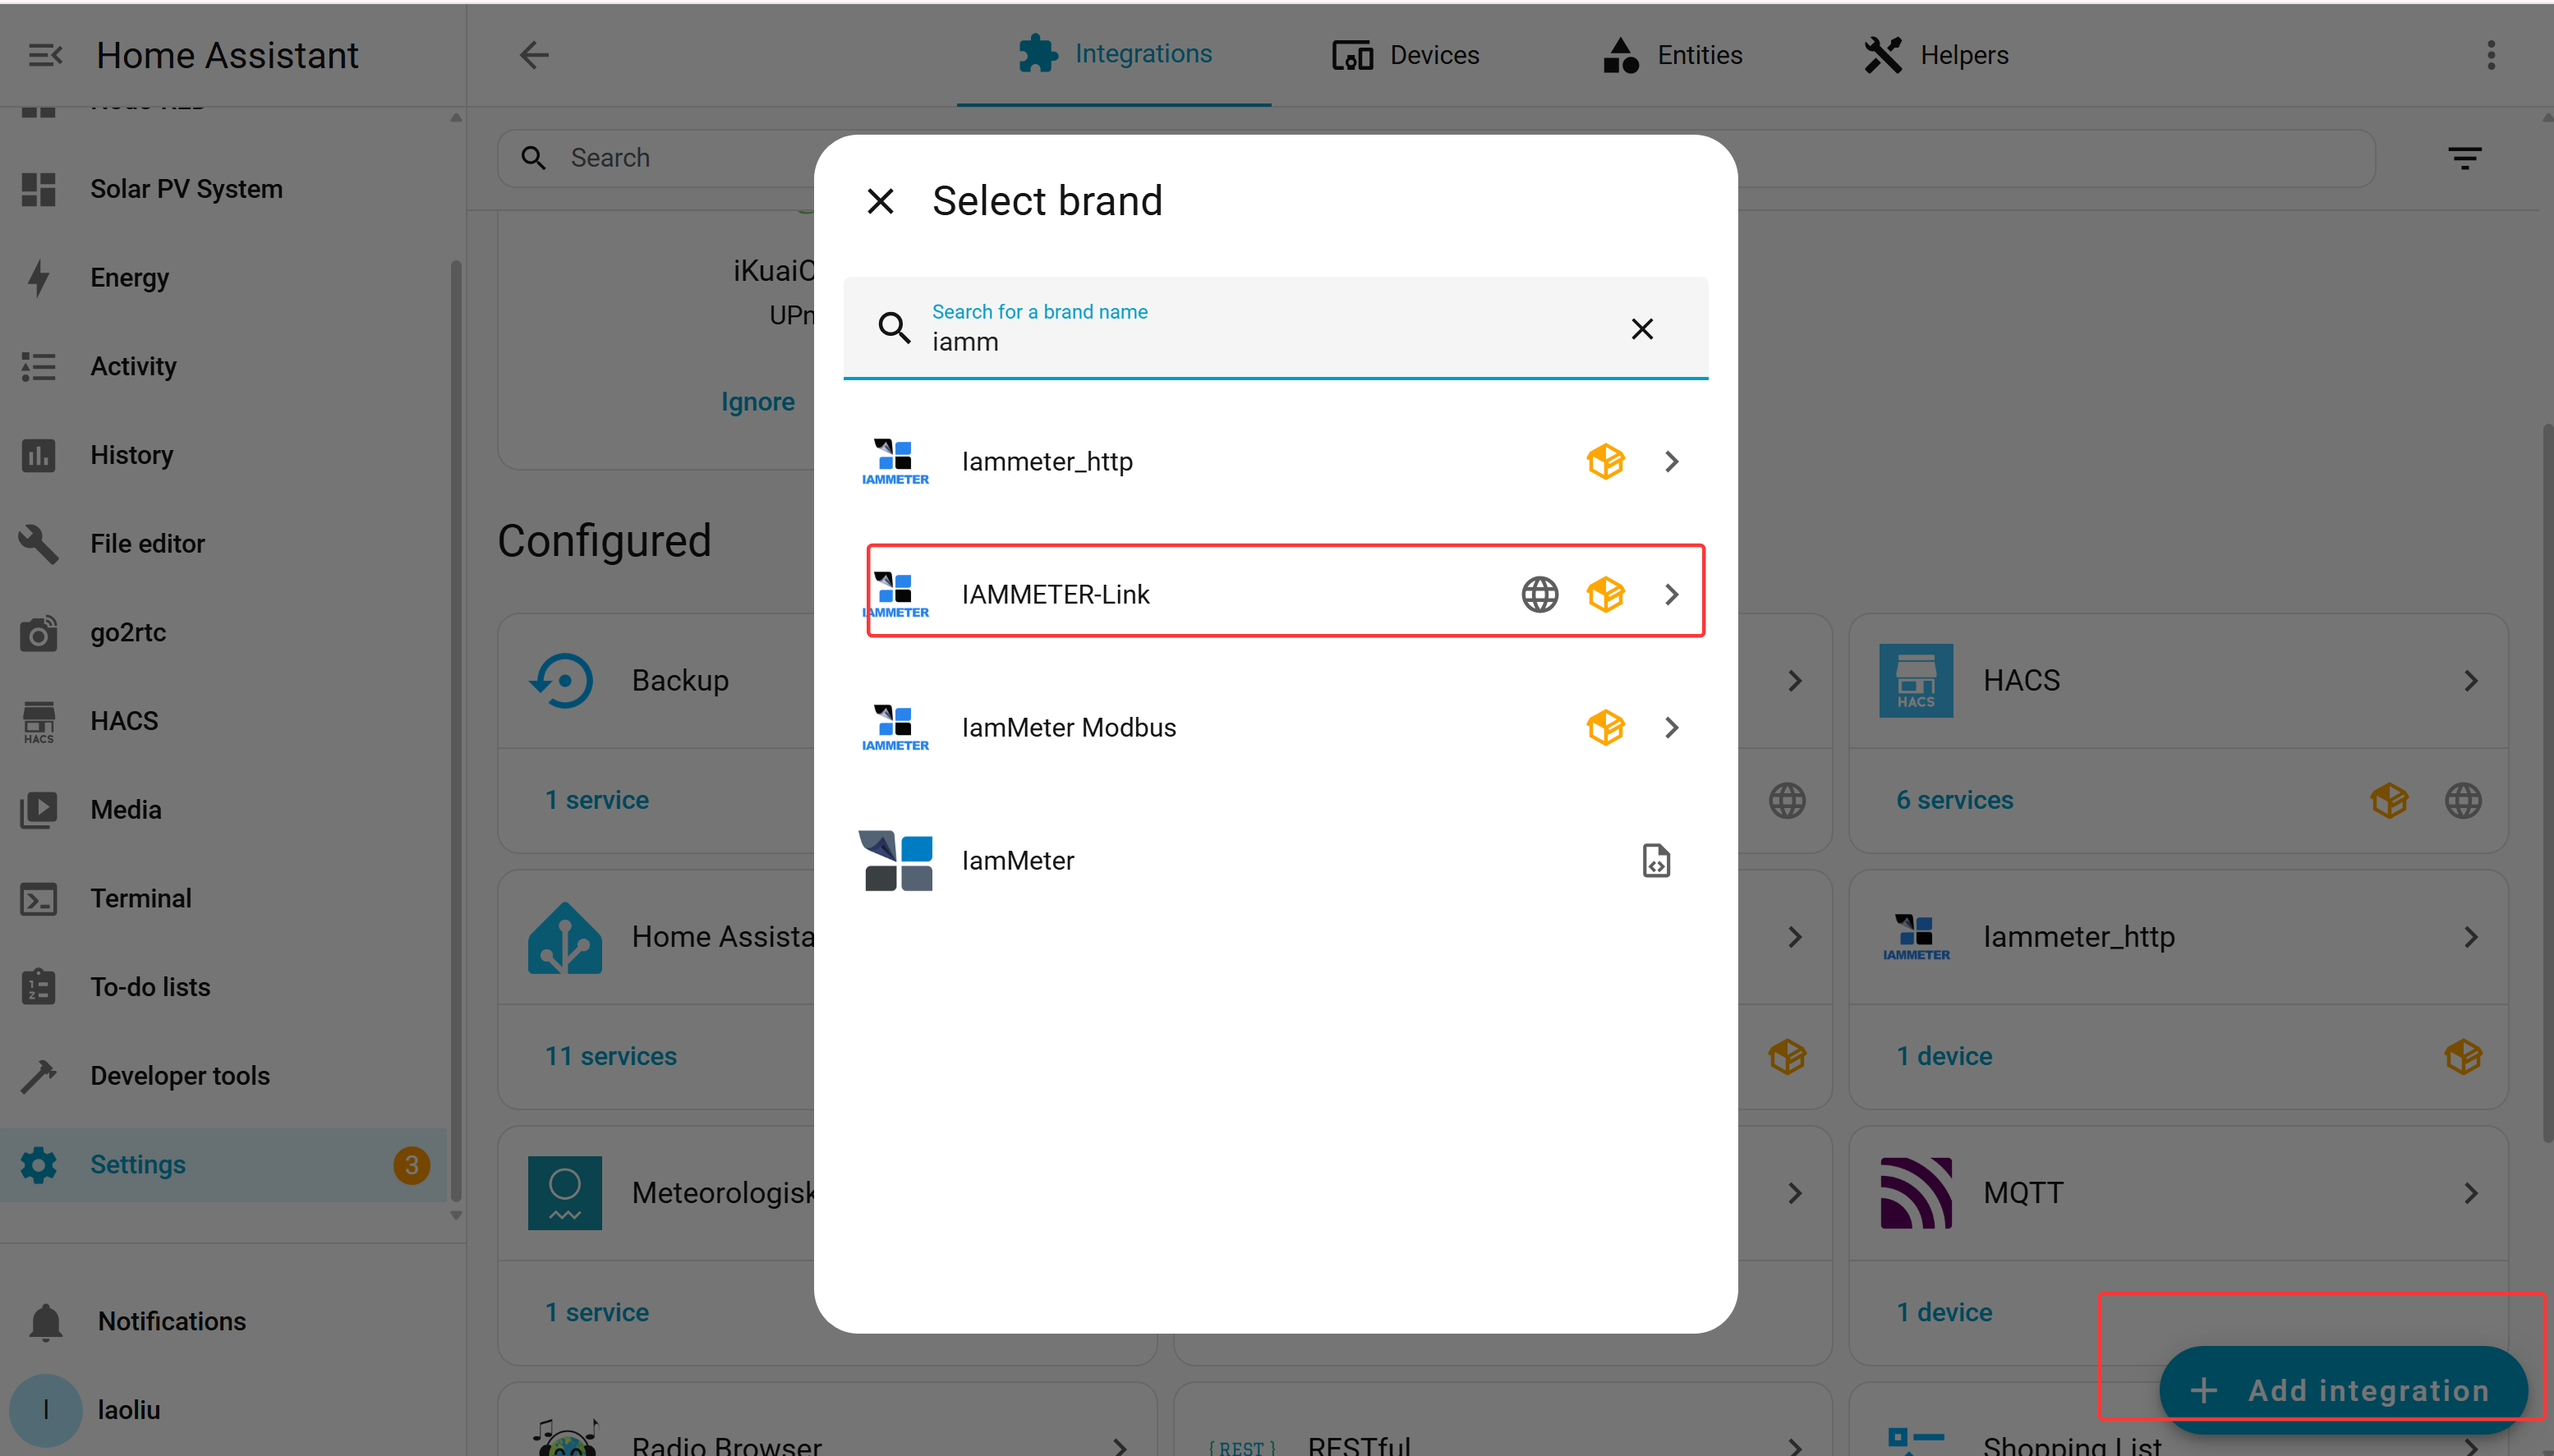
Go to:
Settings → Devices & services → Add integration
Search for IAMMETER-Link and start the Config Flow.
Step 2: Sign in and select a Virtual Meter
Enter your IAMMETER Cloud account information during setup. If you do not have an account, follow the registration option provided by the configuration flow.
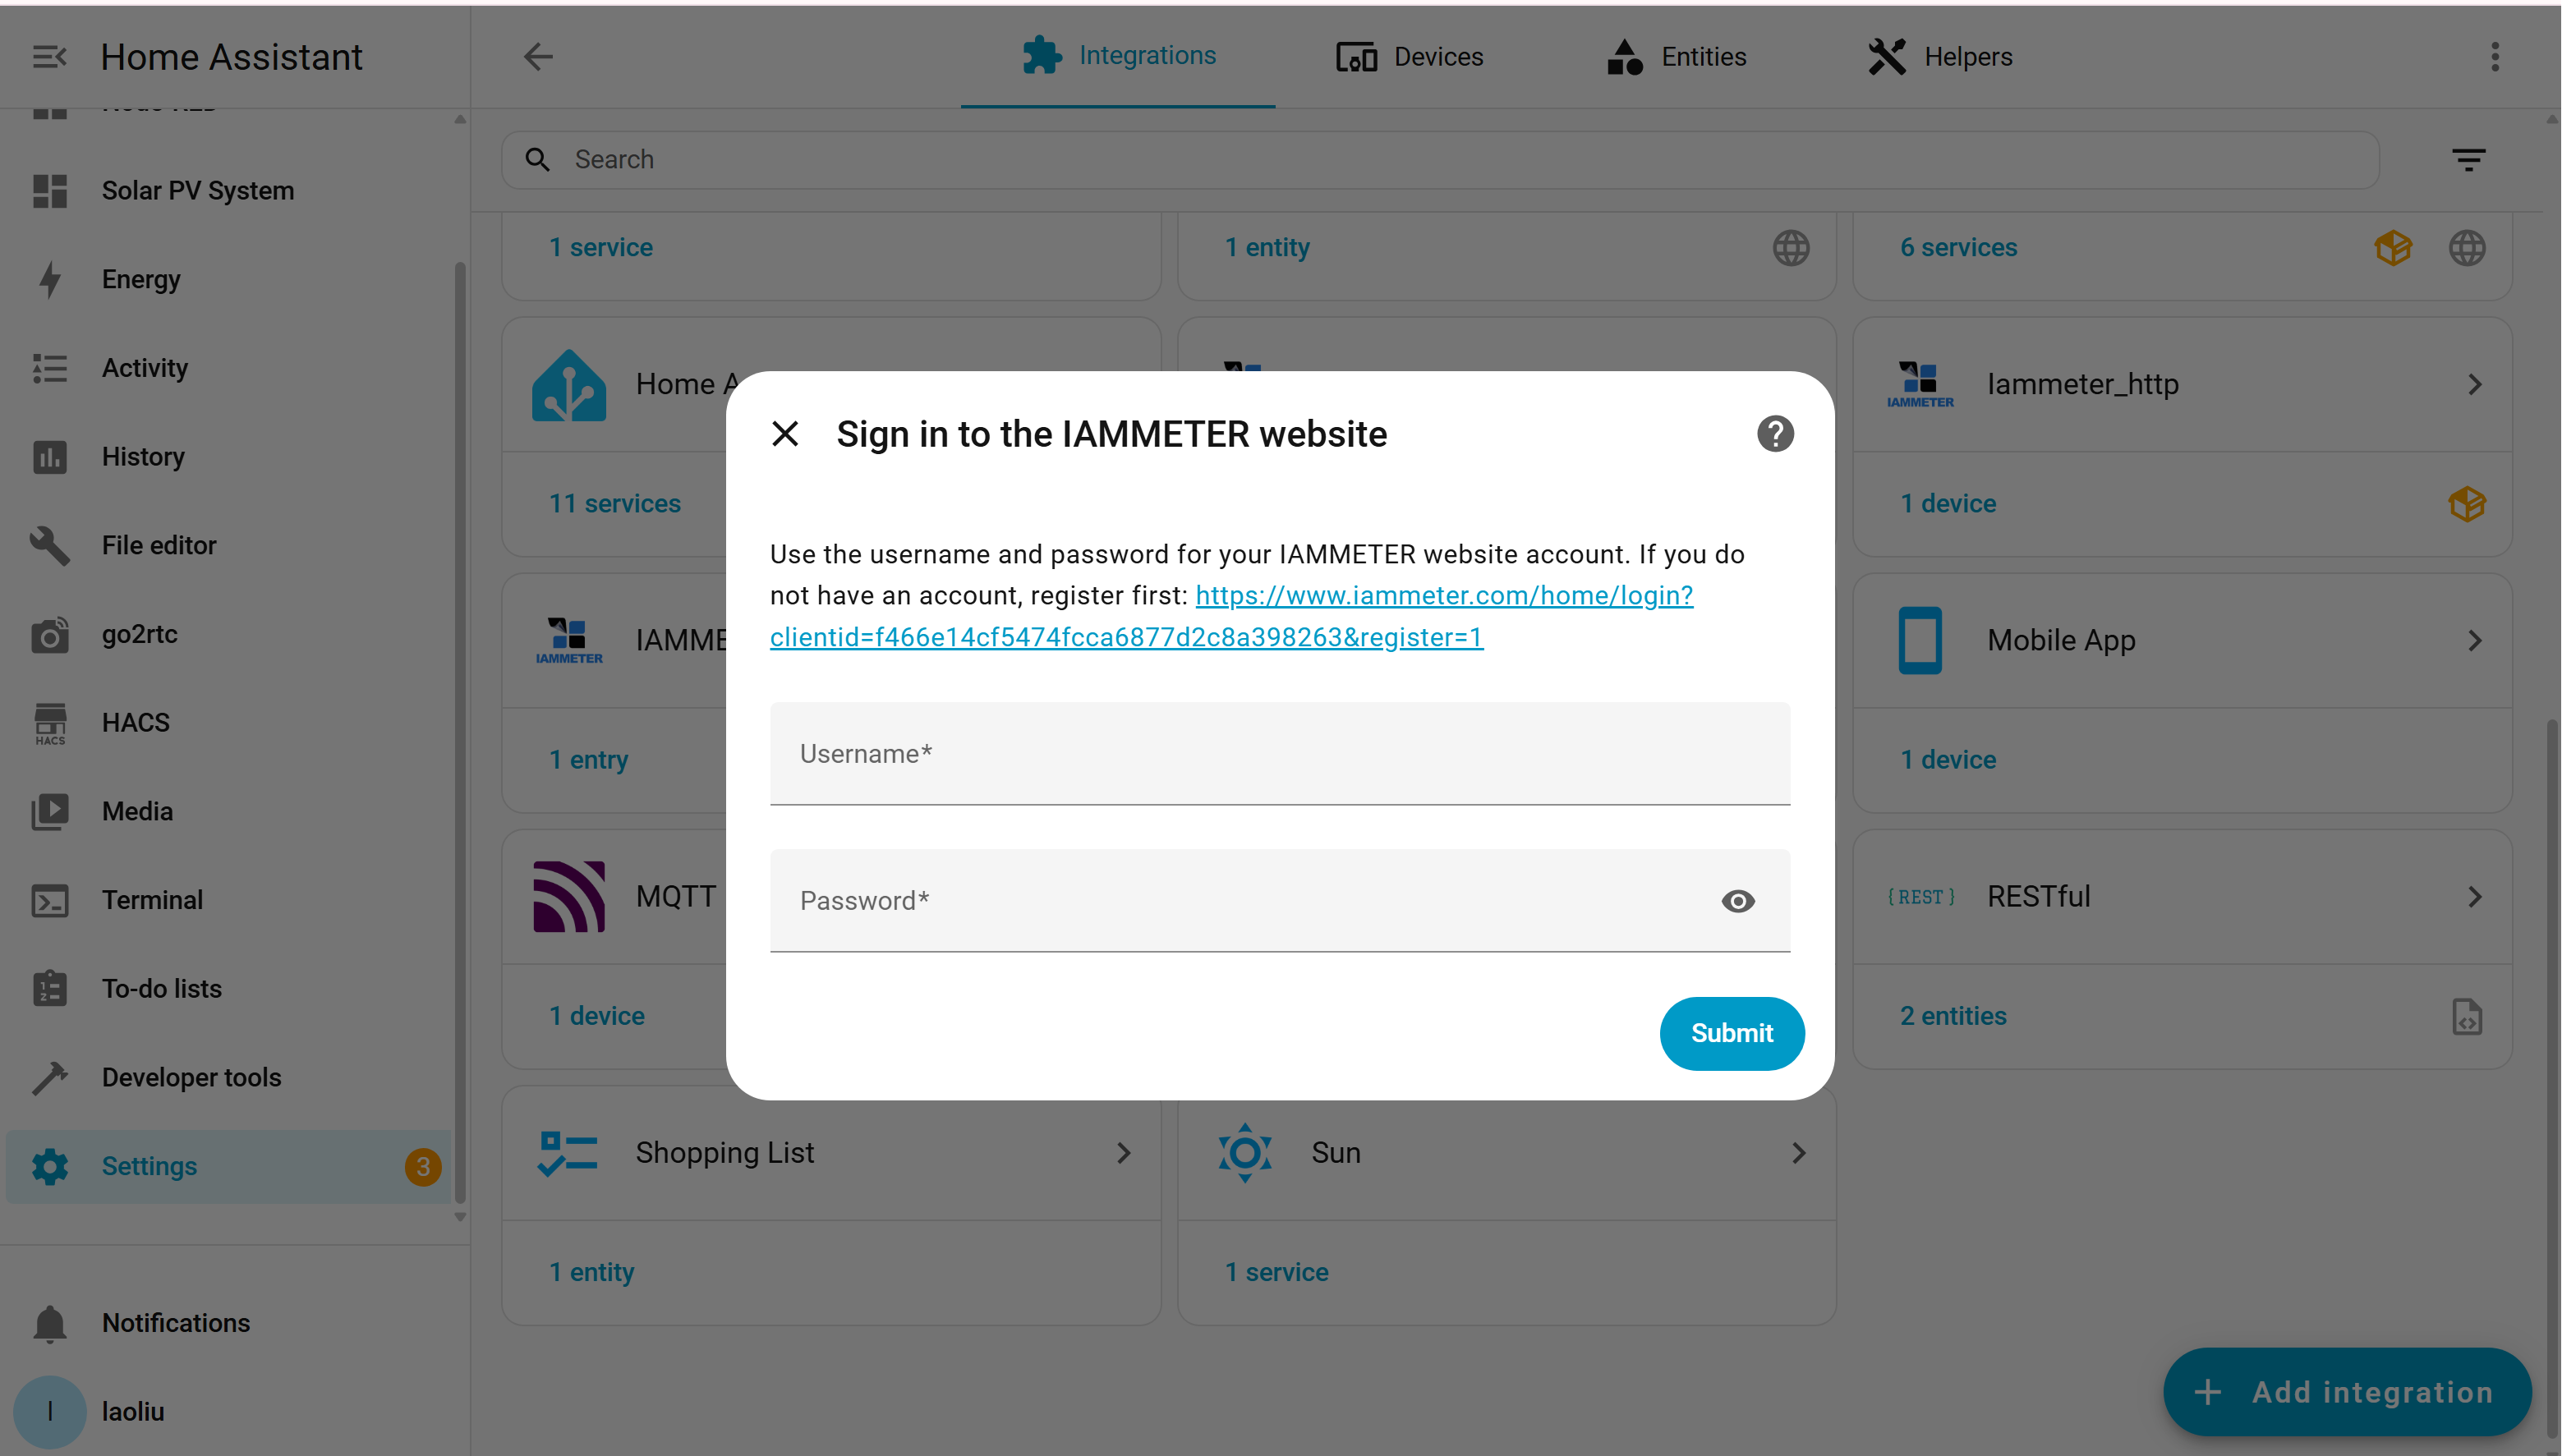
If the account already has an available Virtual Meter, select its serial number. Otherwise, request or create the appropriate Virtual Meter through the available IAMMETER Cloud workflow.
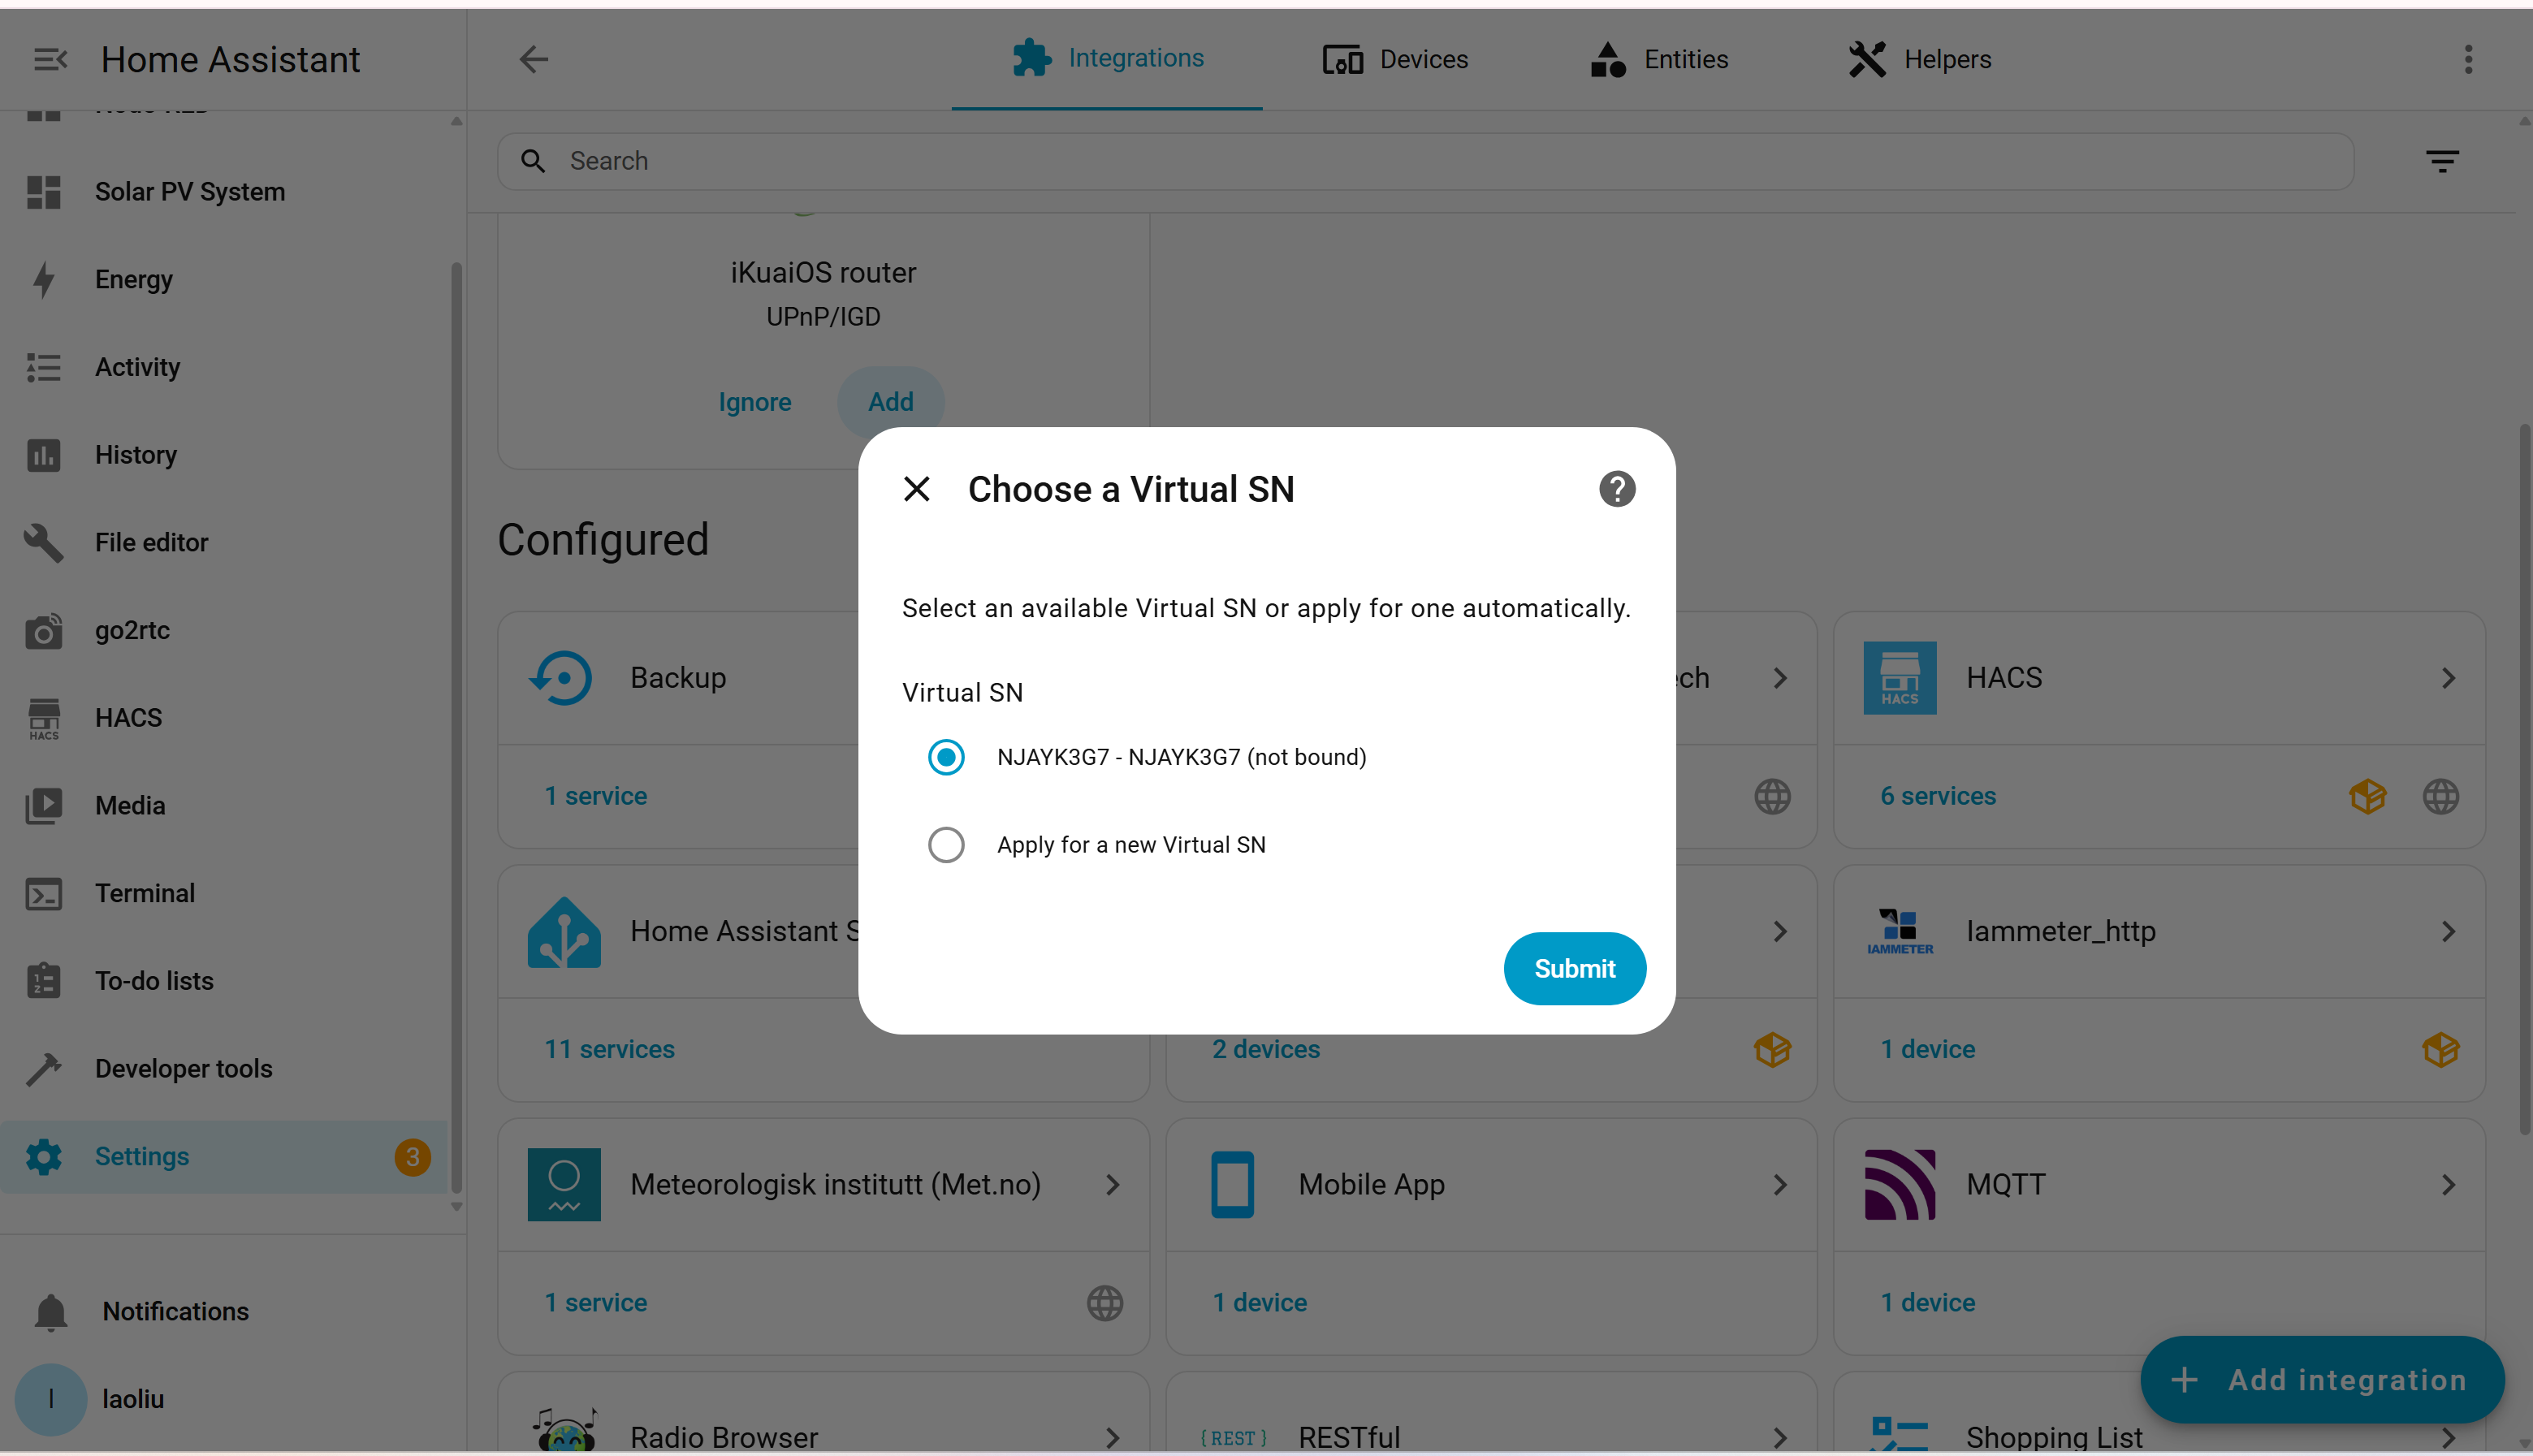
Treat the Virtual Meter serial number as the destination identity for this data stream. Avoid configuring several upload clients to write different systems into the same Virtual Meter.
Step 3: Choose single-phase or three-phase
Select the structure that matches the source data:
- Single Phase for one group of voltage, current, power, Import kWh, and Export kWh;
- Three Phase for separate A, B, and C entity mappings.
For three-phase data, define the role and mapping of each phase carefully. IAMMETER Cloud uses this structure when displaying and analyzing the uploaded values.
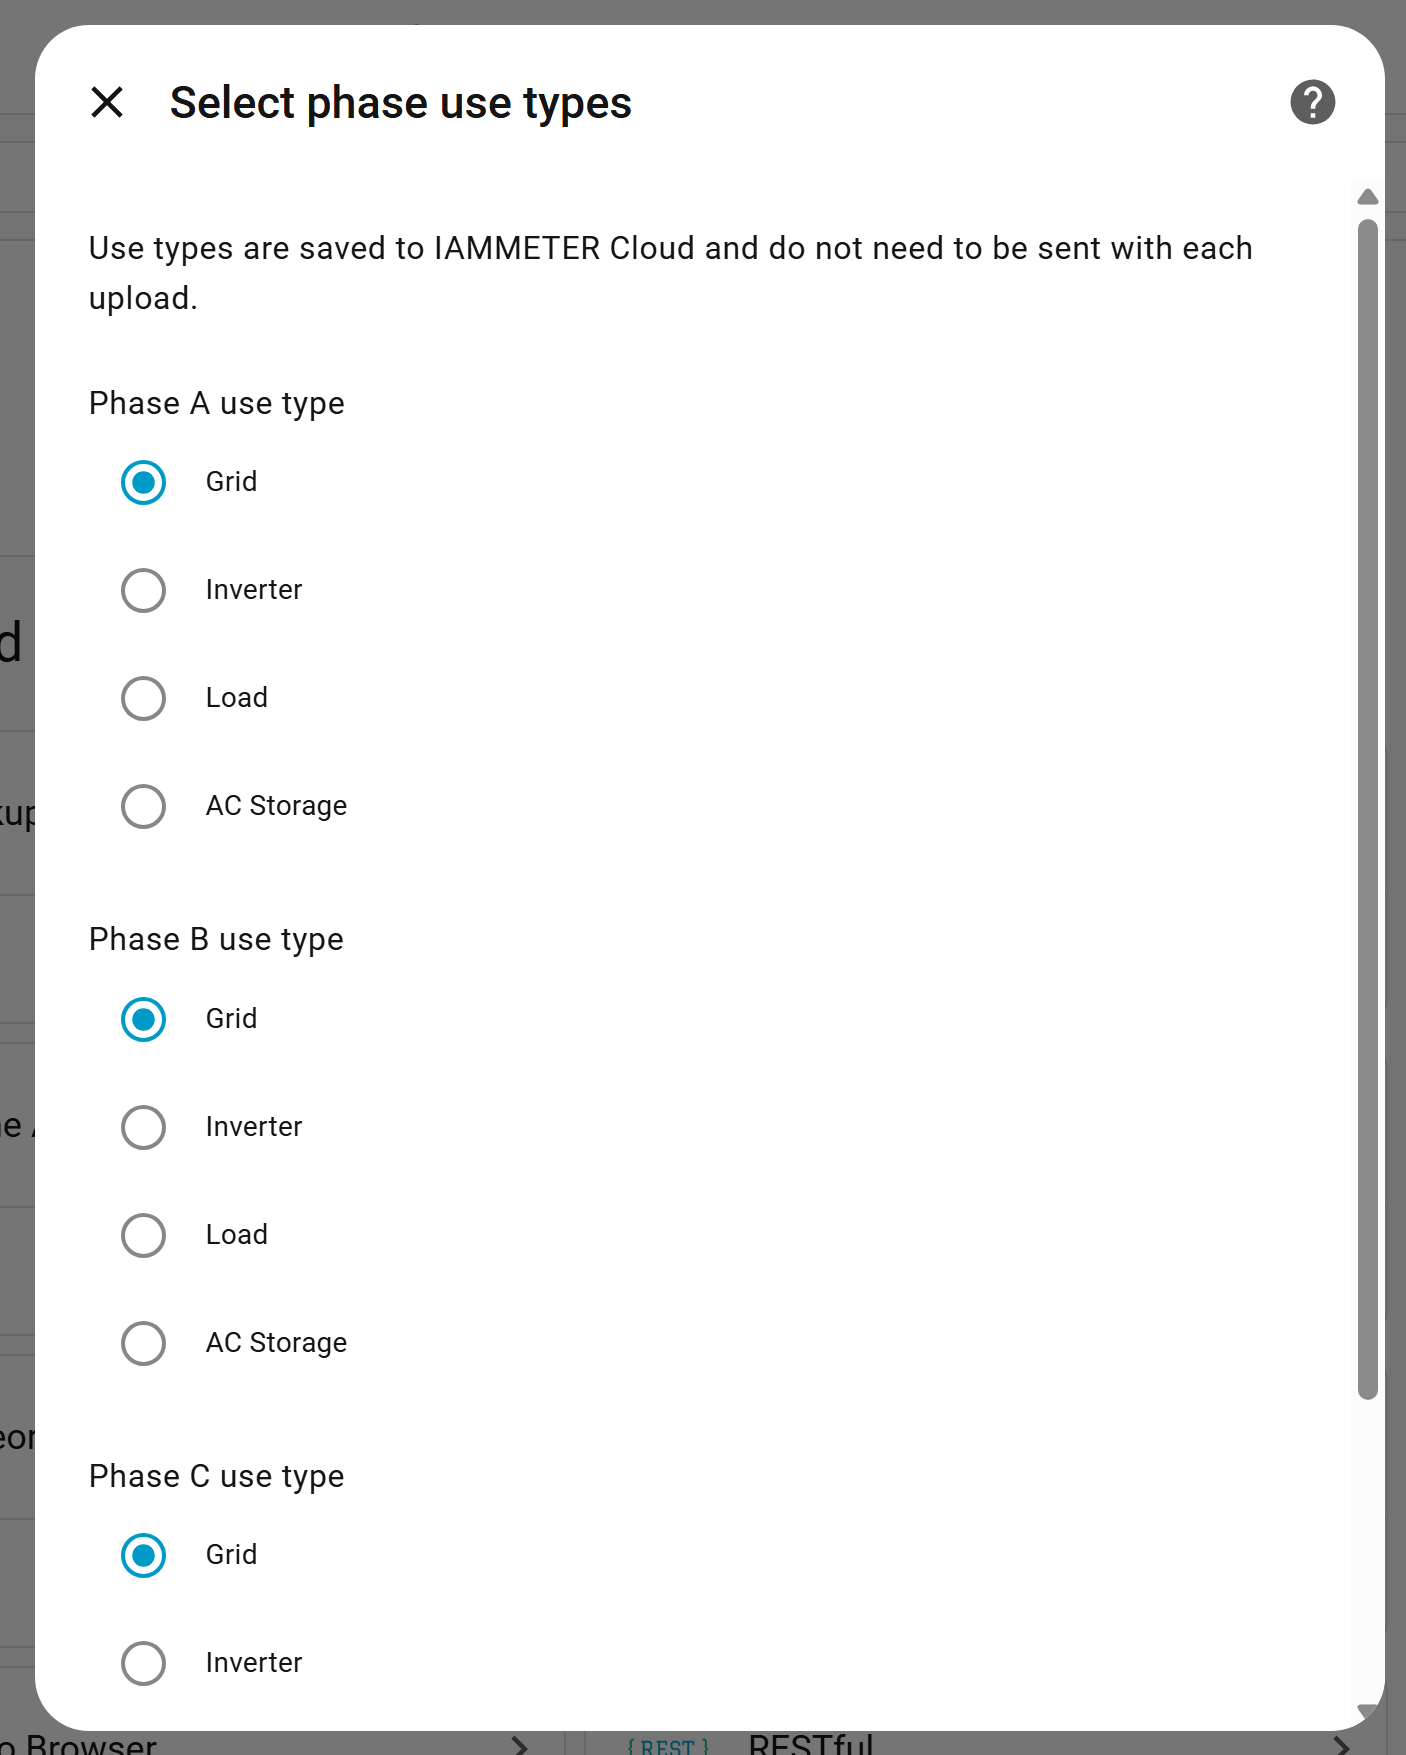
Do not select three-phase merely because several Home Assistant sensors exist. The entities must represent the corresponding electrical phases or measurement channels.
Step 4: Map Home Assistant entities
IAMMETER-Link maps Home Assistant entity IDs to Virtual Meter fields.
Single-phase mapping
| Destination field | Required source unit | Example entity type |
|---|---|---|
| Voltage | V | voltage sensor |
| Current | A | current sensor |
| Active power | W | power sensor |
| Imported energy | kWh | cumulative import sensor |
| Exported energy | kWh | cumulative export sensor |
Three-phase mapping
Map the same fields separately for phases A, B, and C.
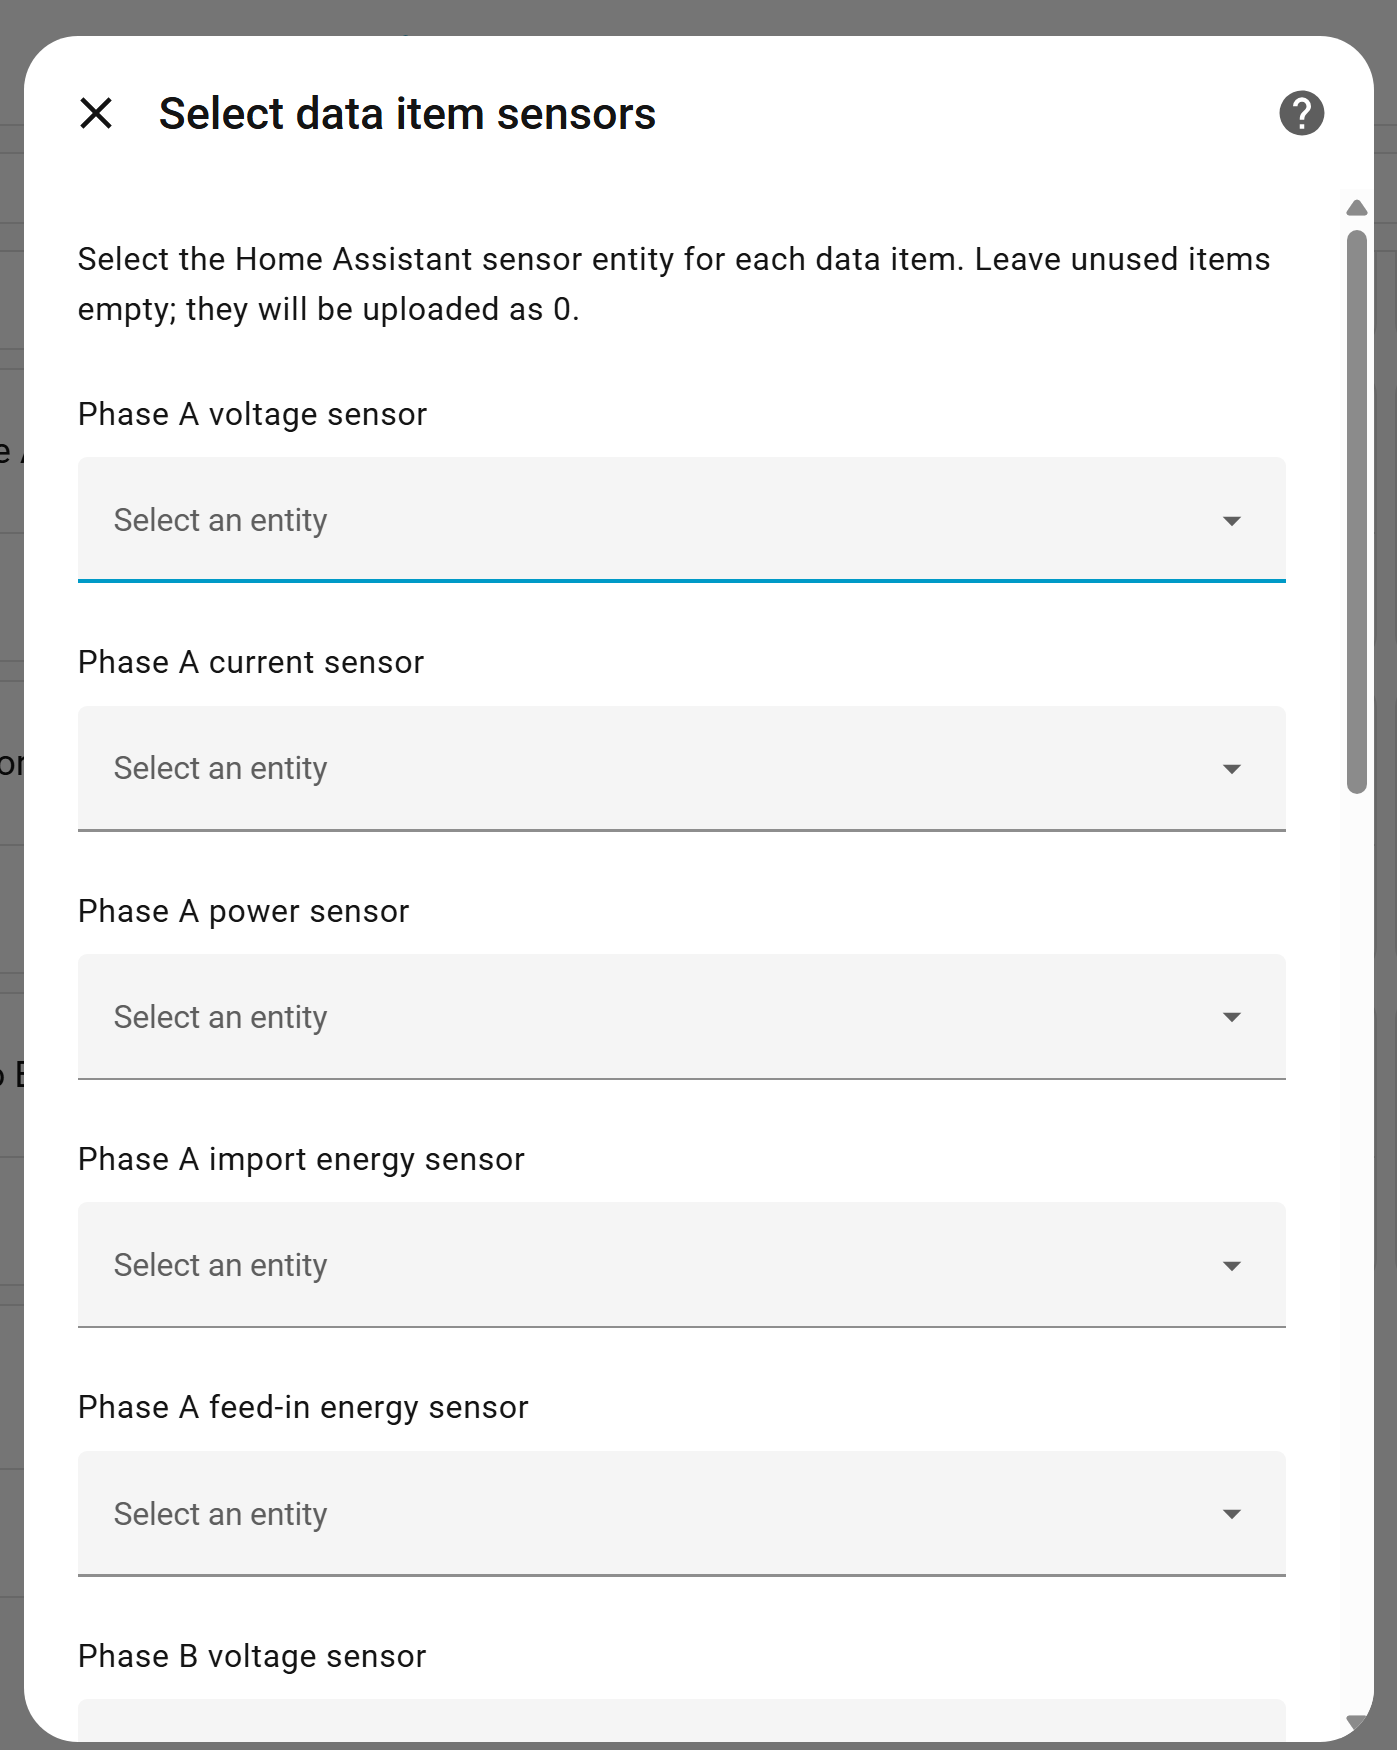
An unused field can be set to 0. However, if a field is mapped to an entity and that entity cannot be read correctly at runtime, the upload process may stop. Map only entities that have been verified as stable.
Validate every entity before mapping
Open Developer tools → States in Home Assistant and verify:
- the entity exists;
- its state is numeric;
- the unit is correct;
- the value has the expected sign;
- it remains available after a Home Assistant restart;
- cumulative energy does not behave like instantaneous power.
Power must be in watts
If the source reports kW, create an appropriate converted sensor or use a correctly scaled entity before mapping. Do not label a kW value as W without multiplying by 1,000.
Energy must be cumulative kWh
Import and Export fields should normally use cumulative kWh entities. A daily energy sensor that resets at midnight has different semantics from a lifetime total and can distort Cloud analysis if treated as total energy.
Confirm import/export direction
Different integrations use terms such as import, consumption, feed-in, return, export, bought, or sold. Confirm which direction each entity represents before mapping it.
Do not invent unavailable measurements
If an inverter integration provides PV generation but not grid import/export, map the available generation fields to the appropriate Virtual Meter role. Do not reuse the same power entity as both generation and grid power merely to fill every field.
Step 5: Verify uploaded data in IAMMETER Cloud
After completing the configuration, wait for the relevant Basic or Pro upload interval, then open IAMMETER Cloud.
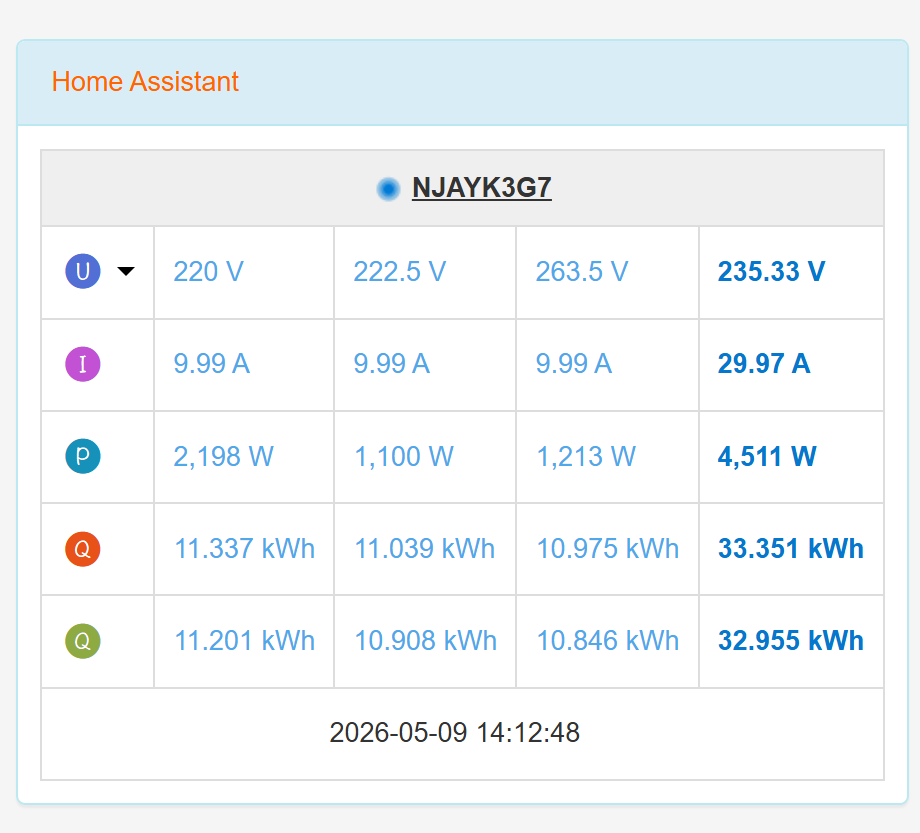
Check:
- the Virtual Meter is online;
- voltage, current, and power have plausible magnitudes;
- Import and Export are not reversed;
- phases A/B/C appear in the expected order;
- cumulative energy increases correctly;
- timestamps continue updating;
- solar or load charts match the source Home Assistant history.
Compare several timestamps between Home Assistant and IAMMETER Cloud before relying on reports.
Solar monitoring example
Suppose an installation has:
- an IAMMETER three-phase meter measuring the grid;
- a three-phase inverter already integrated into Home Assistant;
- no direct supported data connection between that inverter and IAMMETER Cloud.
IAMMETER-Link can send the inverter's Home Assistant power and energy entities to a three-phase Virtual Meter. IAMMETER Cloud can then use:
- the physical meter for grid interaction;
- the Virtual Meter for inverter production;
- both data sources in the broader solar monitoring view.
See the IAMMETER solar monitoring solution and Home Assistant solar monitoring for related use cases.
Troubleshooting
No data appears after setup
- Confirm that Home Assistant has internet access.
- Verify the IAMMETER Cloud account and Virtual Meter serial number.
- Wait for the full Basic or Pro upload interval.
- Check Home Assistant logs for IAMMETER-Link errors.
- Confirm that every mapped entity exists and returns a numeric value.
Uploading stops after working normally
- Look for a mapped entity that became
unknownorunavailable. - Check whether an integration update renamed an entity ID.
- Confirm that a template sensor still renders a number.
- Review authentication and network errors.
- Update to the latest IAMMETER-Link release.
Values are 1,000 times too large or small
- Check W versus kW.
- Check kWh versus Wh.
- Check any template conversion applied in Home Assistant.
- Confirm external CT ratios in the source metering system.
Import and Export are reversed
- Verify the source integration's naming convention.
- Compare the value while the site is clearly importing from or exporting to the grid.
- Correct the entity mapping rather than compensating in Cloud reports.
Three-phase charts look wrong
- Confirm A/B/C mapping and phase roles.
- Verify that each entity belongs to the intended phase.
- Do not mix total power with phase-specific fields.
Local control and Cloud reporting should remain separate
IAMMETER-Link depends on Home Assistant, internet access, and IAMMETER Cloud. It should not be the feedback path for safety-critical or second-level automations.
Use local Home Assistant entities for:
- relay control;
- solar-surplus switching;
- EV charging decisions;
- alarms requiring immediate response.
Use IAMMETER-Link and IAMMETER Cloud for:
- remote visibility;
- longer-term dashboards;
- electricity-cost and energy analysis;
- combining selected energy sources;
- multi-site operational review.
Related guides
- IAMMETER-Link GitHub repository
- IAMMETER-Link v1.1.1
- IAMMETER Virtual Meter
- IAMMETER Cloud
- Compare Home Assistant energy meter integrations
- Home Assistant integration matrix
Updated: July 22, 2026.